
No need to go through specialized software to extract the sound from a video: the VLC media player has a very simple function to retrieve the audio track from a file and even convert it to another format.
It can be convenient, even useful, to extract the “soundtrack” from a video to make it an independent audio file. This is the case, for example, if you just want to recover the music of a filmed clip or concert that you downloaded from the Internet. Or just listen to a comedy show, a lecture, a debate, a class, a tutorial or even a relaxation session, when the image is not needed. Of course, it is still possible to play the video without looking at the screen, on a computer or on a mobile, but it is still preferable to extract the audio from it, if only to have a smaller file – and therefore easier to store and transfer – and consume less energy …
Many specialized tools allow you to perform this extraction free of charge, whether it concerns online services such as Free Online Video Converter Where Audio Converter, or encoding software like Handbrake, which exists for Windows as well as for macOS and Linux. However, in the majority of cases, you can easily be satisfied with an application that you probably already have: VLC Media Player. Indeed, although it is best known and used as a multimedia player, this remarkable completely free software has a host of additional functions, often unknown, and in particular a converter capable of modifying the format of a video. , and thereby extract the audio track. Better yet, VLC allows either to recover the audio in its original format, as it is integrated into the video, but also to convert it into another format, in MP3 or in AAC for example, so as to make it compatible with other devices, or, more simply, reduce the size of the resulting file. The operation is quick and easy. Above all, it is workable on all platforms, since VLC Media Player exists for Windows, macOS and Linux at the same time. The handling is similar with the different versions, although the names of menus and functions vary slightly depending on the operating system. We detail it here for Windows, but you can easily adapt it to macOS and Linux.
- If you have not already installed it on your computer, download the version of VLC Media Player suitable for your operating system and install it.
Download VLC Media Player for Windows
Download VLC Media Player for macOS
Download VLC Media Player for Ubuntu
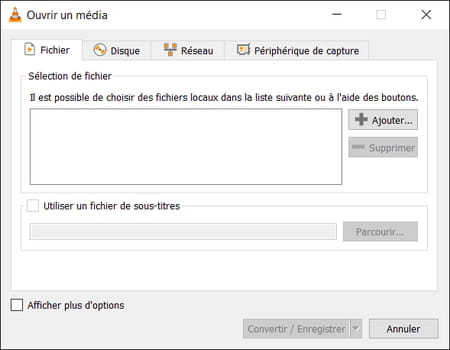
- After installation, launch VLC. Expand the menu Media, at the top, then click Convert / Save …
- In the window Open media that opens, click the button Add.
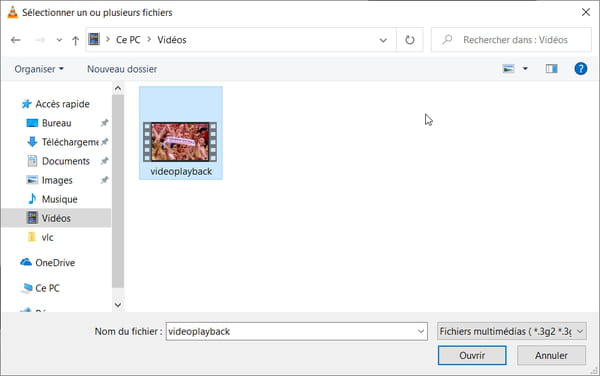
- File Explorer opens. Navigate through the disks and folders on your computer, select the video file from which you want to extract the audio track and click on To open.
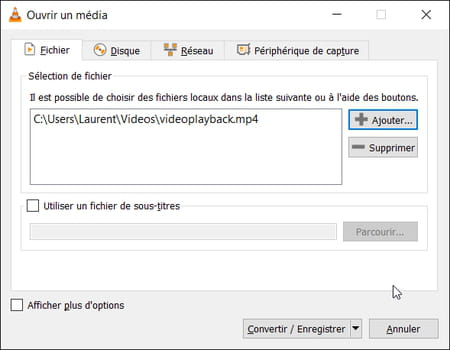
- Back in the window Open media, once the file has been correctly selected, click on the button Convert / Save at the bottom right.
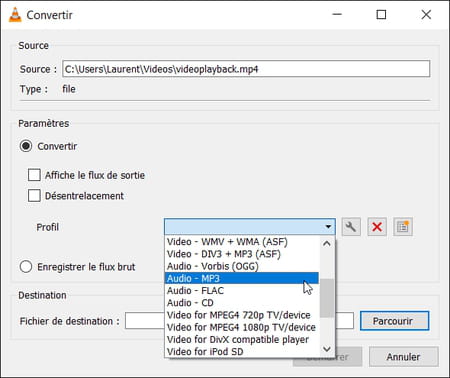
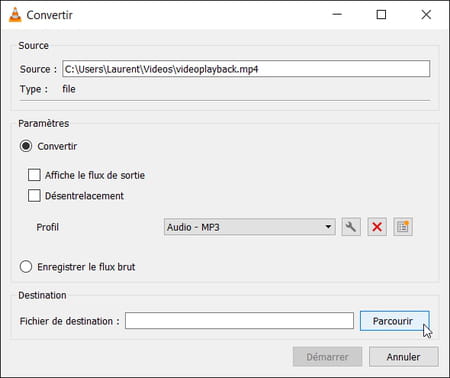
- The window Convert opens, presenting various options for the conversion. In front of the line Profile, click on the drop-down menu, and select a conversion profile among those offered in the Audio section: Audio – Vorbis (OGG), Audio – FLAC, Audio – MP3 Where Audio – CD. Preferably choose MP3, the format that offers the maximum compatibility. The Flac and the CD (Wave) are generally of no interest since the audio embedded in the videos is always recorded in a compressed “destructive” (lossy) format: you will not have a better sound by choosing a superior quality format …
- Although this is not essential, we recommend that you change the default settings of the selected profile to suit your needs. To do this, click on wrench icon, to the right of the profile.

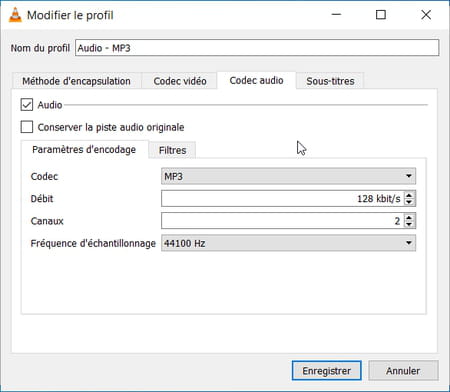
- The window Edit a Profile opens, presenting several tabs (Encapsulation method, Video codec, Audio codec and Subtitles). , Click on the tab Audio codec. Several settings are available. If you want to extract the audio as it is encoded in the video, without modifying it, just check the box. Keep the original audio track. Be careful, depending on the case, you can recover a multichannel AC3 type file that will not be playable with a traditional audio player. This option is especially useful for editing or transcoding video. If you just want to play the audio part with a classic player, a pair of speakers and headphones or stereo headphones, do not check this box and select a codec like MP3 by adjusting the associated parameters in the menus below ( Bit rate, Channels and Sampling frequency). Note that a bit rate of 128 kbit / s is the minimum for acceptable quality. But, again, whatever your setting, you’ll never get better than the original quality… When you’re done making adjustments, click the button. Save to save your changes to the selected profile.
- Once back in the window Convert, Click on the button Browse, to the right of Destination file, to choose the folder in which your converted file will be saved.
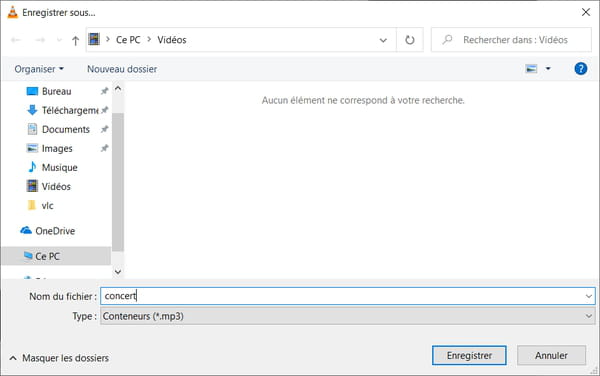
- In the window Save as…, browse your computer’s storage space and select the recording folder. Give your file a name in the field File name and click on Save to validate your choice.
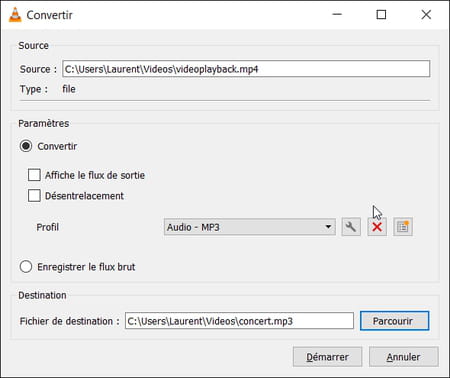
- Once back in the window Convert, finally click on the button To start up at the bottom right to start audio extraction.
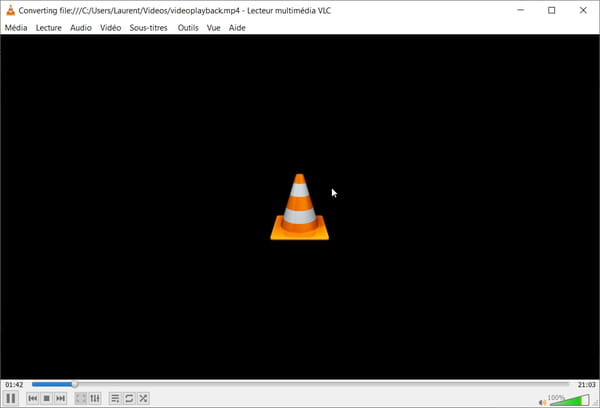
- You can follow the conversion of your file in real time thanks to the blue status bar displayed at the bottom of the VLC window.
- When the conversion-ripping is complete, open the destination folder and start playing the resulting audio file to check its quality. If you are not satisfied with the result, repeat the operation by modifying some parameters (codec, bitrate, etc.).