A birthday to wish for, an appointment to remind, an important message to deliver at a specific time … whether you use an Android smartphone or an iPhone, it is quite possible to schedule the sending of an SMS so as not to forget it when the time comes.
We are all a little head in the air sometimes. Who has never said to himself: “Hey, we’ll have to send an SMS to X to wish him his birthday tomorrow”. By forgetting to do it the next day! To not miss any opportunity to send a message at the right time, there is however a solution: sending delayed SMS. You just have to write your message in advance, when you think about it, then schedule it to be sent on the day and at the time you want. Convenient !
Several SMS applications offer this programming function. But it is not essential to adopt them, especially since by replacing the original application, they require a change of habits. Fortunately, on Android, the Google Messages application has a function specially designed for delayed sending of SMS. The operation turns out to be extremely simple and quick. On iOS, however, it’s a different story. It will be necessary to develop a script for sending the message through the free application Shortcuts offered by Apple.
No additional apps are needed to send a delayed message on Android. Everything is done from the Messages application, installed as standard.
►Open the Messages app. Select your correspondent, then write your letter normally. Then make a long press on the send button until a new menu appears.
►Several choices are available: sending the SMS later in the day at a predefined time (5 p.m. in our example); later in the evening (9 p.m.); the next day (at 8 am) or even the possibility to define the date and time of sending yourself. Tap the option that interests you.
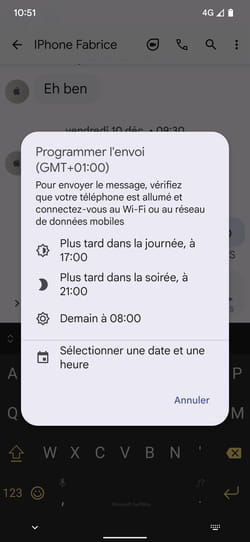
►If you wish to schedule the sending of the SMS on a specific date and time, choose Select date and time then set the desired date and time. In the last dialog box that appears summarizing your choices, press Record. For the SMS to be sent, it will of course be necessary to ensure that the mobile is on (even in standby) and connected to the network.

Apple has made no provision in the Messages application to delay sending an SMS. To achieve this, you have to go through the Shortcuts application (free) in order to define a script.
►If you haven’t installed it yet, download Apple’s Shortcuts app on your iPhone. This allows you to develop all kinds of scripts to automate certain actions.
► Launch the application, then press the Create a personal automation. in the page that appears.
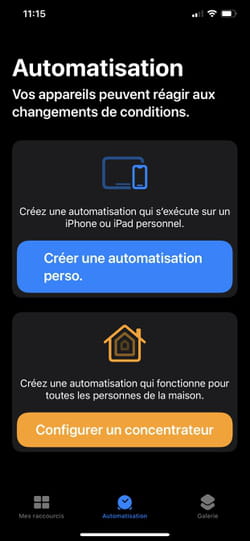
►A new page is displayed and offers several scenarios. Choose, at the top of the list, Time of day.
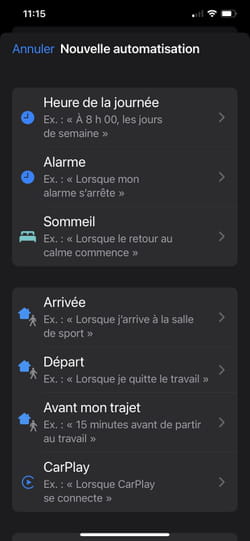
►In the next window, leave the box checked Time of day, then define the time at which the SMS should be sent by pressing the clock displayed below.
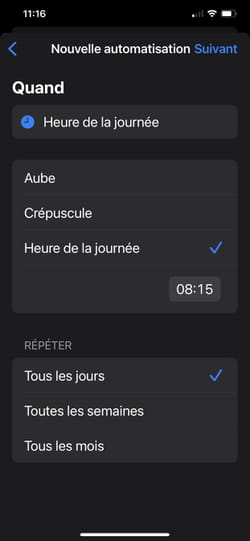
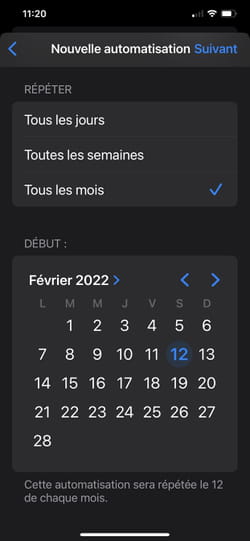
► Then define the sending frequency in the section Repeat. The Shortcuts application leaves little latitude in this area, considering that the action will be recurring. Also, if you want to send only a single shipment on a specific date, choose the option Every month. Then define the day of sending for the SMS. When your choices are made, press Following at the top right of the screen.
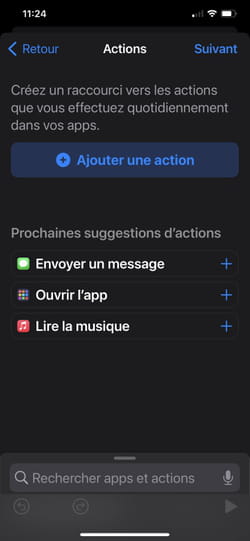
►You must now define the action to be taken. Among the choices offered, choose Send a message (if this suggestion does not appear, press the button + Add an action and select the option Send a message).
►The action is ready to be configured. Press on Message (in blue at the top of the screen) then write the message you want to send.
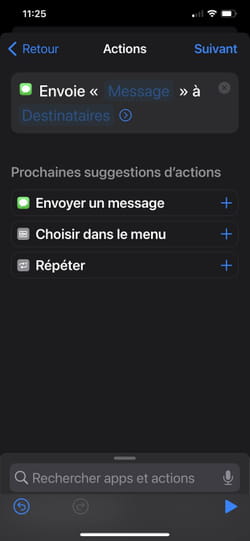
►Then press Recipients, in blue, and select the contact to send the message to. When everything is ready, press Following at the top right of the screen.

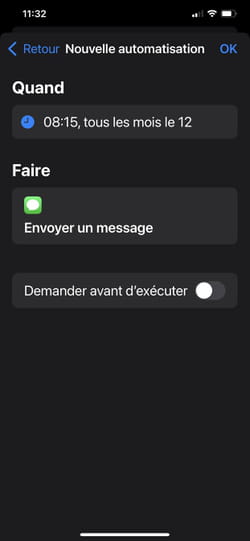
►Your script is ready to be recorded. Uncheck the option Ask before running (so that the message is sent automatically without any action on your part) and validate your choice by pressing Don’t ask in the dialog box that appears. Finally press okay.
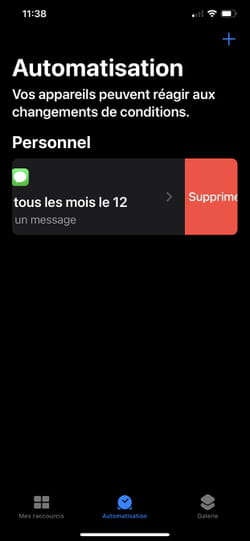
►Sending of the message is now scheduled. Please note, this is a recurring action that will be executed on the same day at the same time every month. To prevent this from happening, you must, after auto-uploading, delete the script. Go to the section Automating then slide your finger from right to left on its name to bring up the option To delete.