
To speed up your web browsing or to circumvent the limitations put in place by your Internet service provider, it is in your best interest to change your DNS servers. A simple, fast, reversible and safe operation.
All servers hosting websites have their own IP address on the web. However, as it is not easy to remember a series of numbers (like 216.58.215.46), each IP address corresponds to a domain name (like google.com to which this IP address is attached). It is for this purpose that the DNS servers (for Domain Name System or French domain name system) were developed. These services are comparable to huge directories which establish the correspondence between the URLs (the “addresses”) of the sites as you know them (such as www.commentcamarche.net) and their IP addresses on the network. A bit like a telephone directory makes the link between the name of a subscriber and his telephone number.
Usually you don’t have to worry about DNS servers. When your computer connects to the Internet, the access provider delivering the connection automatically configures its own DNS servers on your machine. But they are not the best, nor the fastest. In addition, some establish filters (blacklists) which prohibit access to certain sites (in particular those which offer illegal downloads). Fortunately, it is possible to modify the settings to use the DNS servers of your choice. You can thus perfectly use alternative DNS, free and much more efficient, by modifying the associated parameters on your computer. Not only will this speed up your Internet browsing, but changing DNS servers can allow you to access websites that your Internet service provider has blocked for various reasons.
How to Choose a Free DNS Server ?
Many companies on the Web offer free or paid DNS services for the most demanding. Here is a selection of the most popular free and fast DNS servers, each time with the IP addresses in IPv4 and in IPv6, the two current versions of the IP protocol, of the two DNS servers (the “primary” or “priority” and ” the auxiliary”). You can try them all without fear. The changes you make are all reversible. When entering them, you can copy them to the clipboard in order to paste them in the appropriate field without making a typing error.
Google Public DNS
- IPv4: 8.8.8.8 and 8.8.4.4
- IPv6: 2001:4860:4860::8888 and 2001:4860:4860::8844
OpenDNS
- IPv4: 208.67.222.222 and 208.67.220.220
- IPv6: 2620:119:35::35 and 2620:119:53::53
CloudFlare
- IPv4: 1.1.1.1 and 1.0.0.1
- IPv6: 2606:4700:4700::1111 and 2606:4700:4700::1001
DNS.Watch
- IPv4: 84.200.69.80 and 84.200.70.40
- IPv6: 2001:1608:10:25::1c04:b12f and 2001:1608:10:25::9249:d69b
How to change DNS server with Windows ?
Changing DNS servers in Windows 10 is done in System Settings. A relatively simple operation.
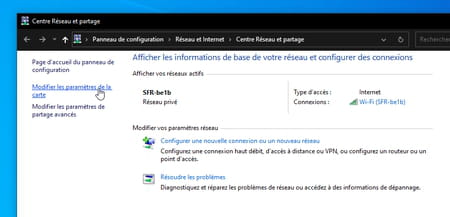
- Click on the start menu of Windows, at the bottom left of the taskbar, then Settings (the gear icon). You can also use the keyboard shortcut Windows+I to go directly to Windows settings. In the window Settings that appears, click Network and Internet. Scroll down the page and click Network and Sharing Center.
- In the left pane of the Network and Sharing Centerclick on the link Change map settings.
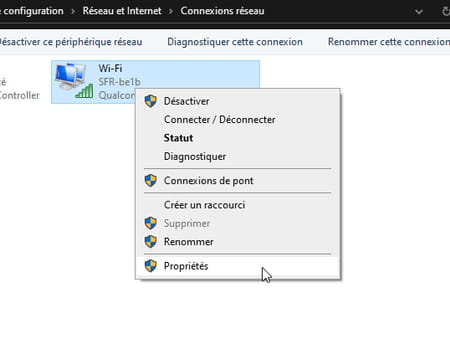
- Right-click the connection used to connect to the Internet (Wireless Where ethernet). From the context menu that appears, choose Properties.
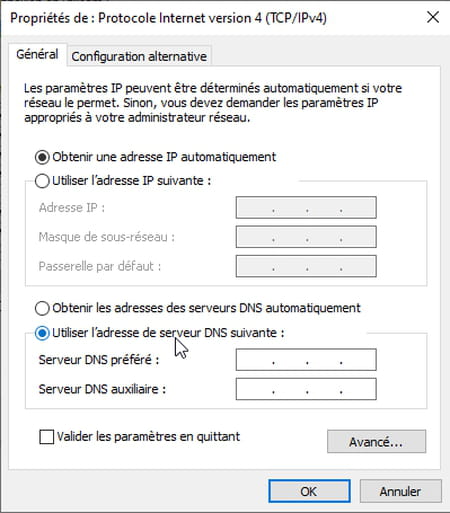
- A new window appears on the screen. Select Internet Protocol version 4 (TCP/IPv4) in the list then click on the button Properties.

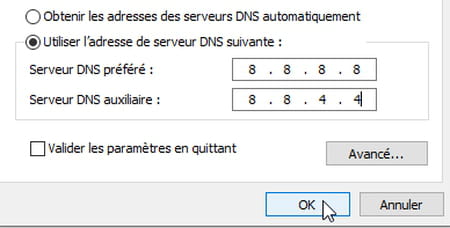
- In the lower part of the window PropertiesCheck the box Use the following DNS server address. The fields below, previously grayed out, become accessible.
- In the field Preferred DNS Server, enter the first address of the DNS server that you selected. For example 8.8.8.8 for Google. No need to enter the dots that separate the numbers. Use the key right arrow of the keyboard to change boxes.
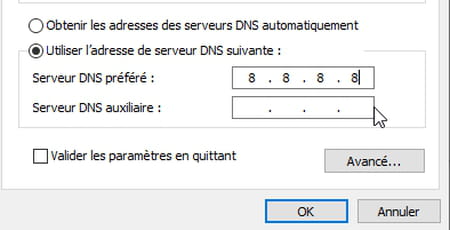
- In the field Auxiliary DNS Serverindicate the second address of the selected DNS server either, for Google 8.8.4.4. Validate by clicking on the button okay.
- Repeat these operations for the IPv6 protocol. To do this, in the window list Properties of (Ethernet or Wi-Fi depending on your connection), select Internet Protocol version 6 (TCP/IPv6) and click on Properties.

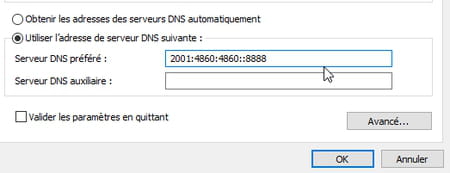
- In the lower part of the window PropertiesCheck the box Use the following DNS server address. The fields below, previously grayed out, become accessible.

- In the field Preferred DNS Serverenter the first address of the DNS server that you selected. 2001:4860:4860::8888 in our example with Google.
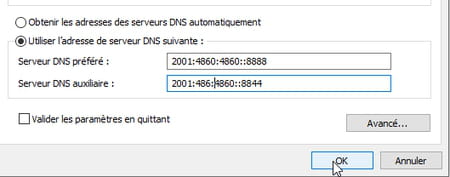
- In the field Auxiliary DNS Serverindicate the second address of the selected DNS server either, for Google 2001:4860:4860::8844. Check the box Validate parameters when exiting then click the button okay. Windows will immediately analyze the changes you have made and warn you in the event of an error (no one is immune to a typing error).
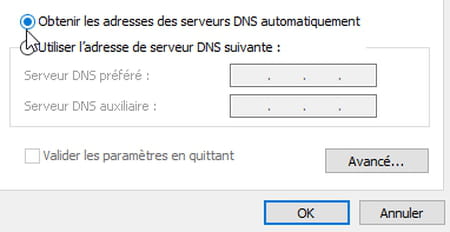
- You can now test your connection and verify that it is faster. If this does not work for you, you can try other DNS servers by entering the addresses that correspond to them or return to the original configuration. To do this, you just have to click on the option Obtain DNS server addresses automatically in the Properties IPv4 and IPv6 protocols.
How to Change DNS Server on Mac ?
Introducing new DNS servers to improve your surfing speed on macOS does not pose the slightest difficulty. All changes are made from the System Preferences panel.
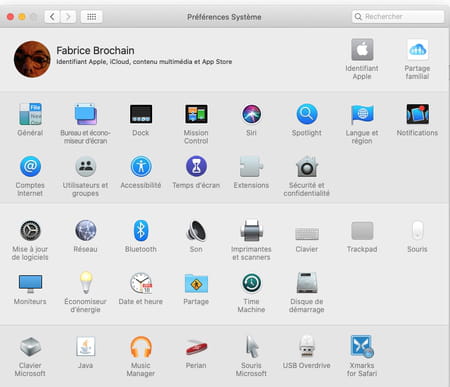
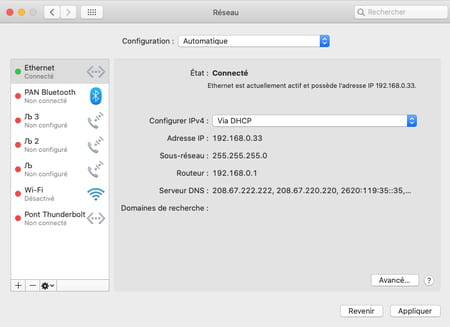
- Click on menu Apple at the top left of the Finder and choose Preferences System. In the settings panel that opens, click Network.
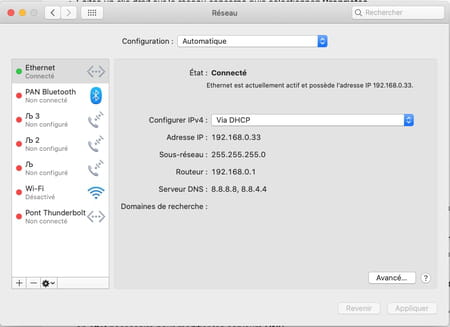
- The new window that is displayed presents the network connections with, at the top of the list, the one that is active at this moment. Click on the button Advanced at the bottom right of the window.
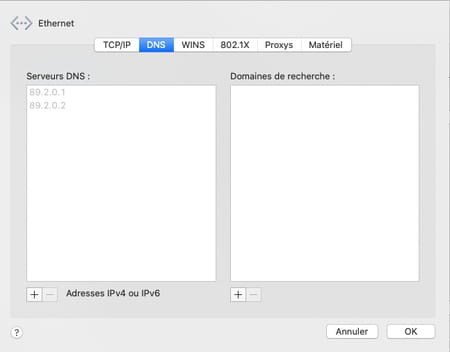
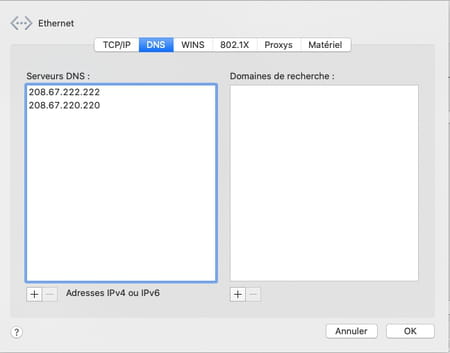
- In the new page that appears, select the tab DNS. Then appear in the left frame the addresses of the priority and auxiliary DNS servers of your Internet service provider. Click on the button + placed to the left of IPv4 or IPv6 addresses.
- Immediately the two addresses previously indicated disappear. Enter the first address of the DNS server that you have chosen. For example 208.67.222.222 for OpenDNS. Tap the key Entrance on the keyboard to confirm.
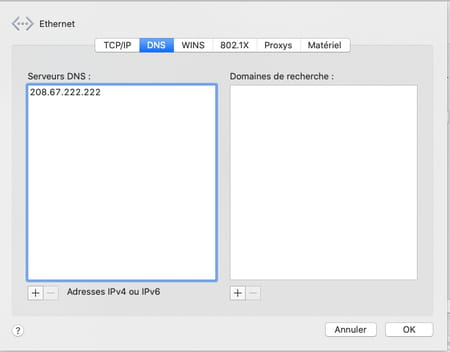
- Click the button again + and now enter the address of the auxiliary DNS server retained either 208.67.220.220 for OpenDNS and confirm by pressing the key Entrance of the keyboard.
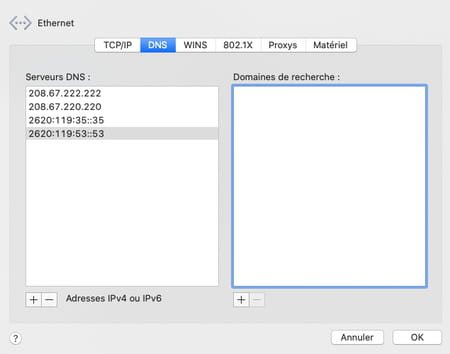
- Add the IPv6 addresses of the priority and auxiliary DNS servers of the DNS service you have chosen in the same way. Click on the button okay.
- The window closes. Now click on the button Apply from the macOS network settings panel. Your new settings are immediately taken into account.
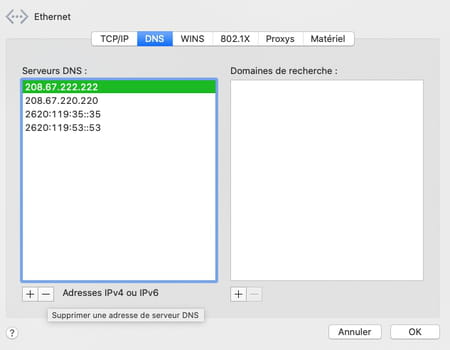
- You can now test your connection and verify that web pages display faster. If this does not work for you, you can try other DNS servers by entering the addresses that correspond to them or return to the original configuration. To do this, simply select each address entered in the DNS settings and click on the button – placed below the list. Once all the addresses have been removed, those provided by default by your Internet service provider will be reinstated. Don’t forget to click okay then Apply for the changes to take effect.
A DNS problem? Come discuss it in our forum!
Don’t forget: whatever your operator and your device, you can change your DNS server easily and for free. This will allow you to circumvent the limitations and filters put in place by your ISP – this is the case when legal measures oblige operators to block illegal sites, such as pirate services that violate the law – and thus access to inaccessible sites and services (see our practical sheet).