There is a little-known trick that can restore our car’s headlights inexpensively, refreshing their appearance and making our trips safer.
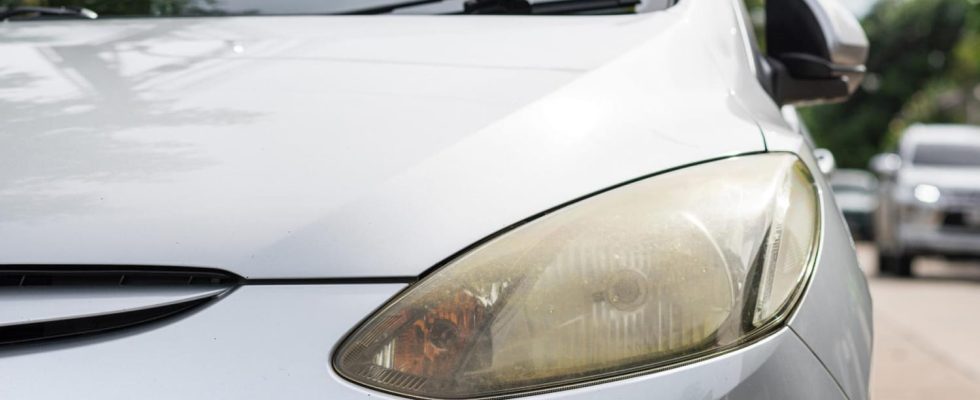
We often talk about the importance of proper car maintenance, and one of the things that is often overlooked is the care given to the headlights. Over time, these can become opaque and yellowed, which affects not only the aesthetics of the vehicle, but above all your safety, by reducing nighttime visibility. Over time, car headlights, usually made of polycarbonate, suffer the damaging effects of the sun’s ultraviolet rays, especially during the summer months, combined with other factors such as pollution, road debris and chemical products. This prolonged exposure causes surface oxidation and degradation, causing the headlights to turn yellow or cloudy.
Undoubtedly, the first instinct for a car owner would be to consult experts who specialize in headlight restoration or to purchase one of the cleaning kits available on the market. However, those who want to restore their headlights on the cheap can use a trick that will cost them nothing more than a few cents, using two products found in every home.
In particular, a “modest” lemon and baking soda can effectively restore the headlights. Both of these products are recognized for their gentle abrasive properties and their ability to remove impurities. The lemon’s acidity helps break down contaminants and dirt, while the baking soda acts as a natural exfoliator, removing the surface layers of oxidation that make headlights cloudy. Here’s how:
Preliminary cleaning: First of all, it is essential to clean the surface of the headlight with water and a mild soap. Dry well with a clean cloth.
Preparation of the mixture: In a bowl, mix an equal amount of fresh lemon juice and baking soda until you get a smooth paste. If the consistency is too runny, add a little more baking soda. If it’s too thick, a little more lemon juice will do. At this point, you might hear a noise from the reaction between the lemon and the baking soda, but that’s nothing to worry about.
Application: With a clean cloth or sponge, apply the mixture to the headlight in circular motions. Be sure to cover the entire clouded surface.
Rub gently: Circular movements ensure even application and help remove dirt and oxidation. Scrub the surface for 5-10 minutes.
Rinsing: Once the scrubbing is complete, rinse the headlight thoroughly with clean water to remove any residue from the paste.
Drying: Dry the headlight with a clean, soft cloth. Make sure that no residue of the solution remains.
Polishing (optional): For an even shinier finish, you can apply some car polish to the headlight and buff it gently.
Although this method gives excellent results, to ensure the longevity of the work, it may be a good idea to apply a UV protection product specially designed for headlights. This will help protect them from future sun damage. Finally, be aware that this mixture can restore the clarity of the headlights, but not as much as specially trained technicians can do.