You don’t have a webcam? Or that of your computer is of poor quality? If you have an iPhone, even an old one, you can perfectly use it as a camera for your videoconferences, on both Mac and PC.
Need a new webcam to improve the ordinary of your daily videoconferences? How about using an iPhone instead? With a specialized application, you can present yourself under your best profile by taking advantage of the excellent quality of one of your smartphone’s cameras. Even a few years old “old” model that you keep sitting idle in the back of a drawer will provide superior image quality to many webcams. The only condition: it must be compatible with version 13 of iOS at least, which includes all models up to and including the iPhone 6S.
How to use an iPhone as a webcam?
If you’ve ever tried it, you found that just plugging in theiPhone to the computer via its USB cable so that it suddenly appears available as a webcam. This operation is devoted to the transfer of photos or, more rarely nowadays, to the update of the iOS system. This is why it is necessary to install a specific application which will act as an intermediary between the computer and the iPhone in webcam mode.
For this, we have chosen to use EpocCam, from Corsair, which also owns the Elgato brand. This tool comes in two modules. The first is installed on the computer (PC or Mac): it is free in all cases. The second is an app to install on the iPhone from the App Store. It exists in two versions: one free, the other paying (8.99 euros).
The free version limits the quality of the image to a definition of 640 x 480 pixels, but not the time of use. Nothing prohibitive in most cases: it will surely suffice for occasional use. Not least because even at this relatively low quality, your iPhone’s photo sensor will give very good results in terms of color and brightness, in a dark room for example.
That said, the free version has another limitation that may be more important, depending on your computer’s equipment: it does not allow you to use the iPhone’s microphone. So if your computer has a microphone, no problem. Otherwise, go directly to the paid version and you will therefore benefit, in addition, from improved image quality, which can go up to Full HD, or 1920 x 1080 pixels.
Please note that some video conferencing applications, such as Zoom, limit the maximum image quality to 1280 x 720 pixels to avoid network congestion during periods of high use, such as during the health crisis.
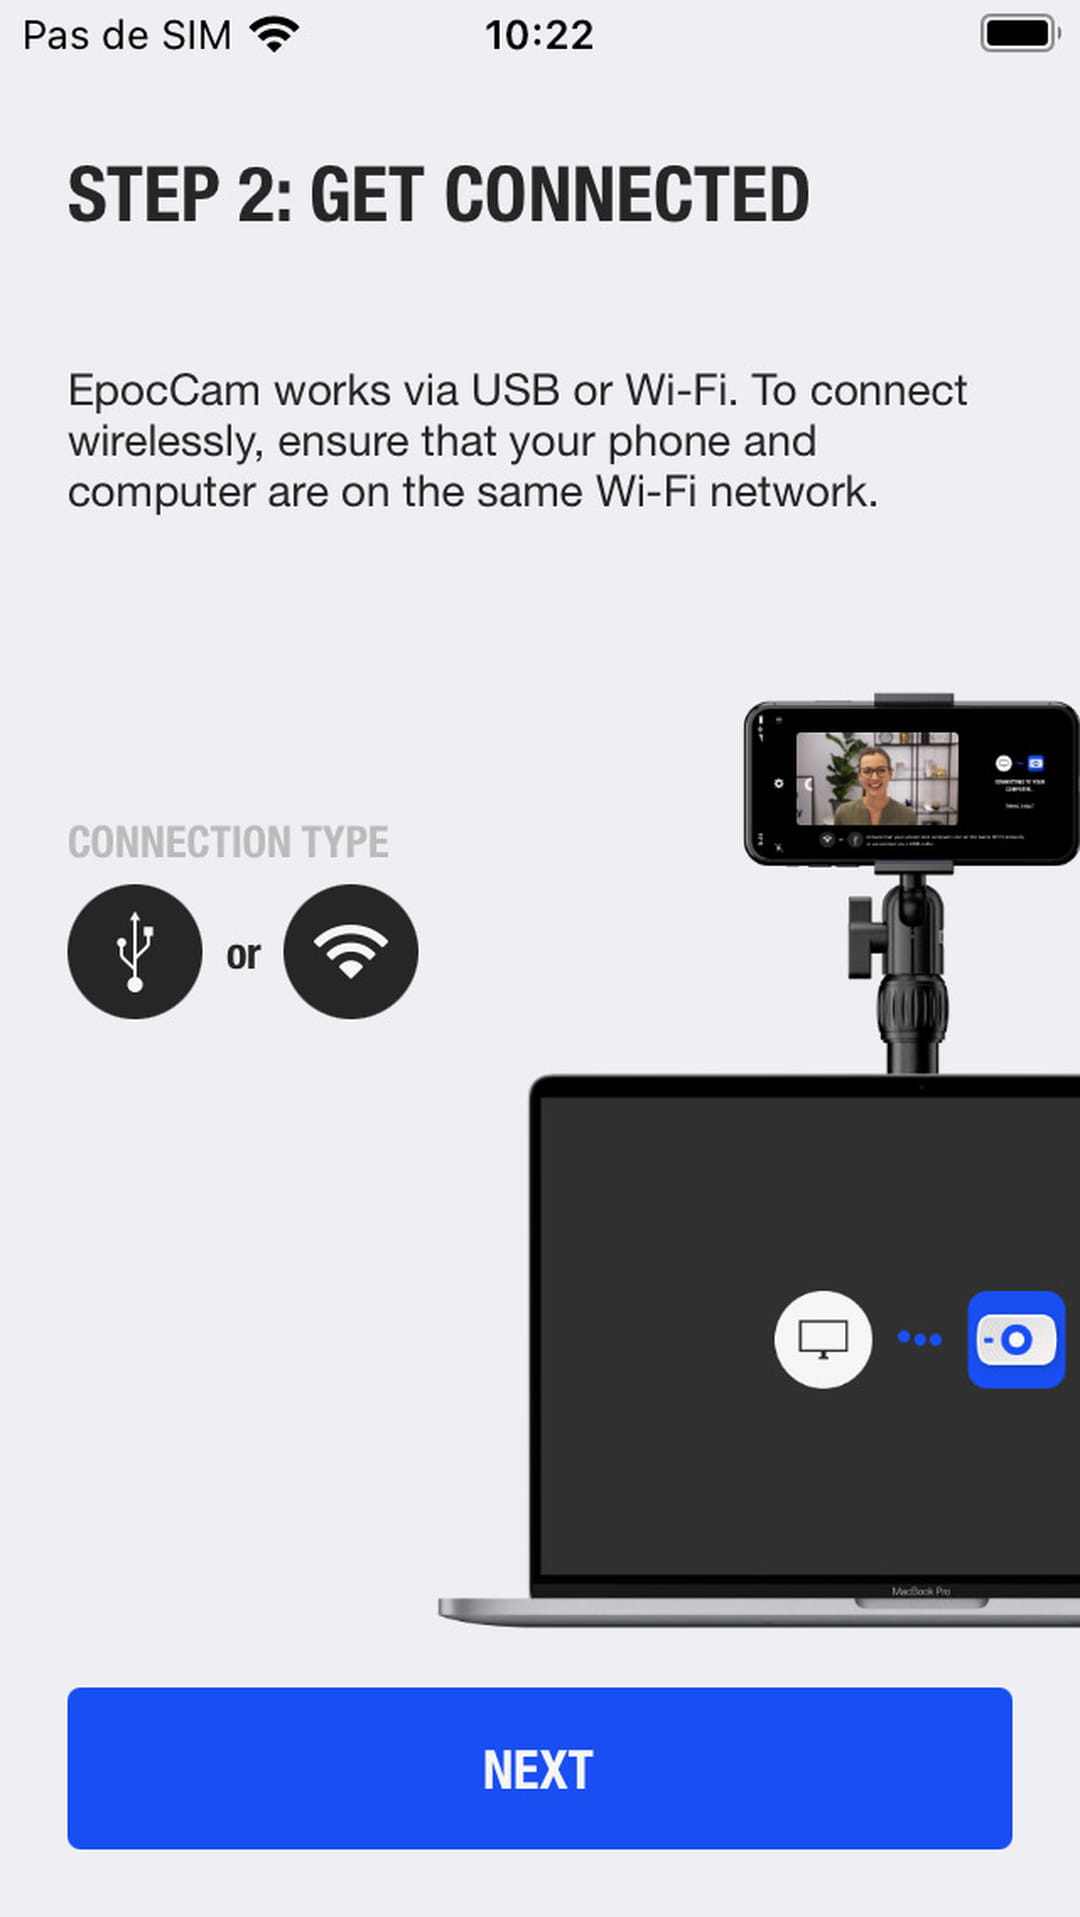
Finally, you can choose to use the iPhone as a webcam: either via the USB cable directly plugged into the PC or Mac, which has the advantage of keeping the battery charged; or via Wi-Fi, for example to be able to change the viewing angle more easily during the conversation.
Install EpocCam App on iPhone
To be able to use your iPhone as a webcam, you must first download the EpocCam app.
- On your iPhone connected to the Internet (Wi-Fi or 4G), go to the App Store.
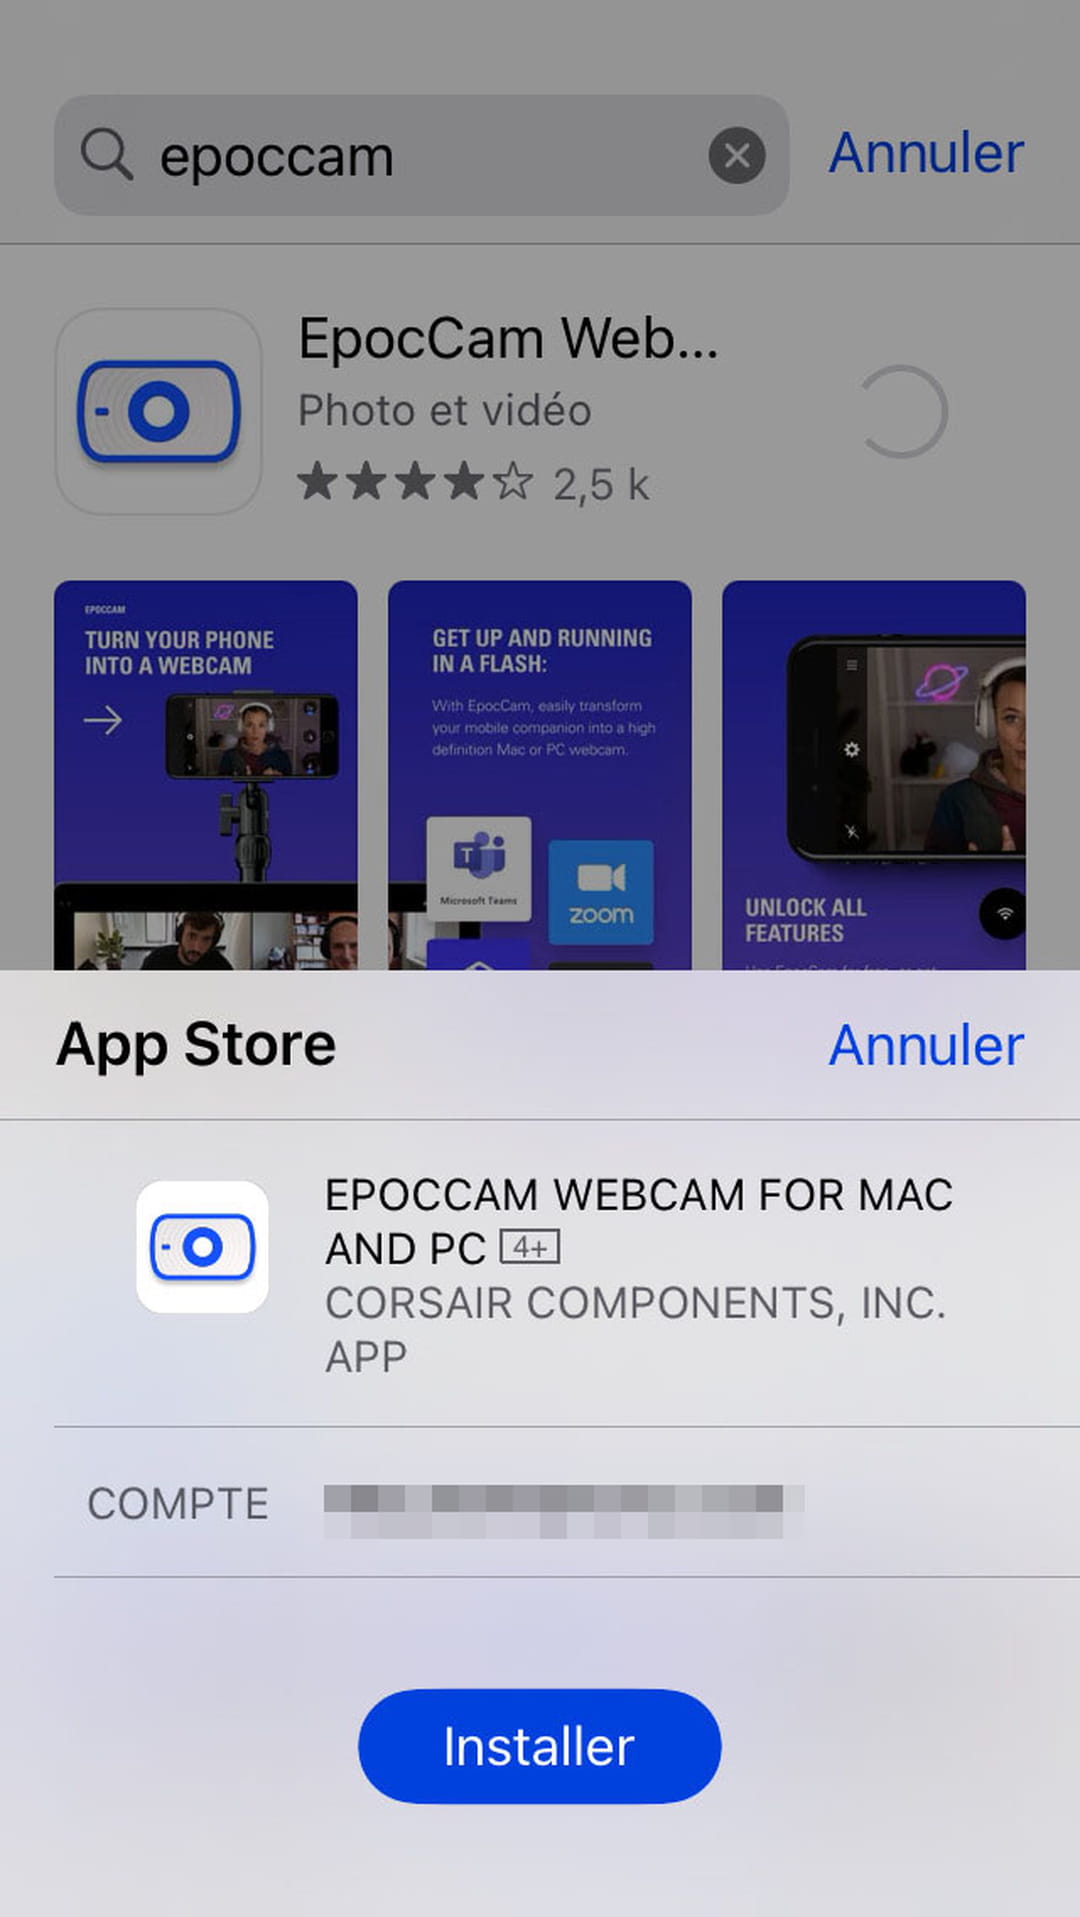
- Press on magnifying glass iconat the bottom right, then type epoccam (with two c) in the search box at the top of the screen. The two versions of the app appear: free and paid.

- Push the button Obtain, just to the right of the free version. Validate your choice using your fingerprint, facial recognition or your Apple account password. The application installs immediately.

- After downloading and installing, the app icon appears on the home screen. Tap it to launch the app. A message, in English, appears. Tap the button Begin (Begin).

- The next screen tells you that you will need to install a module on your computer (see below). Double tap Next (Next) to get to the permissions screen).


Once the EpocCam app is installed on your iPhone, you need to give it some permissions for it to work. This is normal iPhone protocol: the iOS system polices and doesn’t let apps use the camera or network connection without asking for your permission.
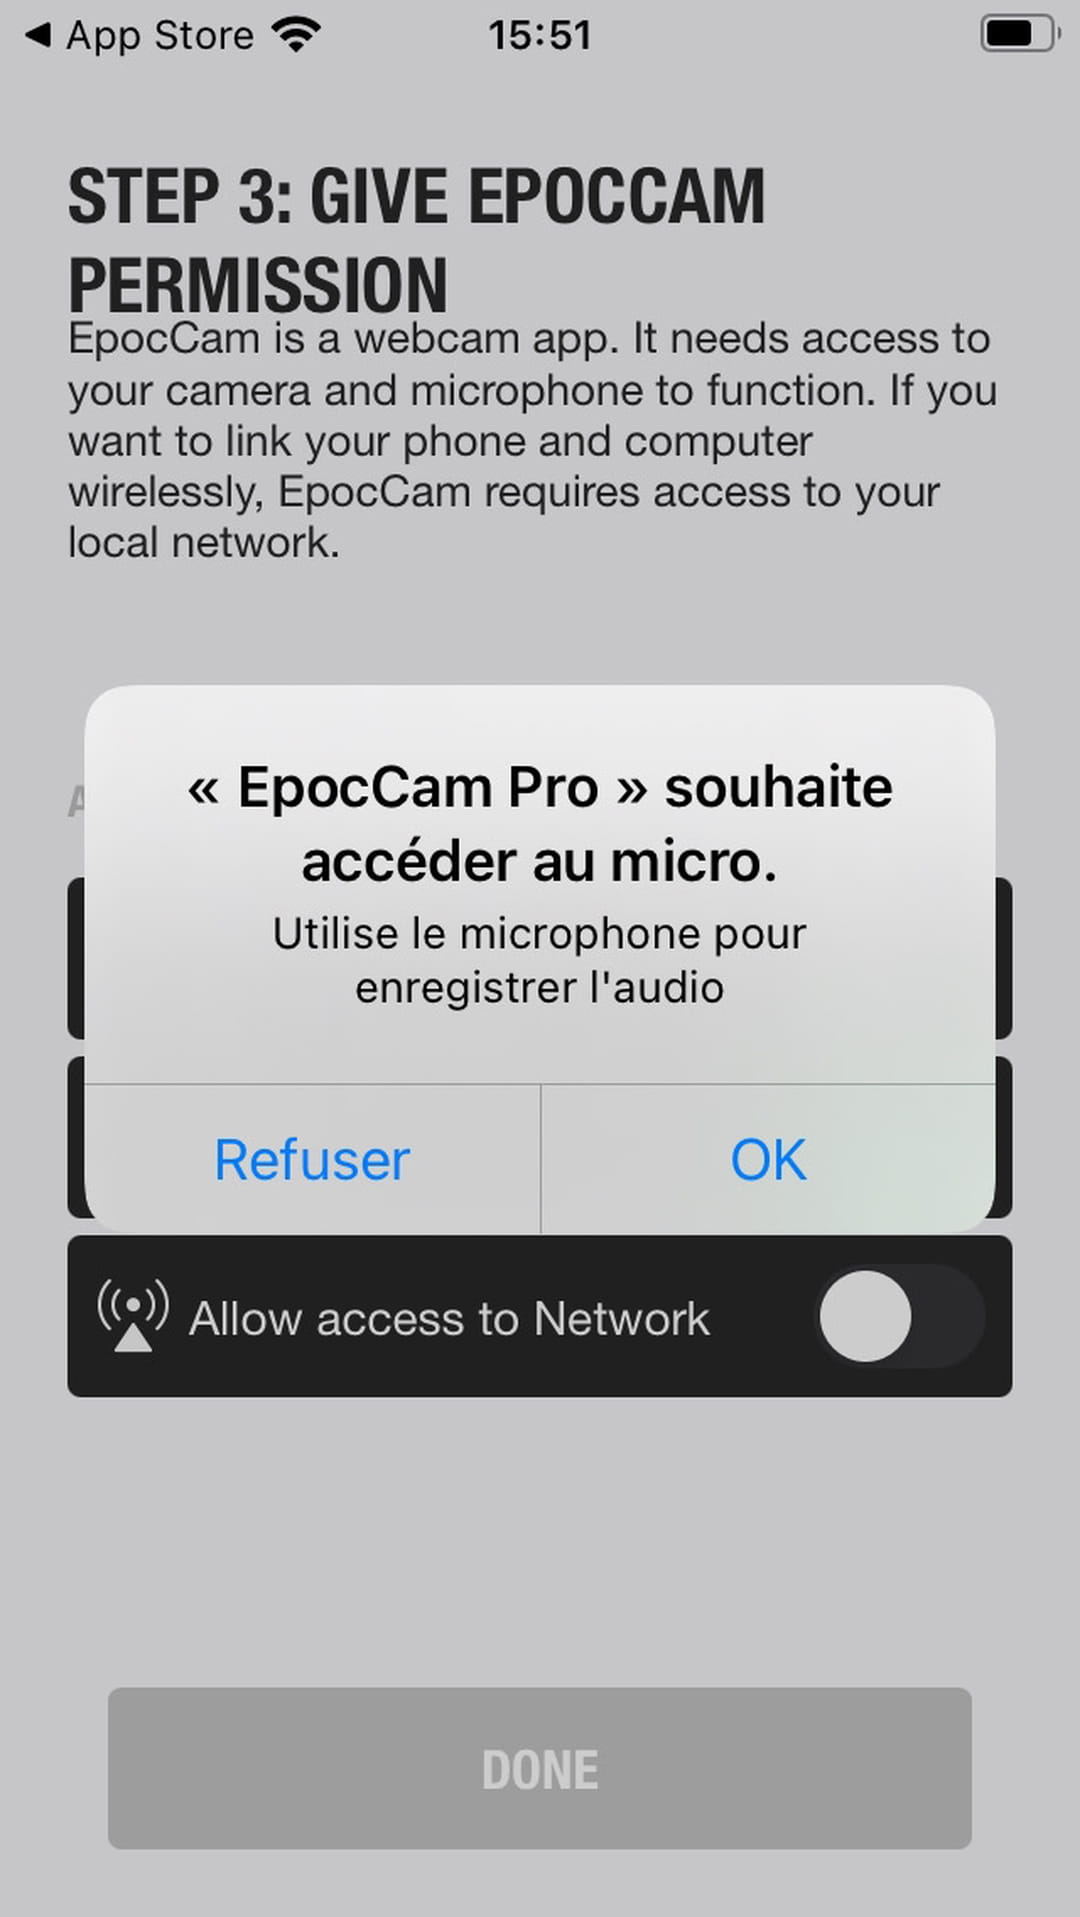
- When you have passed the installation steps described above, the screen App Permissions list the required permissions. They are two in number for the free application and three for the paid version which adds the one allowing you to use the microphone of the iPhone so that your correspondents can hear you.

- Tap Allow access to Camera. A system alert indicates “EpocCam” wants to access the camera. Press on OK.

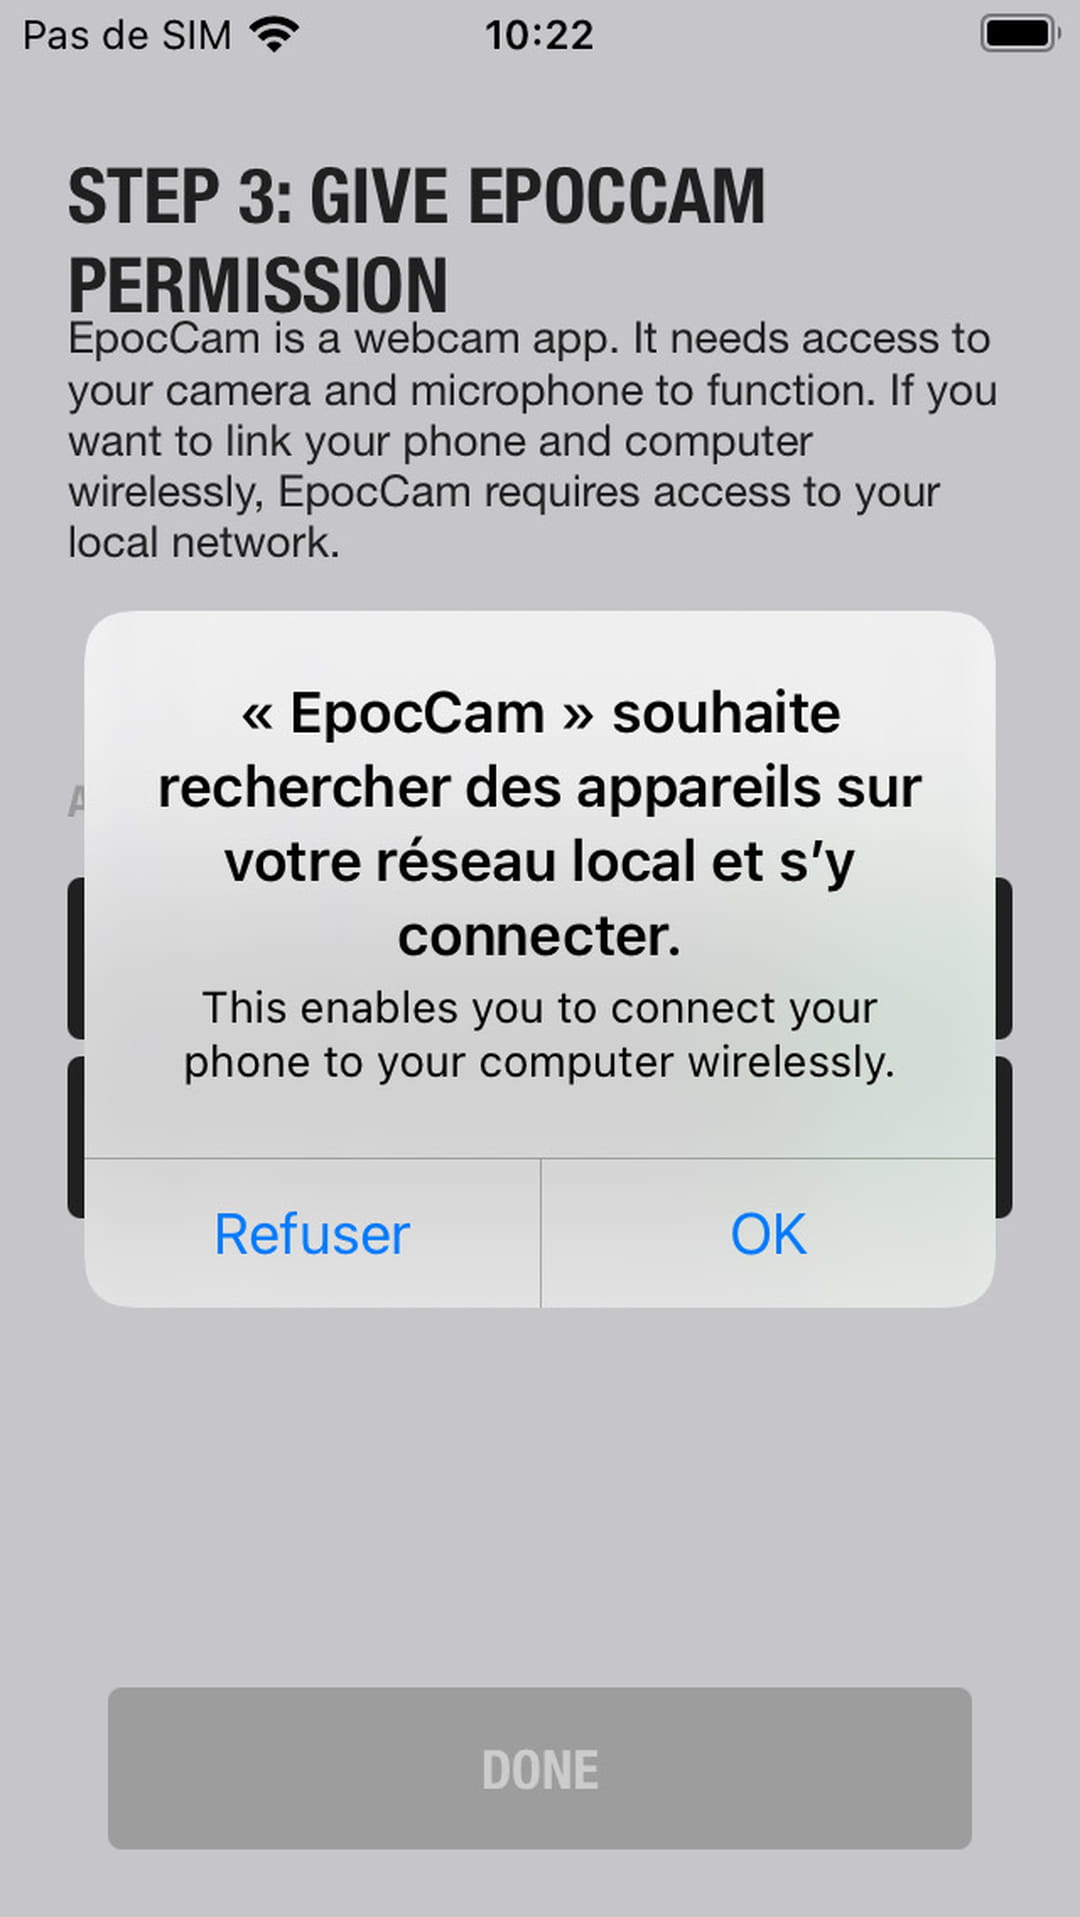
- Then tap on Allow access to Network. A new system alert indicates this time “EpocCam” wants to search for devices on your local network and connect to them. This is what will allow you to use the iPhone as a webcam over your Wi-Fi network. Even if you still plan to use a USB cable, this permission is required for the app to work. Again, tap OK.

- On the paid version, tap Allow access to Microphone. The alert displays “EpocCam Pro” wants to access the microphone. Press on OK.


Install EpocCam driver on computer
For your computer to recognize your iPhone as a webcam, you must install a specific module that will link with the EpocCam application that you have installed on your iPhone (see above).
- Whether you are using a PC or a Mac, first start by launching your Internet browser to go to the page on EpocCam website.

- Scroll down the page so you can click the button macOS Where Windows depending on the type of computer you are using.


Install EpocCam Driver on Windows PC
Once you have downloaded the driver for Windows, go to the folder Downloadvia File Explorer.
- Double-click on the file you just downloaded (with the name of EpocCamInstallerXXX.exe) to open it.

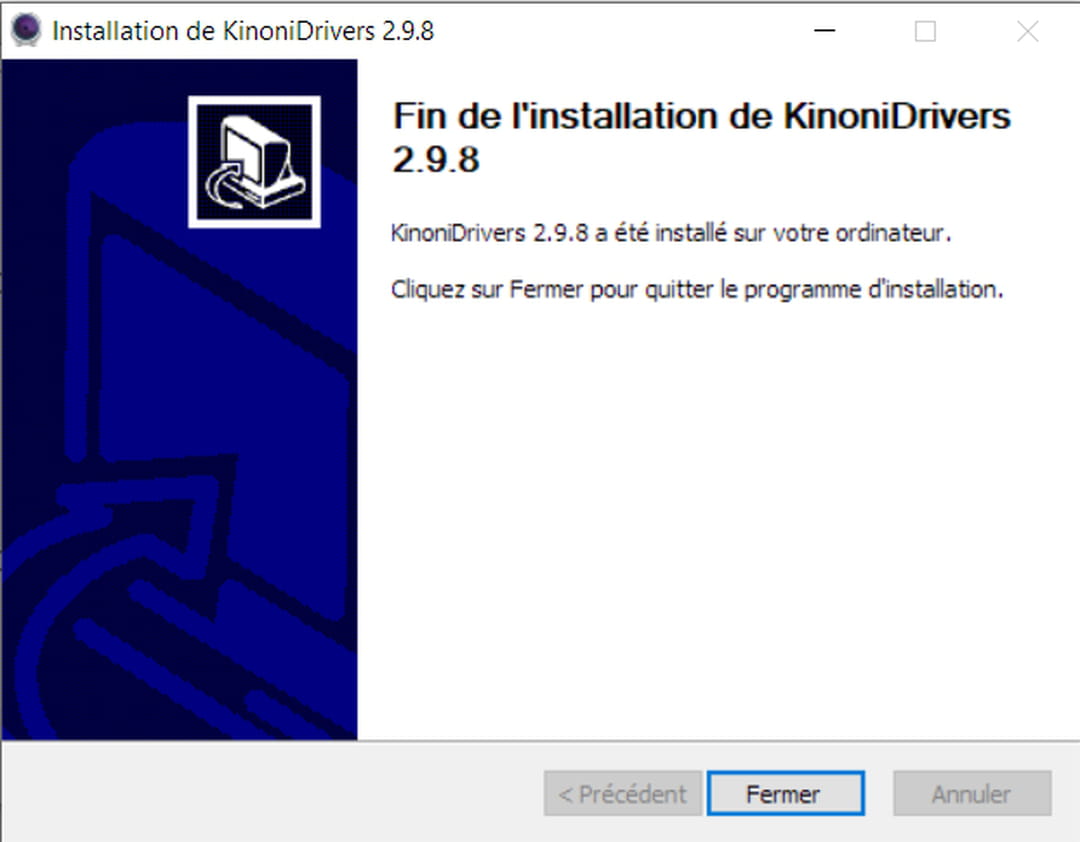
- Follow the usual installation procedure, keeping the default options.

- When the last step is reached, click the button Close to close the window. Don’t be surprised to see the mention of the Kinoni brand rather than Corsair or Elgato: this is the name of the former owner of the EpocCam solution, a mention that should disappear in a future version of the driver.

- Once the installation is complete, you don’t have to do anything. You don’t need to launch any application on the PC: the driver remains active and will automatically detect the EpocCam application on your iPhone when you launch it.


Install EpocCam Driver on Mac
Once you have downloaded the driver for the macOS system, go to the folder Downloadthrough the Finder.
- Double-click on the file you just downloaded (with the name of EpocCam_Installer_X_X.pkg) to start the installation.

- Follow the usual installation procedure, keeping the default options.

- When the last step is reached, click the button Close to close the window indicating that the installation was successful. A message appears offering to move the installer to the Trash. So do it, you won’t need it anymore.

- Once the installation is complete, you don’t have to do anything. You don’t need to launch an app on the Mac: the driver stays active and will automatically detect the EpocCam app on your iPhone when you launch it.


Use iPhone as Webcam on Mac or PC with EpocCam
Once you have installed the EpocCam application on your iPhone and the corresponding driver on your computer, everything is ready. All you have to do is use your phone as a webcam!
- First launch the EpocCam app on the iPhone.
- By default, the screen displays the image captured by the main camera on the back of your iPhone.

- To use the front camera (the one for selfies), tap camera icon bearing a double circular arrow, on the right. This is the most practical mode to use since it allows both to see yourself to be well placed in the shooting field and to access all the options of the application. And the quality of an iPhone’s selfie camera is already far superior to that of most webcams.

- Just above the camera button, the double triangle button allows you to activate the mirror effect, to invert the image horizontally. You will choose the orientation that suits you: the inverted mode is sometimes confusing when you want to point your finger at an object behind you for example and you have the impression that your hand is going to the right when you want show something to his left. Be careful, if you show text, it will sometimes also appear as in a mirror and will therefore be difficult to read by your correspondents. Also keep in mind that your video conferencing software probably also has a setting Mirror effect : this is the case of Zoom, for example.
- On the paid version of EpocCam, note the presence of an icon in the shape of a gear wheel to the left. It gives access to several additional settings. The choice of connection mode (Wi-Fi or cable) while it is necessarily automatically chosen by the free version. And also an image quality setting: Fair (Medium) and Good (Good).

- Still in the paid version, also note the icon microphone at the bottom right which allows you to activate or mute the microphone of the iPhone during a conversation, if you have decided to use it as a sound source in your video conferencing software.
- Also in the paid version of EpocCam, the shaped icon lightning at the bottom left is used to activate the flash of the iPhone. Better to use it only with the rear camera when you show an object for example: otherwise the scathing light of the flash risks damaging your eyes!
- On a recent iPhone with several lenses (here an iPhone X), an additional button at the top right allows, for example, to zoom by switching from mode 1X at 2X.

- When everything is settled on the iPhone, switch to your computer. Again, you don’t have to do anything special since the iPhone is automatically detected as a webcam thanks to the driver you installed.
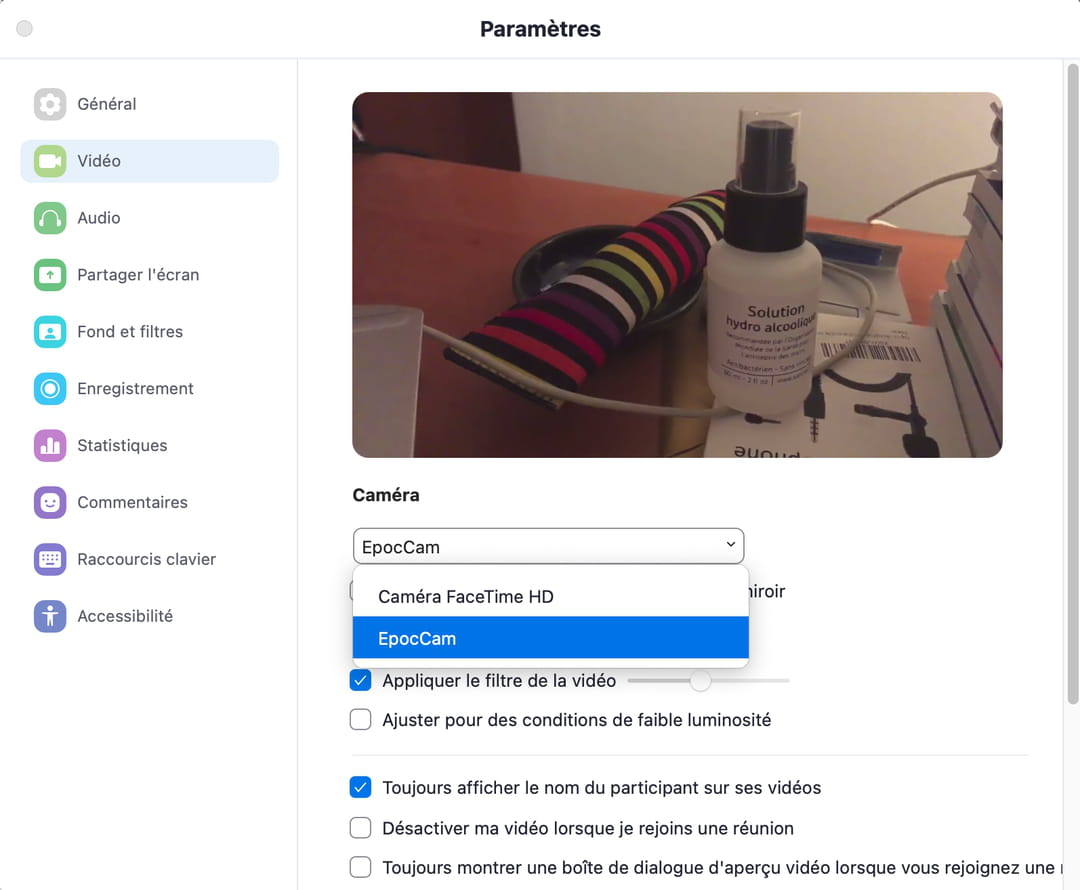
- On the computer, launch your videoconferencing application (here Zoom). Go to the settings to choose the camera to use. From the menu, choose the EpocCam camera. Make sure the image pops and the framing is right for you. You are ready !


Last detail, to conclude: accounting. The principle of the EpocCam driver that is installed on the computer consists in creating a virtual webcam then offered to the system as an additional webcam. Unfortunately, not all applications are compatible with this virtual webcam system. This is particularly the case with Apple’s FaceTime application, which is preinstalled on all Macs. For this, you will therefore have to use the integrated webcam of Macbooks and MacBook Pros or a “real” webcam, connected via USB. Shame.