
Is your PC’s hard drive or SSD starting to saturate? The Windows Disk Cleanup tool will help you easily and quickly recover storage space, without having to manually delete files.
Like everyone else, you have probably accumulated a myriad of files on your computer over time. Of course, your PC’s hard drives and/or SSDs contain important items that you want to keep, such as software, documents, music, photos, videos, games or other personal files. But they also contain a host of less visible items, such as temporary files or system files, some related to Windows updates, which are harder to identify and locate, but which nevertheless occupy an important place which can represent hundreds of bytes (MB) or even several gigabytes (GB). And they should be deleted regularly to free up space, especially when the available storage space runs out.
There are several ways to clean up disk space on a computer (see our how-to sheets on optimizing a slow PC and cleaning up a full disk). But Windows also has a powerful and relatively unknown utility for easily deleting unnecessary system files: the Disk Cleanup tool. Integrated as standard into Windows 10 and 11, it can analyze internal or external disks – hard drive, SSD, memory card, USB key – and automatically delete all kinds of system files that are difficult to eliminate by hand, filtering them by category. And even if it is based on an old-fashioned interface, it is devilishly effective!
How to open Windows Disk Cleanup tool?
Like other specialized Windows utilities, the Disk Cleanup tool is somewhat hidden. There are two very easy ways to find it.
► With Windows 10, click on the start menu, then scroll through the list of installed apps. Click on the folder Windows administrative tools to display its contents, then click Disc cleaning.
► With Windows 11, click on the start menuthen, in the window that appears, click the button All Appstop right.

► Scroll through the list that appears and click Windows tools.

► In the window that appears, click on Disc cleaning.

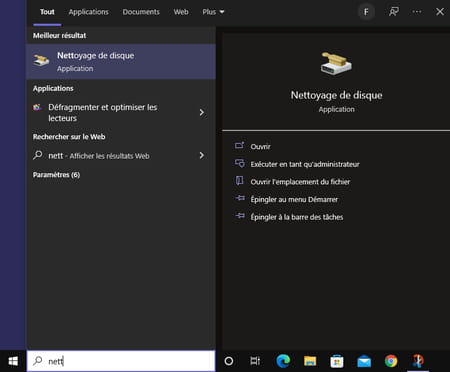
► Another method, which works with both Windows 10 and Windows 11: in the search box on the Windows taskbar, type Disc cleaning (usually the first three letters are enough). A results window is displayed immediately. Click on Disc cleaning or simply validate with the key Entrance of the keyboard.
How to use Windows Disk Cleanup?
Regardless of the method you choose to launch it, the Windows Disk Cleanup tool is used in the same way, under Windows 10 as under Windows 11. You can use it to automatically clean all your storage media, internal or external.
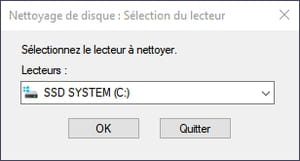
► When launched, the Disk Cleanup tool first displays a small disk selection window. Click on drop-down menu to choose the disk to clean from the list (VS : for the disk on which Windows is installed and which is often the most cluttered), then click on the button okay to validate.
► The Disk Cleanup tool immediately launches an analysis of the contents of the selected disk. After a few seconds of analysis, it displays its report.
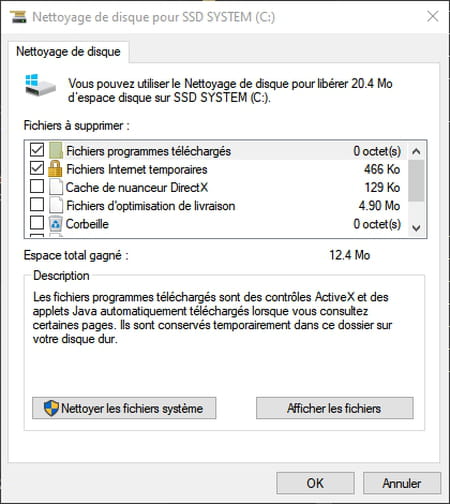
► The window indicates at the top the total space that you can free with the cleaning tool, then the list of the different types of files that you can delete with the space they occupy and titles that are not always very explicit: files downloaded programs, temporary internet files, DirectX shader cache, thumbnails, etc. Scroll down and check the boxes of the file types you want to delete and uncheck the others. Windows then says theTotal space gained if you delete the selected files.
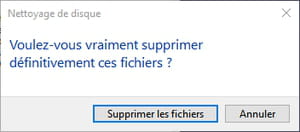
► Click the button okaythen confirm by clicking on Delete files in the warning window that appears next.
► The Disk Cleanup tool then deletes all the file types you have selected by displaying the progress of the operation on a bar. If you have changed your mind in the meantime, you can still cancel the operation by clicking on the button to cancel.
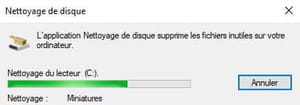
► Note that the tool window closes automatically once cleaning is complete. You have to restart it to perform other operations.
How to delete Windows system files?
Disk Cleanup’s basic housekeeping doesn’t delete everything. And to go further and free up more space, you have to erase more sensitive system files.
► Launch the Disk Cleanup tool using one of the methods given above. Choose a disk to examine from the drop-down menu, then, when its analysis is complete and the report is displayed, click the button Clean up system files at the bottom left of the window Disc cleaning.
► Very curiously, a new disk selection window appears. Choose again the disk to examine in the drop-down menu then click on the button okay.
► The tool then examines the selected disk – the operation can be quite long depending on the type of disk and the size of the disk. It then displays all types of system files that can be deleted along with the space they take up: Microsoft Defender Antivirus, Windows upgrade log files, device driver packages, previous Windows installations, etc. Note that this list is different from the one obtained after a “simple” scan, because it presents other files.
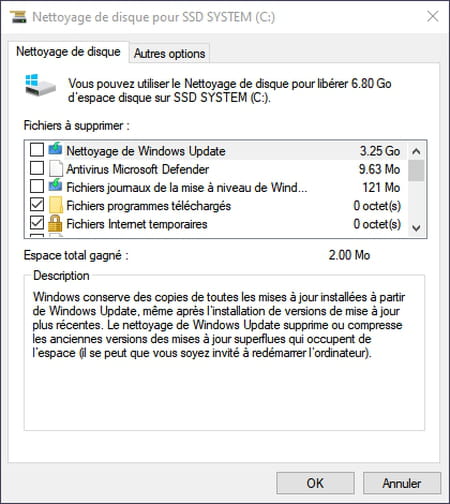
► Again, check the boxes of the file types you want to delete and uncheck the others. Note the often very large file sizes for Windows upgrades. The window shows both the total disk space you can recover and the actual space you will free with your selection.
► Your selection made, Click on the button okaythen confirm by clicking on Delete files in the warning window that appears next to start deleting the selected files.
► The Disk Cleanup tool then starts deleting all the file types you have selected by displaying the progress of the operation on a bar. Be patient, because this deeper cleaning than the previous one can take quite a long time, even on an SSD. Note that the tool window closes automatically once cleaning is complete.
It’s not over! The Disk Cleanup tool offers to go even further by deleting other unnecessary elements from Windows, such as unused applications or outdated restore points. As always, you have to be sure not to erase important elements, but, again, there is a way to save a lot of space on a disc.
► First proceed as in the previous step. Launch the Disk Cleanup tool using one of the methods given above. Choose a disk to examine from the drop-down menu, then, when its analysis is complete and the report is displayed, click the button Clean up system files at the bottom left of the window Disc cleaning.
► This time, click on the tab Other options, at the top of the window. The content of the window changes and the tool offers two sections: Programs and Features and System restores and shadow copies.
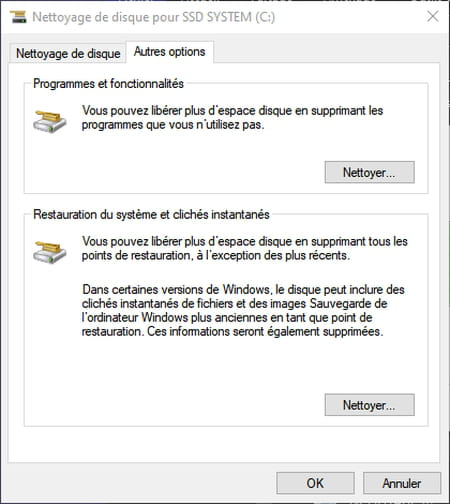
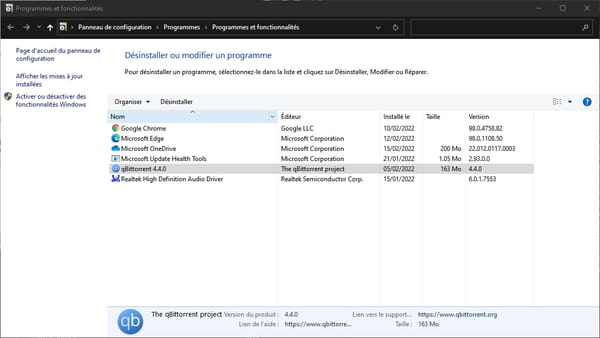
► Section Programs and Features corresponds to installed applications and various Windows modules. Click on the button To clean… A new window, inherited from the old Windows Control Panel, is displayed showing the applications likely to be uninstalled, with the size they occupy on the disk. To remove an application from the PC, click on her name to select it, then press the button Uninstall, at the top of the list. Note that this method duplicates another Windows function (see our practical sheet). It would be high time for Microsoft to clean up its own functions…
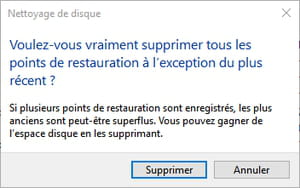
►The section System restores and shadow copies corresponds to automatic Windows backups, which allow you to return to a stable system in the event of a problem. Click on the button To clean… A small warning window appears, offering to erase all system restore points, except the most recent. Click on To delete to start the operation.
And there you have it: within minutes, you’ll typically reclaim several gigabytes of storage space without cleaning up by hand!