Want to stand out on Facebook? Create an avatar, your image or purely whimsical, which you will use to illustrate your publications and your reactions. Or even to replace your profile picture!
If you are often on Facebook, you probably already use emojis, stickers (stickers) and other pictograms in your comments and messages to underline or qualify your remarks by bringing a humorous or whimsical touch. But if you are tired of ready-to-use models or if you want to go further in personalization, you can also create an avatar, a small drawn character – in your image or completely fanciful – which can adopt different poses or expressions and which will advantageously replace the standard stickers in your discussions by bringing a touch of originality. It is even possible to use it as a profile picture!
Clearly inspired by Snapchat’s bitmojis, though less sophisticated, Facebook’s avatars are still new. And as often when deploying a new function, they are not available to everyone at the beginning. If this is your case, you will have to wait a little longer.
Furthermore, the creation and modification of an avatar must be done in the Facebook mobile application – not in the lite version. However, once the avatar is created, it can be used on both mobile and desktop, in the web version of Facebook.
To create an avatar, you must use the Facebook mobile application, available on Android and iOS, for iPhone and iPad and already have an account. If you don’t have one, see our practical sheet Creating a Facebook account on computer or mobile. The creation of an avatar is done starting from an asexual and bald character. Don’t be surprised if Facebook doesn’t ask you for your gender: it’s only through your choices such as haircut, silhouette or even the presence of a beard or mustache that it will take on a masculine or feminine. Likewise, you cannot indicate your age, but you can suggest it by playing with various options such as hair color or wrinkles…
- Launch the Facebook app on your mobile and log in to your account if you are not logged in by default.
- On your account home page, tap the three strokes at the top right of the toolbar.
- Scroll down the screen and optionally tap See more to display all the options, then press the button Avatars.
- A welcome screen displays a message. Press on Next.
- First you need to choose the color of your skin. Scroll through the thumbnails displayed on the screen, press thumbnail that suits you – you can always modify it later –, then on the button Next.
- You then arrive on the personalization screen of your avatar. It has three parts: at the top, your avatar; in the middle, a carousel with buttons to define the different characteristics of the avatar (skin color, haircut, color, make-up, silhouette, eyes, etc.); below, the variations available for each element.

- To customize your character, simply scroll through the carousel to choose a section (face shape, eyebrows, lips, nose, glasses, dress code, etc.), then tap on one of the variations offered in the game bottom. You can make multiple attempts, change sections and reconsider your choices at any time. The choice is quite vast, even if it is not infinite, and there are really multiple feasible combinations.
- If you want to create an avatar in your image, press the little mirror icon top right, near the face. Facebook then asks you for access to your camera. Accept. Your face then appears in a thumbnail, to the right of the avatar, like a miniature mirror, to allow you to adjust the different elements to your image. Press on the little cross to close the thumbnail. You can open it at any time.
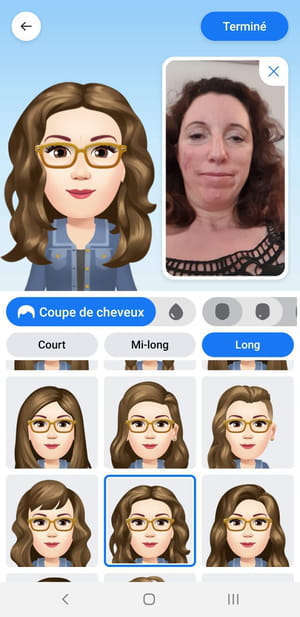
- When you are satisfied with the result, press the button Endedthen on Next on the next two screens. Your avatar is created!
- Facebook then suggests that you Share in News Feed your new image in a post. Choose Ignore for the moment.

- The screen that is then displayed will welcome you each time you return to the function Avatars. You can change your avatar at any time by pressing the button Pencil,
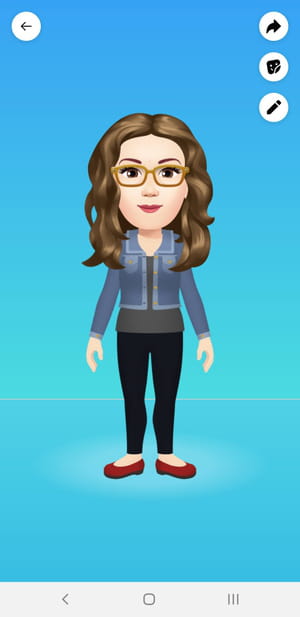
- You can view all the stickers (stickers) automatically generated by Facebook from your avatar by pressing the face button, between. The list grows steadily.
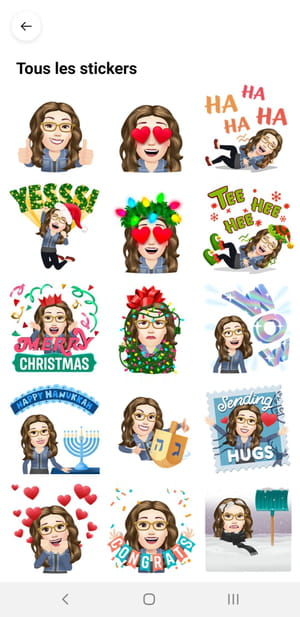
- Tap a sticker in the gallery. A small menu appears at the bottom of the screen with different options. You can then send it directly to Messengeruse it in a publicationthe to copy or send it via other apps on your mobile like Snapchat or WhatsApp by choosing More options.
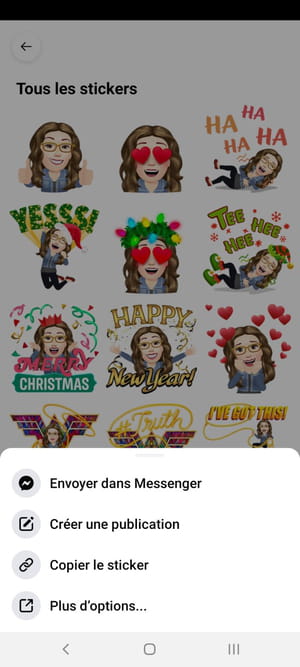
- Go back to your avatar screen and press right arrow button, at the top of the screen. A small menu appears at the bottom of the screen with different options. You can then share your character in a publication or to use it temporarily as new profile picture.
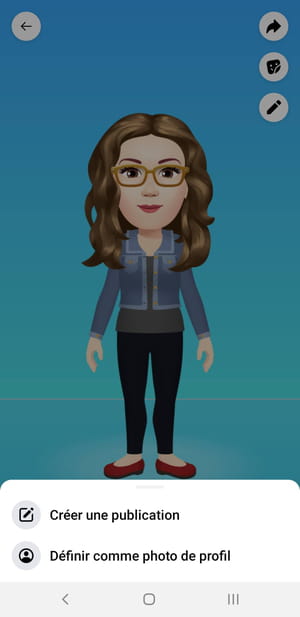
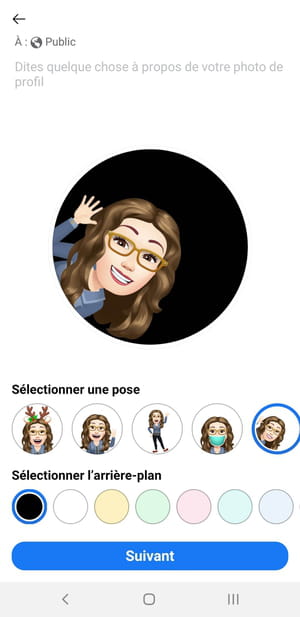
- If you choose the option Set as profile picture, a new screen is displayed. You must then select the attitude of your virtual double from the five offered automatically in the section Select a pose as well as a colored background by choosing one of the color chips in the section Select background. Press on Next when you are done.
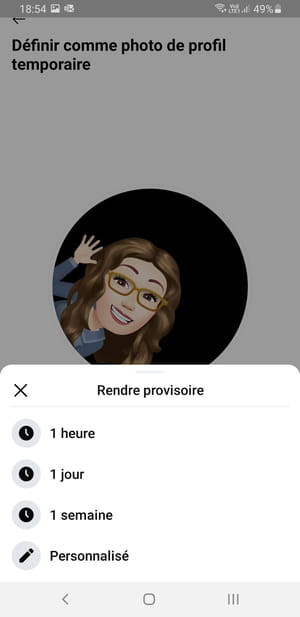
- From the drop-down menu that appears next, choose how long this image should replace your current profile picture 1 hour, 1 day, 1 week Where Custom.
- Back to the previous screen, press To register. Your avatar is online on your profile
Now that you have created your avatar, you can create your virtual double and its variations to personalize your posts and comments on Facebook, on both mobile and computer.
With the Web version for desktop
- With your usual web browser, go to your Facebook account.
- To use your avatar in one of your publications, , on your Facebook home page, click on the field What do you mean ?
- In the mini window that opens, click on the small multicolored Aa buttonbottom left, then the button with four squaresat the bottom right.
- The contents of the window change. In the game Avatarsclick on one of the icons offered with your avatar.
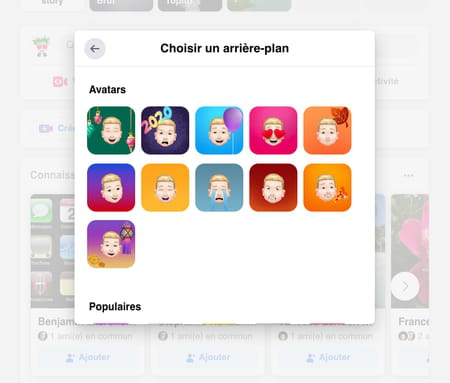
- A colored image with your virtual double then fills the screen: it will serve as the background for your publication. Write your message, then click Publish.

- To insert one of your new personalized stickers in a comment, click button Comment in a publication.

- Then click on the first icon (Post an avatar sticker) to the right of the comment field. A window opens with the list of available stickers. Click on the one you like to insert it in your comment.

- If you change your mind, click the little cross to erase it. Press the key Hall to have your message published with the sticker.

With the Facebook mobile app
- Launch the Facebook app.
- To use your avatar in one of your publications, on the home screen, press the field What do you mean ?
- In the menu that appears, tap Aa Background color.
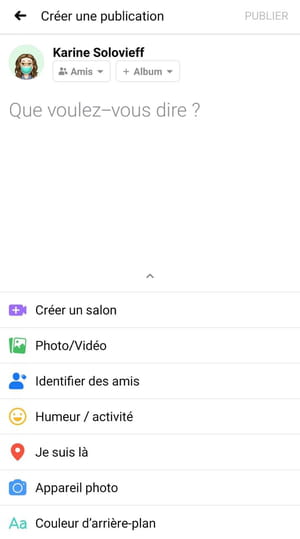
- On the next screen, tap the button with nine squaresbottom right, end.

- A small window titled Choose a background appears with a section Avatars which features miniatures of your avatar in various poses on colored backgrounds. Press on the thumbnail whoever you like to select it.
- The corresponding image is then displayed in large format: it will serve as the background for your publication. Write your message with the virtual keyboard, then press Publishtop right.

- To use a sticker with your avatar in a comment, tap Comment in a publication. Then press the icon with your avataron the right under the field Your comment.

- A mini window opens with a series of miniature stickers. Then press the sticker you like: it is automatically inserted into the comment box. You can delete it by pressing the small cross at the top right and replace it or add another one.
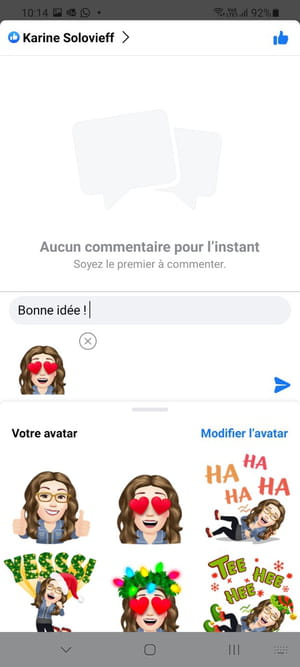
- When you are finished, press the key arrow shaped to post your comment.
You can perfectly use in Messenger the avatar and its derivatives that you have created on Facebook, the two services being intimately linked. You thus have a new panoply of personalized designs to enrich your conversations, both with the Messenger module integrated into the web version of Facebook and with the mobile messaging app.
With the Web version on computer
- In your browser, log in to your Facebook account and access the list of your Messenger discussions by clicking on chat iconat the top right of the window.
- Open the conversation that interests you and click on the name of your contact.
- In the window that opens, click sticker iconthe third from the left, at the bottom of the window.
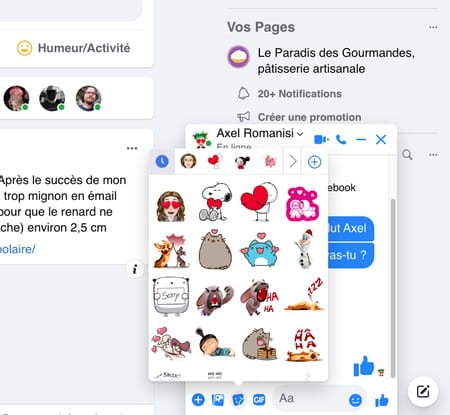
- The Stickers window opens. In the list of sticker collections in the top bar, click picture your avatar.
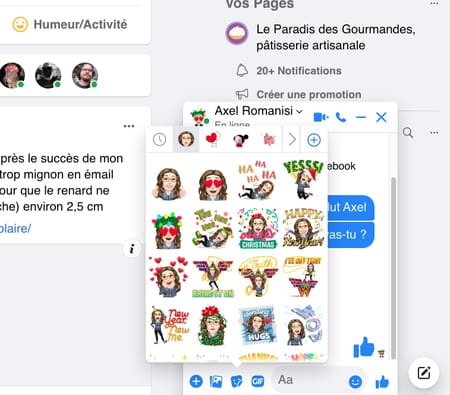
- The stickers generated from your avatar are displayed. Click on the sticker that suits you to insert it into your discussion. Attention, choose it well because it is sent directly, without validation on your part!
With the Messenger mobile app
- Launch the Messenger app on your mobile.
- The list of your chats is displayed. In the conversation that interests you, press the name of your contact.
- In the window that opens, press the smiley buttonat the bottom of the screen, next to the field Aa.

- Push the button decals.

- In the list of sticker collections that appears at the very bottom of the screen, tap the sticker with your avatar.
- Tap the sticker you like to select it and insert it into your chat. Attention, the image is sent directly, without validation on your part: choose it well!

