Want to share a video online while maintaining the anonymity of certain people or hiding sensitive elements? YouTube offers a tool specially designed for this use and very easy to use.
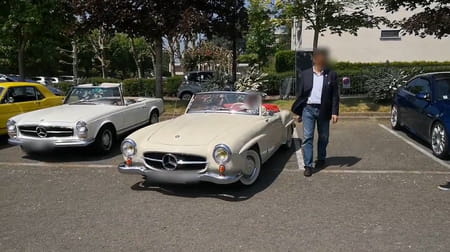
When sharing videos online, it is best to be careful not to let certain elements appear. It could be faces (especially those of children), signs characteristic of a person (a tattoo, for example), license plate or any other element of decoration which could make it possible to identify a place that the ‘we want to keep it a secret. Not to mention that the image rights in force in France specify that anyone can refuse publication and demand the withdrawal of a photo or video on which it appears.
One way to ensure good confidentiality and a minimum of anonymity is to blur specific areas of a video that have details that you want to keep hidden. A practice that one often meets on television during reports where the faces of protagonists, brands or logos are masked. Previously, this process required expensive video effects software and a powerful computer. Indeed, blurring an element of a video turns out to be much more difficult than processing a simple photo (read our practical sheet to know how to blur details of a shot), since the blurring must be applied to a moving element. .
But you no longer need to have a heavy and complex paraphernalia to achieve this today. The YouTube platform provides an online video editor: YouTube Studio. It relies on Google’s algorithms to follow throughout the sequence the movement in the image of the elements that you have designated in order to hide them. Easy to handle, it is quite effective. However, if you want even more precise results, you can turn to free (but more complex) editing software like HitFilm Express Where DaVinci Resolve (see our selection).
The YouTube platform has many tools for anyone who publishes videos online. Its editor allows you to create a montage and apply effects and fakes without requiring special knowledge. But before that, it is obviously necessary to import the file to modify on the platform and to do so identify yourself with a Google account.
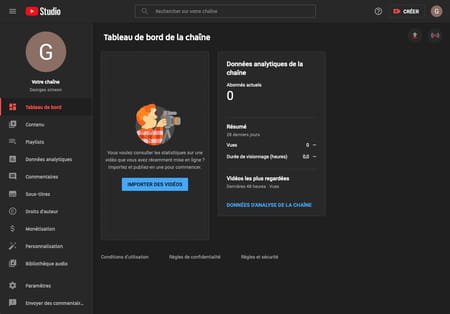
► Go to the YouTube space designed to make the edits: YouTube Studio. Identify yourself using your Google account and the associated password. If you’ve never used YouTube Studio, click the button Create channel to access the tools then click on To continue in the welcome panel.
► The YouTube Studio dashboard is displayed. This is where the sequences that you publish – or not – on YouTube will be grouped together. Click on the button Import videos.
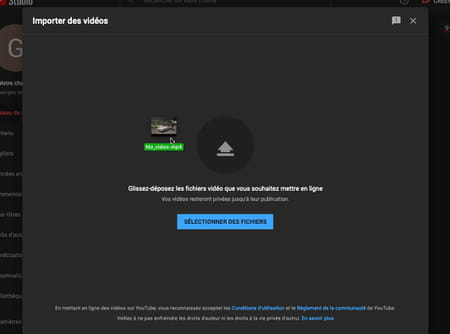
► Drag the video file you want to edit into the main window or click the button Select files to search for it in your storage on your computer.
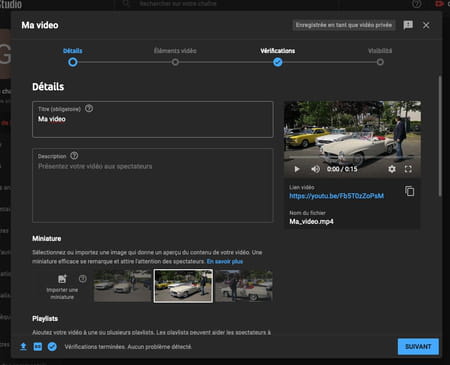
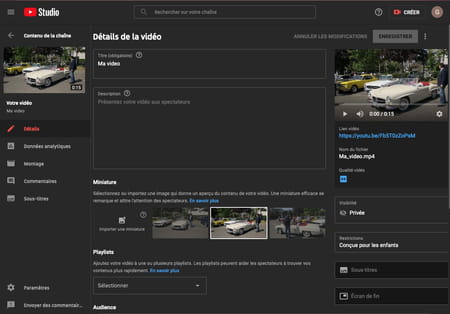
► You must then indicate some information about your video. You must give it a title, then indicate a comment (optional) and specify if it is suitable for children in case you want to publish it on YouTube. Check at the top of the window that the status of the sequence is correct Save as private video (which will limit its visibility on the platform to you and only the people you invite) and click on Following.
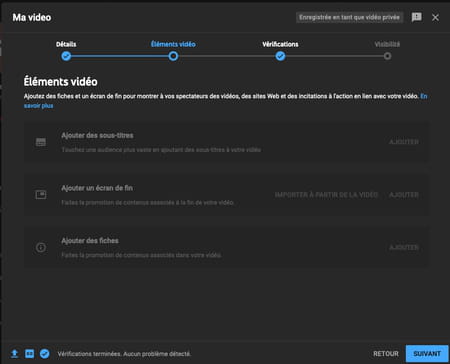
► YouTube then offers options to add subtitles, credits or files. Click on Following.
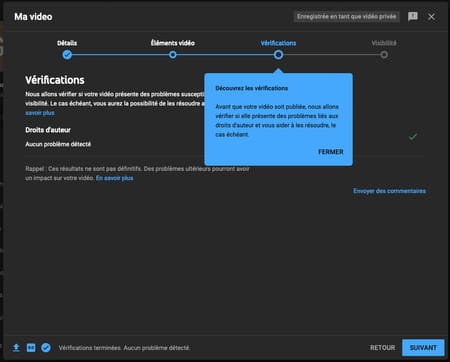
► YouTube will now do a quick scan to verify that your video is not copyright infringing. Click on Following.
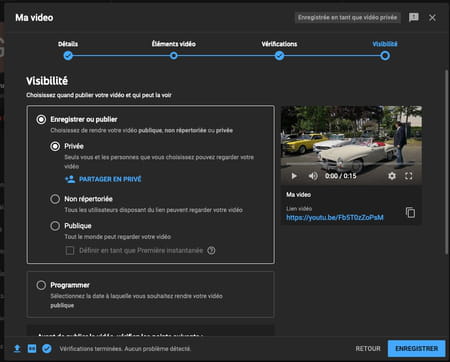
► Finally, the last panel summarizes the options chosen for the visibility of the video on the platform. Keep value Private chosen by default for the moment (you can come back to this choice later) and click on Save. Your video file is then sent to YouTube’s servers.
The YouTube video editor is quite easy to use. Above all, the algorithms implemented by Google save precious time in managing the tracking (tracking the movement) of the elements in the image.
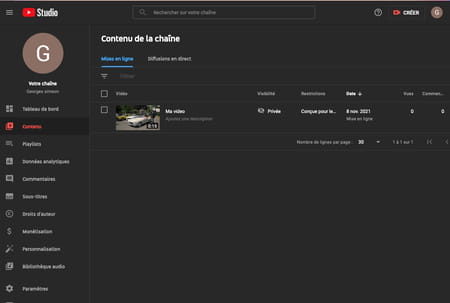
► The YouTube Studio dashboard is displayed again. Click on the tab Contents in the left column. The video you just imported appears as a thumbnail. Click on it.
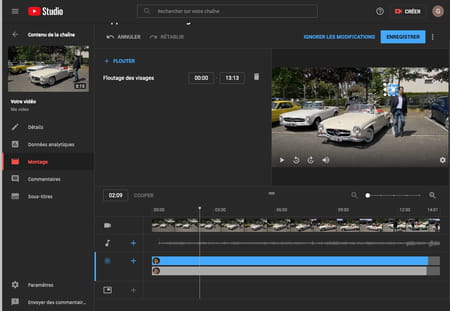
► The information that you specified when importing the file is now displayed. Click on the tab Assembly in the left column.
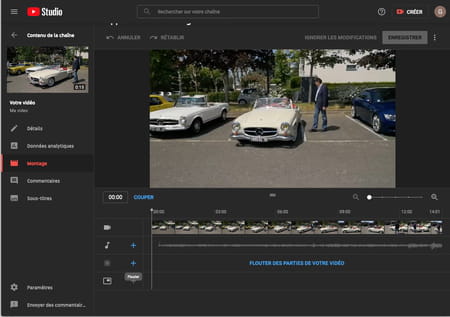
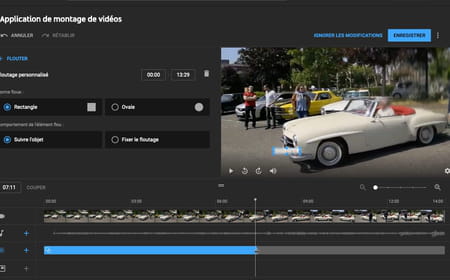
► A video editing tool interface is displayed. Your clip is displayed in the center of the window with, below, a timeline of the images that compose it. In it, in the penultimate row, is the button Blur. Click on the button + to explore the blurring options.
► YouTube Studio offers you two options: Blur faces Where Custom blurring.
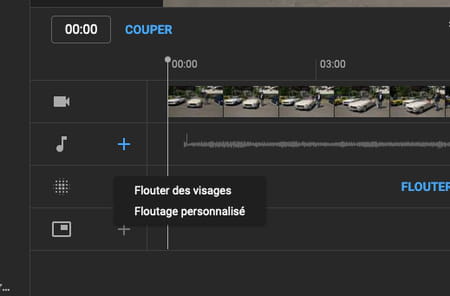
Blur faces
► With the first option, Google’s algorithms will work for you. They will analyze the image and automatically detect the faces present to apply a masking filter to them. Choose this option. The analysis starts automatically.
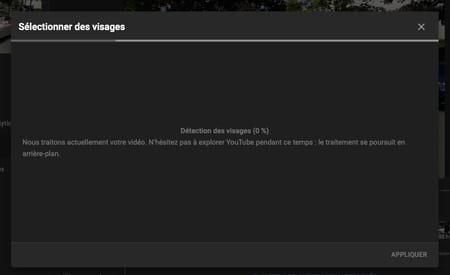
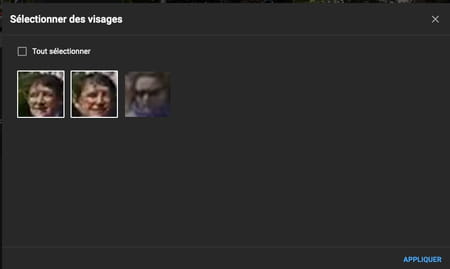
► At the end of the scan, the tool presents the faces it has detected in the sequence. Click on the ones you want to blur and validate with To apply.
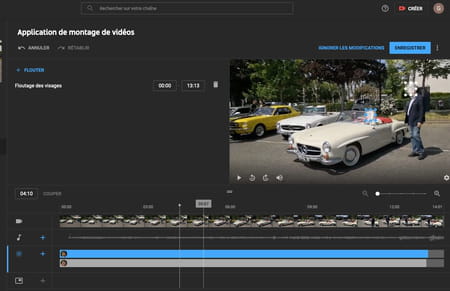
► YouTube Studio shows you the result. Start playing the sequence by clicking on the play button to verify that everything went well. If the follow-up has a few hiccups, click on the button Pause and readjust the masking block to where it needs to be by moving it with the mouse.
► Several adjustments are sometimes necessary for the tracking to perfectly match the movements in the image. Don’t hesitate to move the frame around the image and adjust its size using the handles. When you are satisfied, click Save Changes.
Blur other elements
► YouTube Studio lets you choose the elements you want to blur yourself, such as a vehicle’s license plate or a piece of scenery. Choose the option Custom blurring.

► Then choose the shape of the blur mask: a rectangle or an oval. Also decide if the mask should stay still in the image (handy if it’s a still shot) or have Google follow the movement if the element moves in the field.
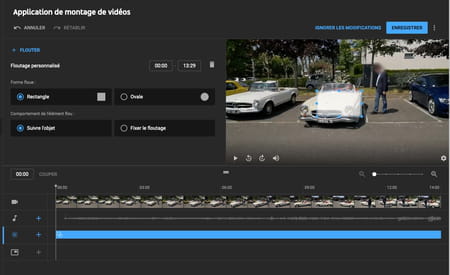
► Finally move the mask over the object you want to blur and adjust its size.
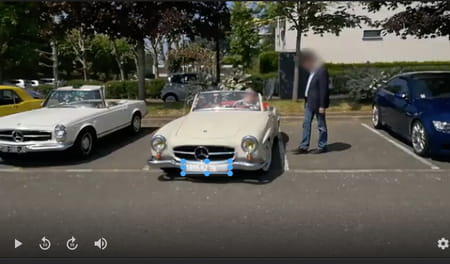
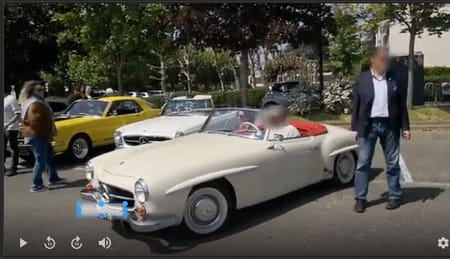
► Play the video to see how effective the tracking is. You can see that the size of the mask automatically adapts according to the size of the element in the image.
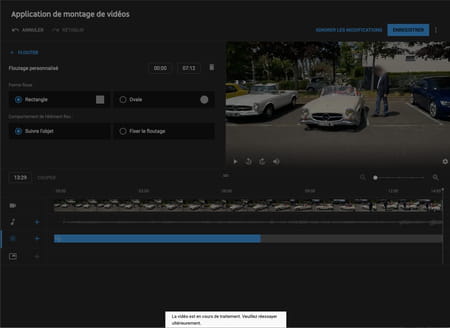
► If the object to be blurred disappears from the field, remove the blur mask. To do this, in the timeline, adjust the length of the blue line corresponding to the effect by moving its left end to the point where the effect should disappear.
► When you are satisfied, click on Save. It may take several minutes to process the video.
► When your edit is complete, the video is ready to be published. You can also choose to retrieve the file. Click on the menu Channel content, at the top left to return to the dashboard then on the tab Contents in the left column. Check the box corresponding to your video then pull down the menu Other actions and choose To download.

► You recover a file in .mp4 format that you can share on any platform or play with multimedia software like VLC.