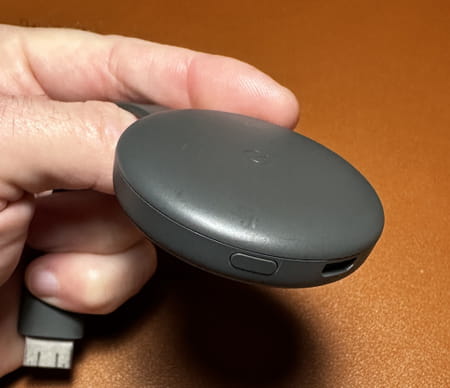
To work, Google’s little Chromecast box must be connected to a Wi-Fi network. And if it can only memorize one at a time, you can easily change it to move it or connect it to another network. .
The Google Chromecast is a handy device for streaming content directly from your Android, iOS, Windows or macOS device to the living room TV. Inexpensive – it costs less than forty euros – it only needs three things to work: an HDMI socket to send the sound and the image to the TV, a power supply and a connection to a Wi-Fi network The latter is essential to access various online content. It is indeed from the Web that the Chromecast will draw the online content that you want to display on the television. The smartphone, tablet or computer only acting as a simple remote control. Convenient. However, a problem arises. The Chromecast can only remember one Wi-Fi network. If you change it, it is lost. A situation that can occur, for example, when you move the device around the house and want to connect it to a second, better Wi-Fi network, or when you take your Chromecast on vacation and want to connect it to your vacation spot. . Also, depending on whether the device is or is not yet connected to the Wi-Fi network it knows, the manipulations to modify the Wi-Fi network differ. Here are the steps to follow.
To change the Chromecast’s still-connected Wi-Fi network to the network it knows, make sure you have an Android smartphone or iPhone with the Google Home app connected to the same Wi-Fi network as the Chromecast. ‘device.
► Launch the Google Home app on Android or iOS. Press on the thumbnail corresponding to your Chromecast.
► On the next page, tap the toothed wheelat the top right of the screen.
► The Chromecast settings are displayed. Press on Device Information at the top of the list.
► Now press Wi-Fi network.
► A dialog box pops up. It allows you to delete the current Wi-Fi network. Press on Delete network.
► On the TV screen, the Chromecast now asks to be configured. Now connect your Android mobile or your iPhone to the Wi-Fi network to which you want to connect the Chromecast.
► Return to the Google Home app and press the button + at the top left of the screen.
► Choose Configure a deviceat the top of the list.
► Then press New device.
► Select your home and press the button Following.
► The Chromecast device search starts. When detected by the app, press Yes.
► The configuration starts. A code is displayed on the TV screen. Confirm it is the same on the Google Home app.
► Finally validate the Wi-Fi network to which the Chromecast must connect.
► Enter the password for this network and press Login. After a few seconds, the Chromecast is connected. All that remains is to indicate the room of the house in which it is located and to associate it with your Google account and that’s it. The Chromecast is ready to work as before and it retains its name.
Did you take your Chromecast in the suitcase to enjoy it on the TV at your vacation spot? And the active Wi-Fi network is obviously no longer the same as at home. Alas, impossible in this case to modify the Wi-Fi network that it has saved in its memory. Google’s Home app does detect it but cannot access it. It is also impossible to connect to it from the smartphone, tablet or computer via direct Wi-Fi. The Chromecast, once connected to the TV and turned on, is content to desperately seek the Wi-Fi network it knows. In this case, there is unfortunately no other solution than to reset the box. The saved Wi-Fi network will then be deleted from memory and you will need to proceed with setting up the Chromecast as if you had just taken it out of the box. The same operation will be necessary once back home. To proceed with the reset without having access to the Chromecast settings, follow the advice in our practical sheet.


