To transfer an image by email, post it on a web page or publish it on a social network, it is better to adapt its size and weight. A simple operation, but one that requires attention to obtain an optimal result.
The performance of smartphones keeps improving. Especially in the field of photography. This area has even become the main selling point for manufacturers. Ever larger, ever more beautiful and ever precise images, further magnified by the quality of the LCD or OLED panels of the mobiles. Thus, the photo sensors of mobile phones today display mind-boggling definitions of 48, 64 or even 128 million pixels on some models.
Although it is not proportional to the real quality, this constantly growing number is not without impact on the size of the file generated. The more pixels the image contains, and therefore more information, the more its “weight” (in megabytes) increases. Difficult, therefore, to share it easily by email if you want to keep all its quality, that is to say without abusing the compression. Likewise, it is not useful to publish photos in very high definition on the Web or on social networks, especially when we know that they are generally displayed in reduced size, with a lower definition, so as not to weigh down the images. pages. In practice, very high definition images are only useful in two cases: for printing – hard copies – and for retouching, especially for professionals.
If you have transferred your snaps to computer, PC or Mac, you can easily control the size of the images you want to transfer, share or publish with the help of specialized tools. Depending on your needs, they will allow you to lighten the images by modifying their definition (the number of pixels in width and height that compose them) and / or their resolution (the number of pixels per inch expressed in ppi) without distorting them or crop them. No need to go through a professional and complex image editing application like Photoshop for such a simple task! On Mac, the Preview tool that comes standard with macOS can take care of the operation with just a few clicks. On a PC, it is better to entrust this task to the free software XnView MP: simple, complete and efficient, it offers many more options than the Photos app integrated into Windows 10 …
XnView is not a newcomer to the world of images. The first version of the software dates from 1998! But it continues to be updated and remains free for non-commercial use. Packed with tools for image editing, it is quite suitable for changing the size of your shots.
- First, download XnView on your PC and install it. The operation presents no difficulty.
Download XnView MP for Windows
- Once launched, the Startup Wizard is displayed. Click on OK to validate the proposed settings.
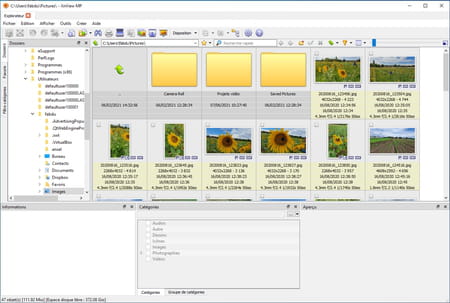
- The XnView interface is displayed. After a few seconds, it should have analyzed the contents of your storage space to find the snapshots it contains. Navigate through your folder tree to select the image to edit.
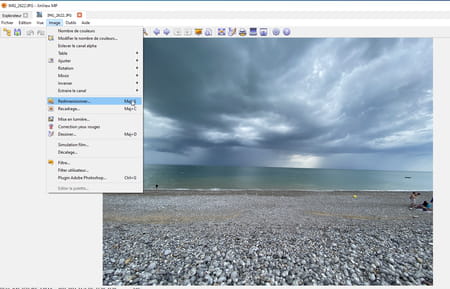
- Double-click on the desired snapshot. It is displayed in the XnView window. Expand the menu Picture and choose Resize.
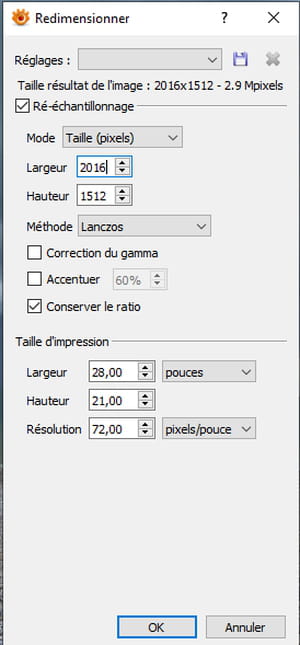
- A palette presents itself. It displays the dimensions of the image (here 4032 x 3024 pixels) as well as its resolution (72 pixels per inch or ppi in our case). Leave the option Keep the ratio checked not to distort the image.
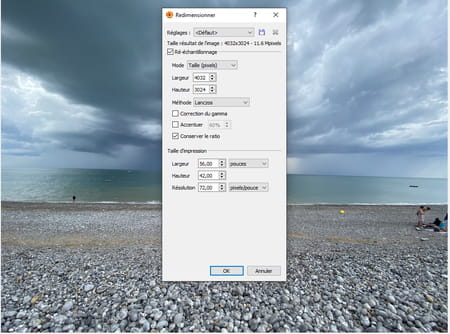
- Modify the number indicated in the field Width Where Height – one is enough, the other adapts automatically – either by entering a new value, or by using the small arrows on the right. For example, you can halve the width shown. The height is automatically modified according to the chosen size. You can see in passing that the resolution (72 dpi) does not vary. The image will therefore be smaller but will not lose quality.
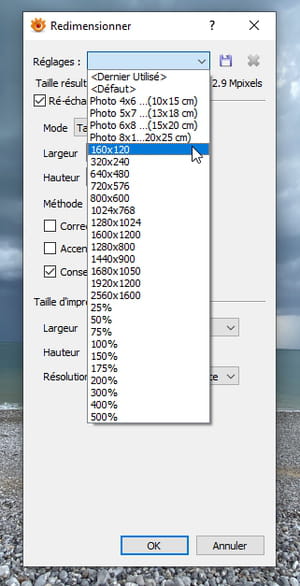
- If you don’t know which size to choose, pull down the menu Settings at the top of the pallet. Several predefined sizes are available.
- When your choices are made, click OK. Our snapshot, which originally weighed 3.70MB, now weighs 900KB. Its resolution (the number of pixels per inch) has not changed. Click the icon in the shape of a floppy disk in the XnView toolbar (Save as) and save a copy of your image to your PC.
No need to download a special tool to edit your images on a Mac. The Preview software, supplied with macOS, takes care of the operation.
- Launch Preview from the Dock or folder Applications.
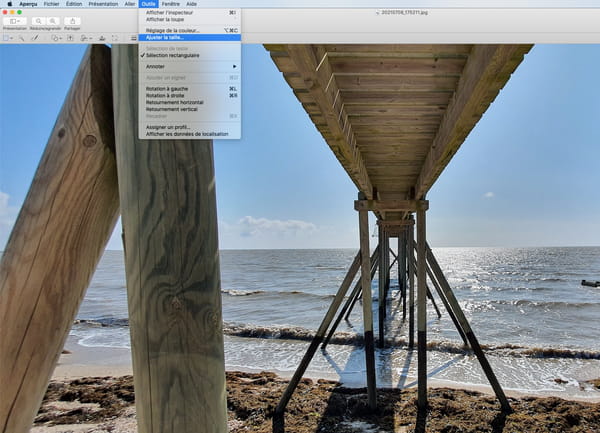
- Open your image with the software then pull down the menu Tools and choose Adjust size.
- A palette of settings is displayed. Leave the boxes checked Proportional scale and Sample image again.
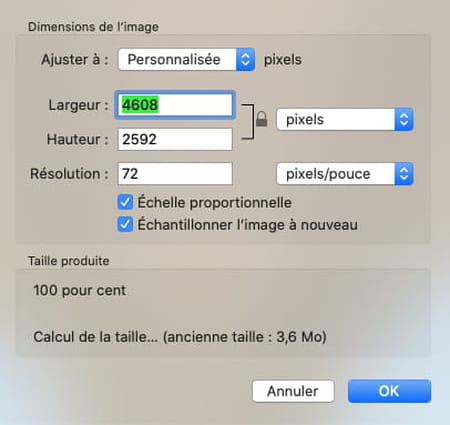
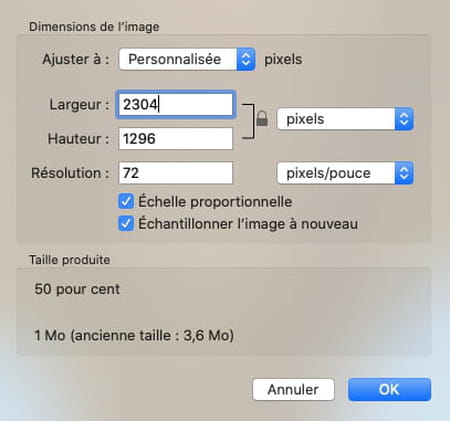
- Our original image has a size of 4608 x 2592 pixels for a resolution of 72 pixels per inch and a weight of 3.6 MB. For example, you can halve the indicated width. The height is automatically modified according to the chosen size. You can see in passing that the resolution (72 dpi) does not vary. The image will therefore be smaller but will not lose quality. The size of the file that will result from this transformation is updated in the section Produced size (1 MB in our case).
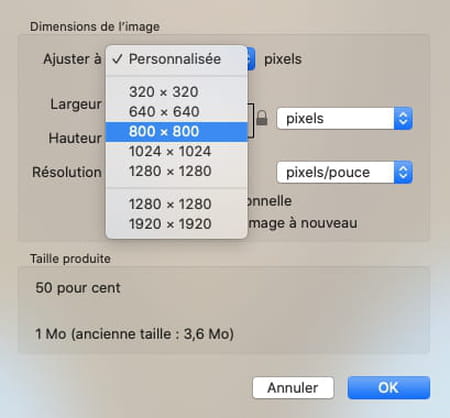
- If you don’t know which size to choose, pull down the menu Adjust to at the top of the pallet. Several predefined sizes are available.
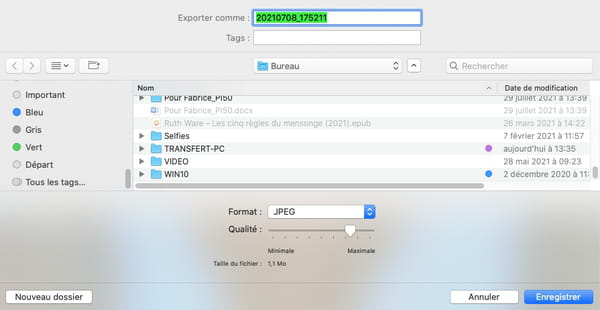
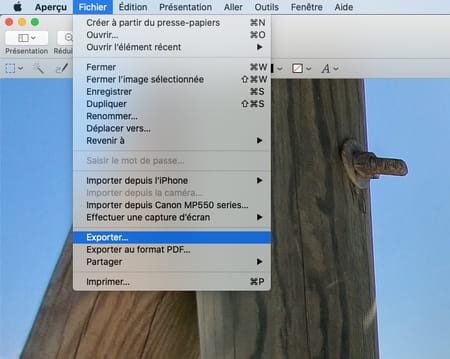
- When your choices are made, click OK. Now pull down the menu File and choose not Save (at the risk of overwriting the original image) but rather the option Export.
- If you choose the format Jpeg Where JPEG 2000, you can further reduce the size of the final file by adjusting the compression (however, at the risk of degrading the quality of the image). To do this, move the cursor Quality, placed under the drop-down menu Format, towards the left. When you are satisfied, change the name of the file and click the button Save.