To avoid queues in front of the only computer in the house to be connected to a USB printer, share it over the local network! Everyone will be able to print from their own computer, PC or Mac.
If you have a USB-connected printer on a Mac or PC, there is no need to invest in a Wi-Fi printer to meet the printing needs of every family member, especially if they are episodic. You can share it with the other computers in the house as long as all these little people are connected to the same local network. Because, in the same way that we can share files on the network (see our practical sheet Sharing files on a local network), peripherals such as the printer can also be made available to all users. This way, everyone can print from their PC or Mac without having to monopolize the computer to which the printer is connected.
The only constraint: the Mac or the PC to which the printer is connected must remain on. Without it, the printer is disconnected from the network and therefore inaccessible. However, there is a small difference between the Windows and macOS universes. If the printer is connected to the Mac, the Mac can remain asleep without interfering with print jobs. This is not the case with Windows PCs. Finally, it goes without saying, the printer must also be switched on …
Two details to finish before moving on to the practical part. First, printer sharing works regardless of how your computers are connected to the local network, with a cable (in Ethernet) or wireless (in Wi-Fi). Then don’t worry about the drivers on the remote computers: whether it’s Windows or macOS, the system will ask you for them if necessary, but, in general, it will do its own thing to find and install them.
Is your USB printer connected to a PC or Mac? In a few clicks you can make it available to other users.
Share a printer connected to a PC
- Access to Settings Windows 10 with the keyboard shortcut Windows + I, then click Peripheral devices. In the window that appears, choose Printers and scanners in the left pane.
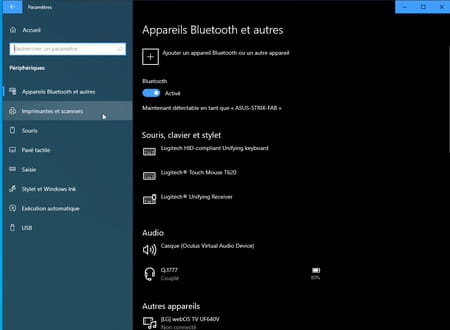
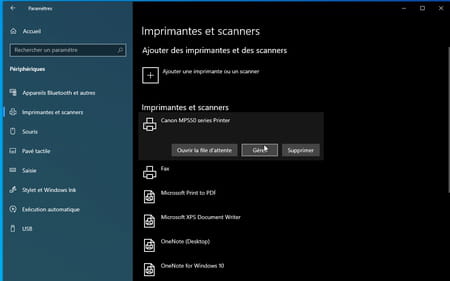
- Click on the name of your printer which appears in the list, then on the button To manage.
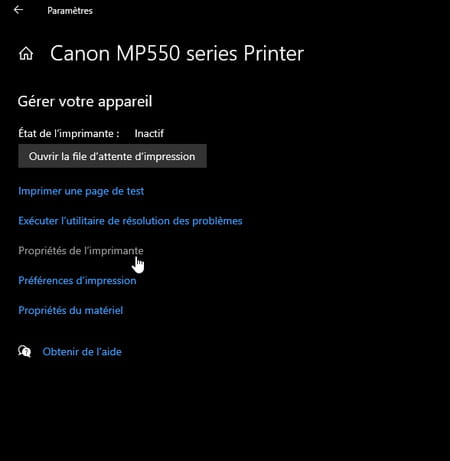
- In the window that appears, click Printer properties.
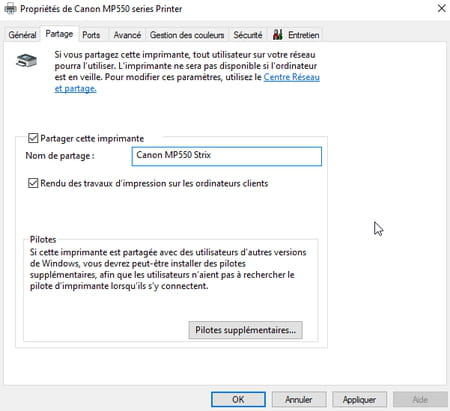
- A new window will appear. Activate the tab Share. Check the box Share this printer. Optionally, give it a recognizable name on the network. Finally click on To apply then on OK.
Share a Linked Printer to a Mac
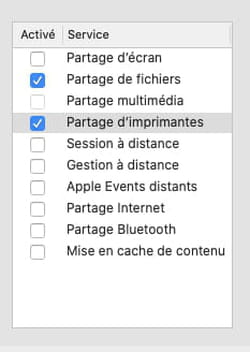
- Access to System Preferences from macOS via the apple menu, then click Share. In the window that appears, check the box Printer sharing.
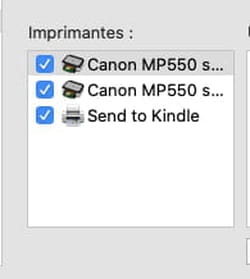
- In the section Printers, choose the printer model to share. It must obviously be installed on the Mac with its drivers.
- Finally, in the section Users, leave the mention Printing allowed for All.
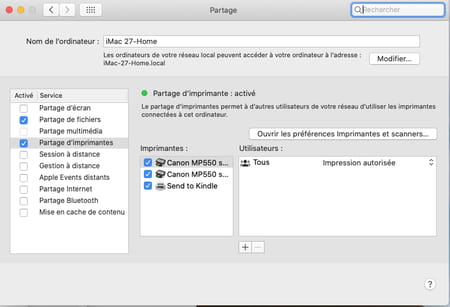
Your printer is now ready to accept jobs from computers connected to the network. Some settings are still necessary to start printing.
Print from a PC to a printer connected to a PC
- Access to Settings Windows 10 with the keyboard shortcut Windows + I, then click Peripheral devices. In the window that appears, choose Printers and scanners in the left pane.
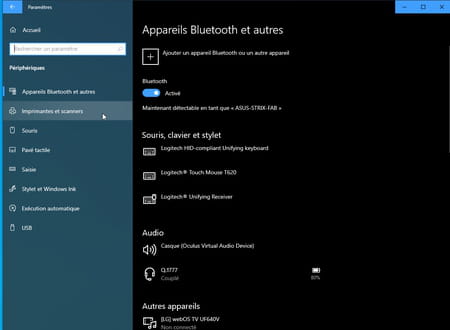
- Click on the button + Add printer or scanner at the top of the window. Windows searches for devices available both in USB and on the network. To speed up the search, click on the link I can’t find the printer I’m looking for in the list.
- In the window that appears, check the box Select a shared printer by name then click on Browse.
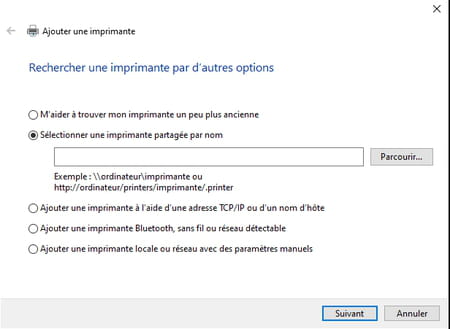
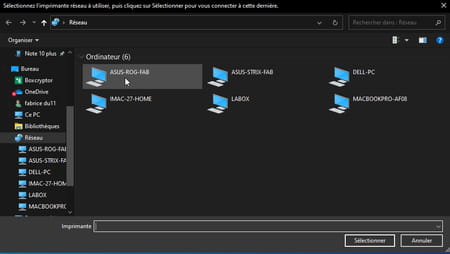
- Windows then checks the computers on the network. Click on the name the one to which the printer is connected.
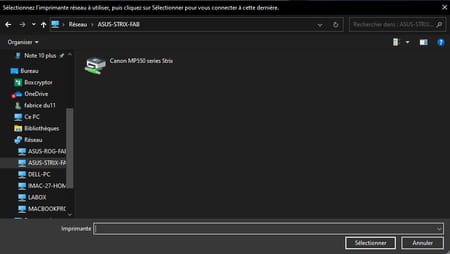
- The printer appears immediately. Click on her name then on To select.
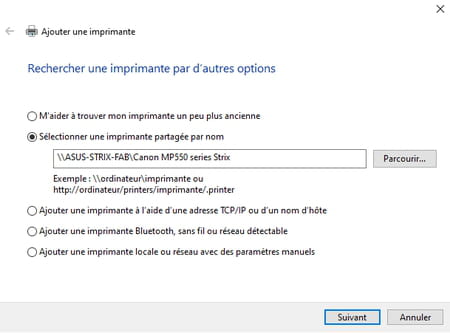
- The window Add printer now contains the correct information. Click on Following.
- Windows confirms the addition of the printer. Click on Following. You can print a test page to verify that everything is fine.
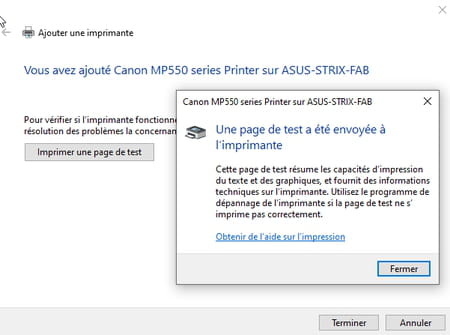
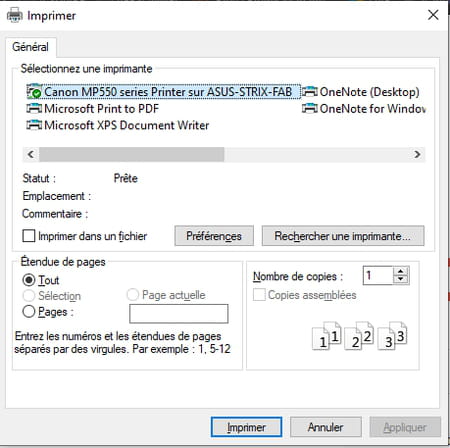
- Open any document and print as you normally would. Select the printer from the list of available machines and validate.
Print from a PC to a printer connected to a Mac
- Access to Settings Windows 10 with the keyboard shortcut Windows + I, then click on Peripheral devices. In the window that appears, choose Printers and scanners in the left pane.
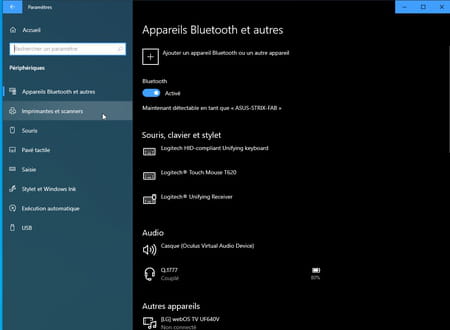
- Click on the button + Add printer or scanner at the top of the window. Windows searches for machines available both in USB and on the network. After a few seconds, it should eventually find the printer plugged into the Mac. Its name is also followed by the name of the Mac on the network.
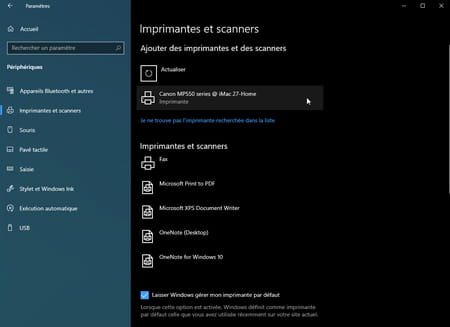
- Click on her name then on the button Add device.
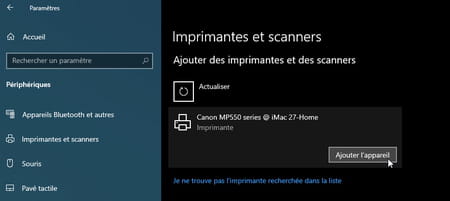
- Windows is responsible for downloading and installing the corresponding drivers. If it doesn’t, download and install the drivers for your machine yourself by going to its manufacturer’s website. After a few seconds the printer is ready.
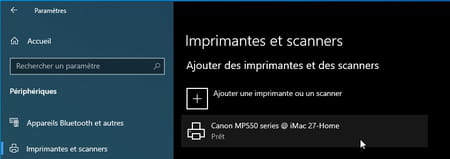
- Open any document and print as you normally would. Select the printer from the list of available machines and validate.
Print from a Mac to a printer connected to a PC
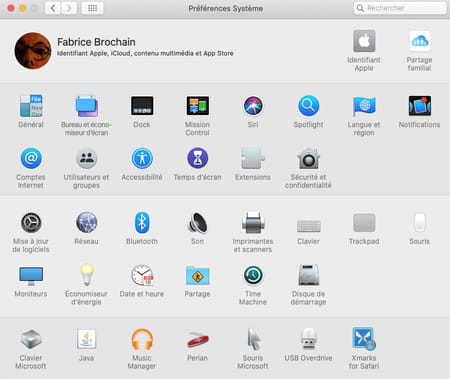
- Access to System Preferences of macOS via the apple menu, then click Printers and scanners.
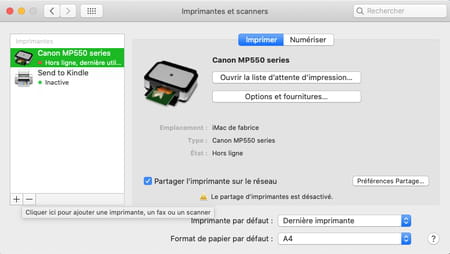
- In the window that appears, click the button + bottom left to add a new printer.
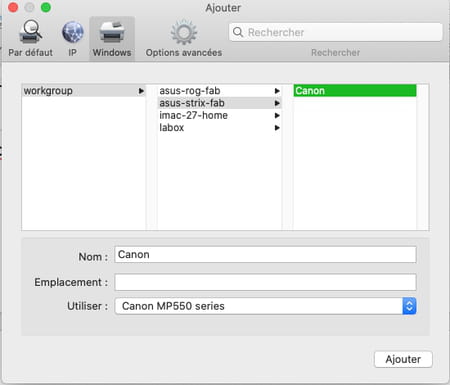
- In the window that appears, activate the tab Windows. Click on Workgroup, then select the computer on the network to which the printer is connected.
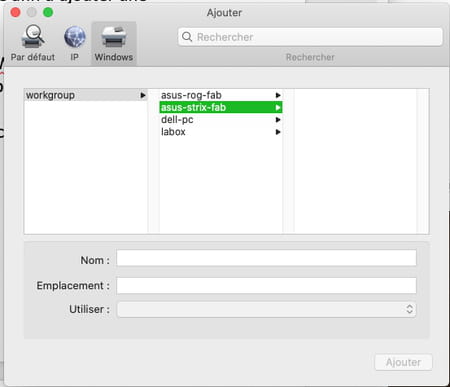
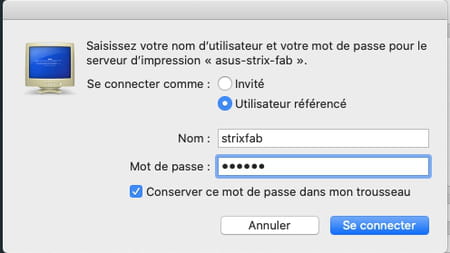
- A dialog box asking you to identify yourself appears. macOS remains very picky about the permissions granted on the network. Even to use a shared printer on a PC, you need to know the PC user account name as well as its password (the mode Guest does not seem to work). Enter this information, then check the box Keep this password in my keychain. Otherwise, you will be required to identify yourself each time you wish to print a document … Validate with To log in.
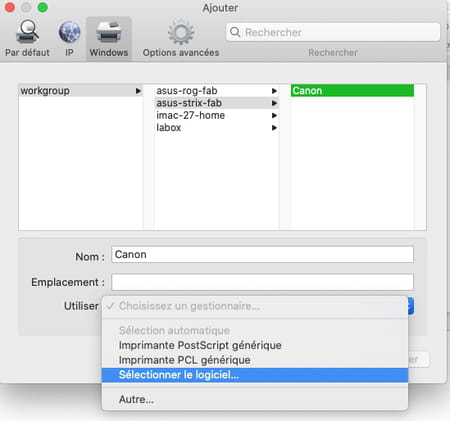
- The printer connected to the PC is displayed. Click on her name, then on the drop-down menu Use and choose Select software.
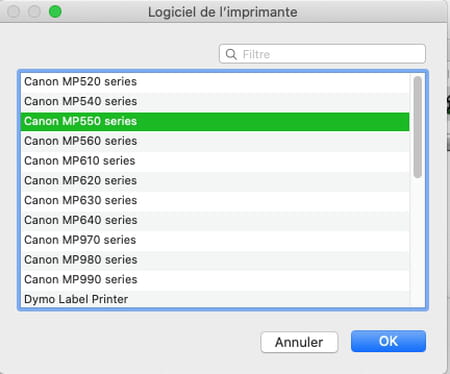
- Select the printer model from the list and validate.
- Finally click on the button Add. The printer is ready for use.
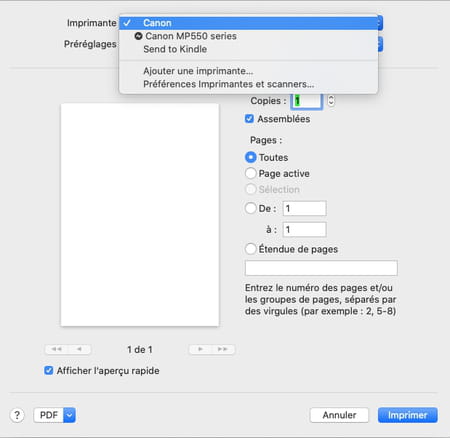
- Open any document and print as you normally would. Select the printer from the list of available machines and validate.
Print from a Mac to a printer connected to a Mac
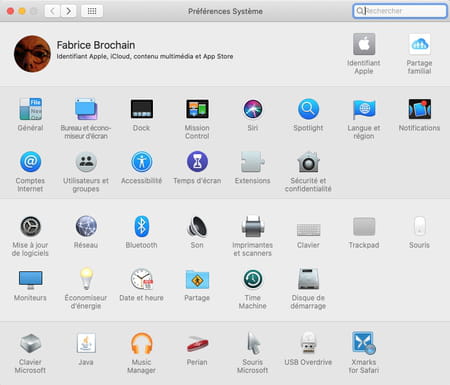
- Access to System Preferences of macOS via the apple menu, then click Printers and scanners.
- In the window that appears, click the button + bottom left to add a new printer.
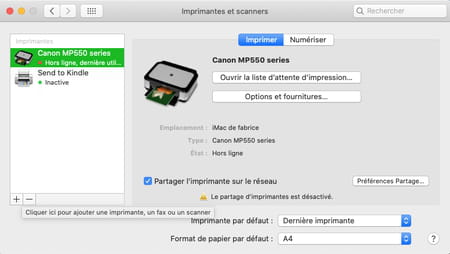
- The printer connected to the other Mac is immediately detected (thanks to the Bonjour protocol of macOS).
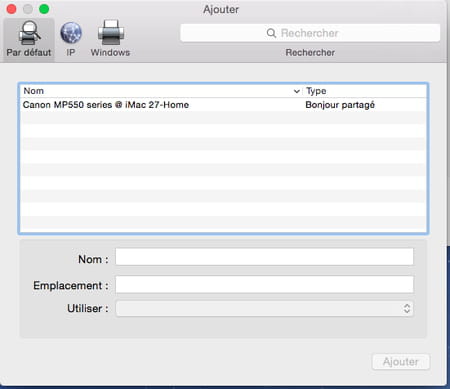
- Click on her name, then on the drop-down menu Use and choose Use software.
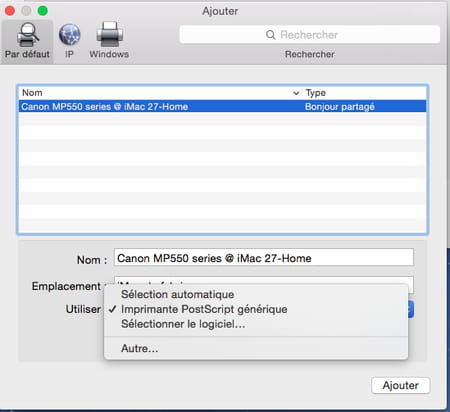
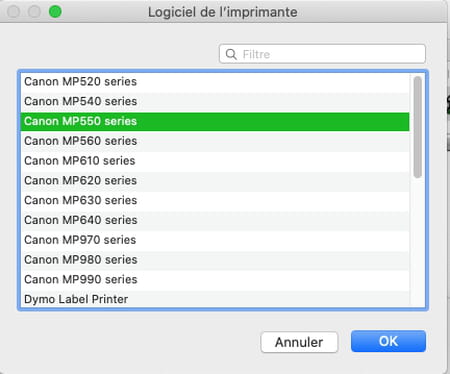
- Select the printer model from the list and validate.
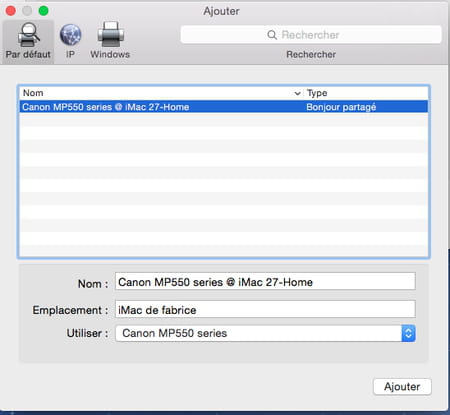
- Finally click on the button Add. The printer is ready for use.
- Open any document and print as you normally would. Select the printer from the list of available machines and validate.

