There is no doubt that many photos appear in duplicate or even triplicate in the storage space of your computer. Fortunately, there are effective and free tools available to find and eliminate unnecessary images.
Your computer’s storage space isn’t unlimited, with entry-level PCs and Macs often having a low-capacity hard drive or SSD to keep costs down. It is therefore necessary to take care not to saturate it so that the system as the applications, continue to function without causing slowing down. In general, a little regular cleaning is necessary to free up a little space by eliminating all unnecessary elements. But where to start ?
Along with videos, photos are among the largest items. The pictures that we retrieve from the phone, from the family camera, those retrieved from the Web or downloaded from an e-mail… difficult to assess their quantity. Especially since it happens very often that several identical photos are found scattered in several different folders. Those who synchronize their connected devices from their computer or who duplicate their photos for safe editing are familiar with this phenomenon. But there is no question of embarking on a blind duplicate hunt.
Fortunately, there is a plethora of free tools that can do almost all the work for you. For Windows, you can thus rely on Panaustik, Duplicate Cleaner, CCleaner, VisiPics, or Awsome Duplicate Photo Finder to only cite a few. On Mac, Photos Duplicate Cleaner, Cleaner One Pro Disk Clean, Duplicate File Finder Remover, or Duplicate Photo Finder can also take care of this tedious operation.
Whether you are using a PC or a Mac, we suggest you use dupeGuru. This tool, also free, has a simple interface in French. It allows you to hunt for duplicate images in your storage space, but also, if you feel like it, to do the same for audio files or any other type of item that should not appear in multiple copies on your hard drive or SSD. Above all, dupeGuru does not only analyze the names of the files: it also compares their content and finds images that are not strictly identical but similar. Convenient for spotting photos taken in a burst, for example, or with a slight change in settings.
The operations described below are performed with the Windows version of dupeGuru. They remain the same with the macOS or even Linux version.
How to remove duplicate images?
The advantage of dupeGuru is that it offers a very clean interface that goes straight to the point. Don’t look for pretty buttons or detailed menus: here, efficiency comes first.
► Start by repatriating dupeGuru on your computer and install it.
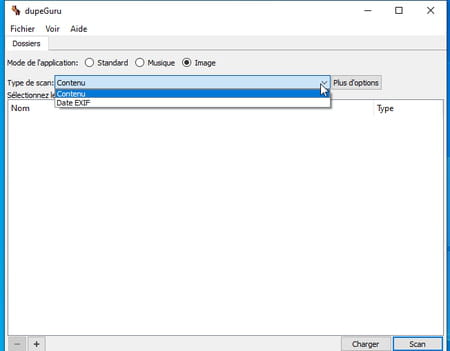
► Start dupeGuru. The software offers three analysis modes: Standard to examine files of all formats, Music to scan music files and finally Picture for all image files. Check the box Picture.
► Leave the menu Scan type on Contents. The other option only compares the Exif data (the information in the image file). On the other hand, click on the button More options at the end of the line.
► Here you can refine the analysis that will be carried out. For example, you can ask dupeGuru to compare images of different sizes (which can be useful for duplicate but edited images) or find the same images but have a different file format.
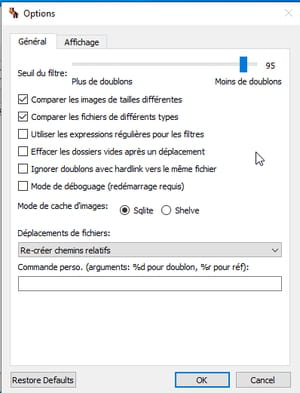
► Adjust the slider Filter threshold placed at the top of the window. By moving it to the left, the analysis will be faster but you will be able to collect more false positives (images considered to be similar when they are not). Click on OK when your settings are ready.

► Click on the button + at the bottom left of the window. You should now tell dupeGuru the volume or folder containing the images it should scan.
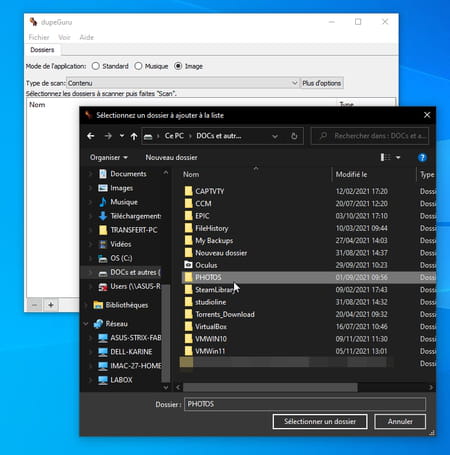
► Now click on the button Scan at the bottom right of the window. Scanning of the storage media starts or of the defined folder.
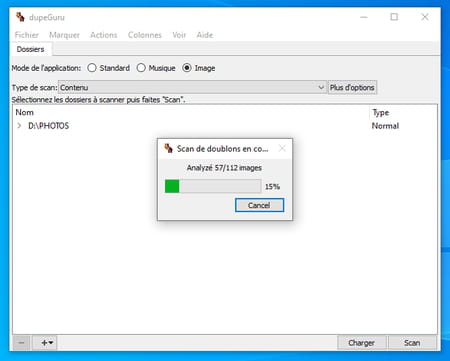
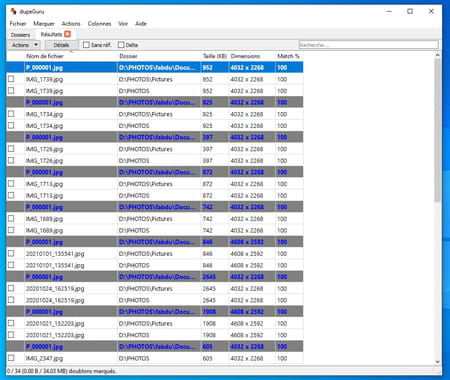
► After a few seconds, the analysis carried out presents its results. Images identified as duplicates (or more) are listed in a table. For each snapshot is indicated its location on the hard drive or SSD, its name, its size, the dimensions of the image and above all, the similarity rate in the column Match%.
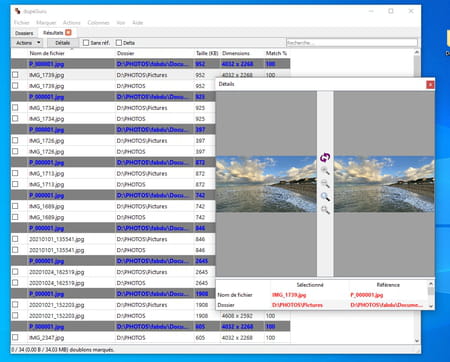
► To find out, click on the name of a file indicated in bold then on the button Details at the top of the interface. A new window showing on the left a thumbnail of the selected image is displayed. Now click on one of the similar files spotted by dupeGuru. The image is displayed on the right. You can thus compare the two pictures. Use the magnifying glass to appreciate the similarities in more detail.
► If the photos are similar, you can get rid of the unnecessary copy. Select it by checking the box to the left of its name. Repeat for any snapshots that you suspect are duplicates. You don’t have to compare all the images (unless you have plenty of time in front of you). You can trust dupeGuru when it shows 100% match rate in the Match column.
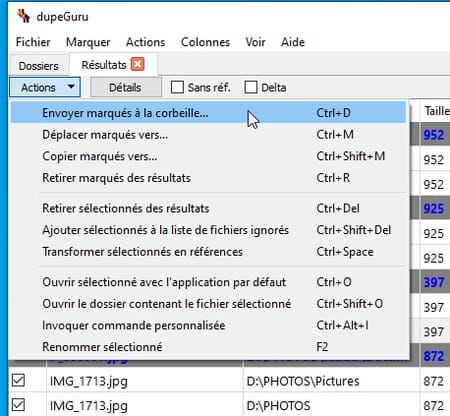
► When your selection is made, click on the button Actions. Several options are available to you. You can thus place all the selected items in the recycle bin or move them to another location, for example. It is even possible to rename them.
