An invoice to archive, a photo to share, an administrative document to send by email… There are many opportunities to use a scanner or a multifunction printer. Here are the good reflexes to adopt according to the elements to be digitized.
Contrary to what we imagined ten years ago, the paper has still not bowed out. Even if many procedures can now be carried out digitally via the Internet, administrative forms received or to be sent on paper remain quite frequent. For some, we can fill them in and then scan them to send them by email in order to save time. Your scanner or your multifunction printer can also allow you to keep a digital archive of important documents such as invoices for example, which will be easier to find on your computer than by going to rummage in that famous tote box hidden at the bottom. of a closet. As for the printed photos on which we find random storage, their digitization can allow them to be shared with loved ones in just a few clicks and without damaging them. In an emergency, you can also just use your Android or iOS mobile to immediately have the scanned item on your smartphone (read our practical sheet Scanning a document with a smartphone). However, the result can be very variable since it depends on the quality of the mobile camera and the light conditions during the shooting. For a perfect result, it is better to rely on a multifunction printer or a scanner connected to a PC or Mac. A simple operation but which requires a few adjustments for an optimal result. Indeed, a black and white administrative document does not deserve the same level of quality as a photo print. Here’s how to get all your scans done, regardless of the scanned document.
To proceed with the scanning of your document, it is better to refer to the utility supplied with your scanner. It should normally have installed on your computer, along with the driver, when you plugged in your scanner or multifunction printer. Whatever the brand of your machine (Canon, Epson, HP, Brother, etc.), there is necessarily a program dedicated to scanning. If you don’t have one, try downloading it from the device manufacturer’s website. This type of software – free – is generally available in the Support or Assistance section of the Drivers and software section. All you have to do is enter the model of your scanner or multifunction printer to repatriate it.
- Connect your scanner to your computer and turn it on. Then search among the programs installed on your PC or Mac for the presence of a utility dedicated to your machine (the brand of the device usually appears in the name of the software). For our example, we will use a Canon MP550 multifunction printer combined with the Canon MP Navigator EX utility on Windows and Canon MP550 Series on macOS.
On windows
- Launch the utility then look for a button or menu Digitize. In our example, it is called Num / Import.
- If the software offers it, activate the option Use the scanner driver.
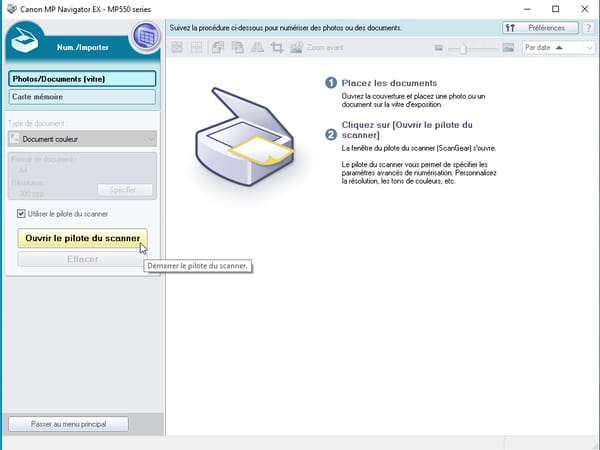
- Your machine is now detected and ready for use. Click on the button Overview Where Preview to check that everything is working fine.
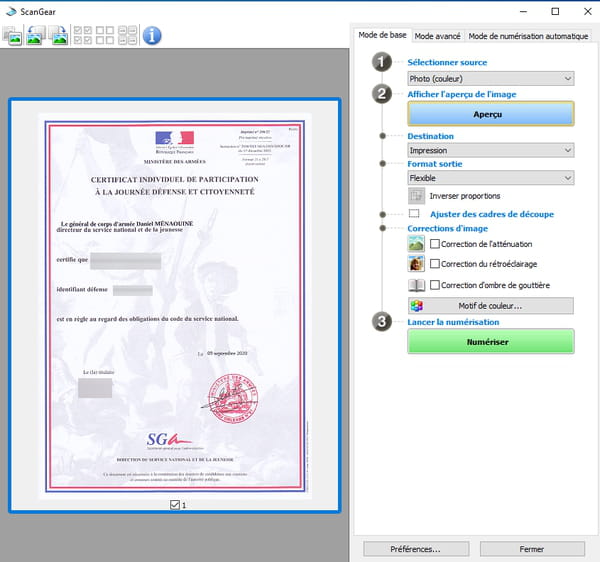
On macOS
- With our printer, the utility version on macOS is used to manage both the printer and the scanner. Just click on To scan.
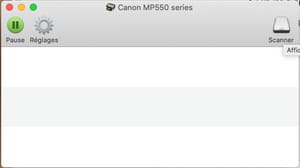
- Immediately, the scanner goes into motion to provide a preview of the document placed on the glass. You are ready for scanning.
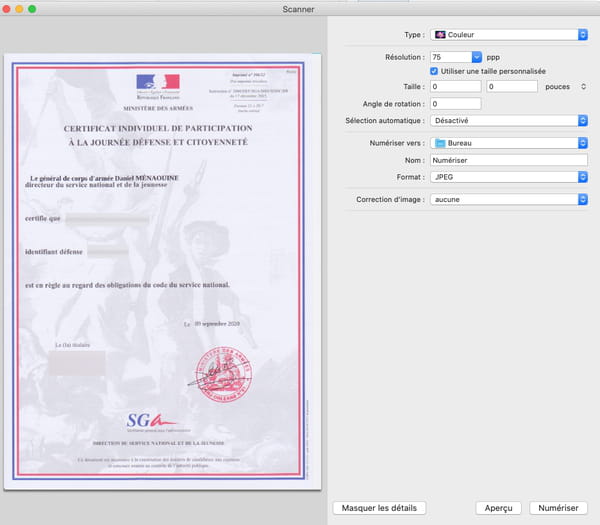
Windows and macOS both have software dedicated to scanning documents. They both rely on the device driver to provide the correct settings.
On windows
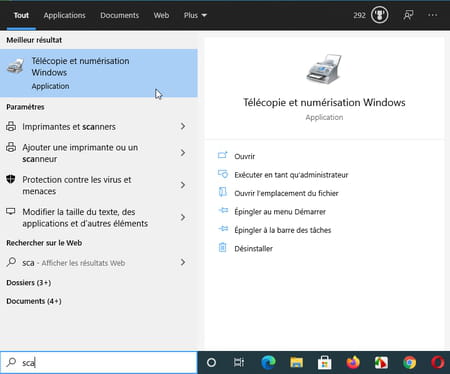
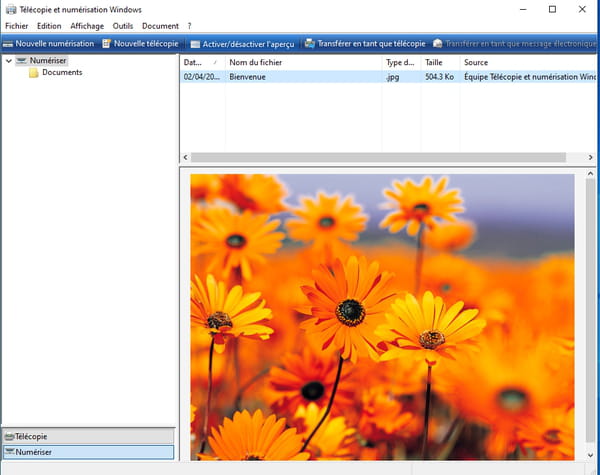
- Type “scanner” in the Windows search box and click Fax and digitization Windows among the results that appear.
- The scan utility launches. Its interface is a little dated (it proposes by default to send faxes – or faxes – but it remains functional. Click at the bottom of the window, in the left pane on Digitize.
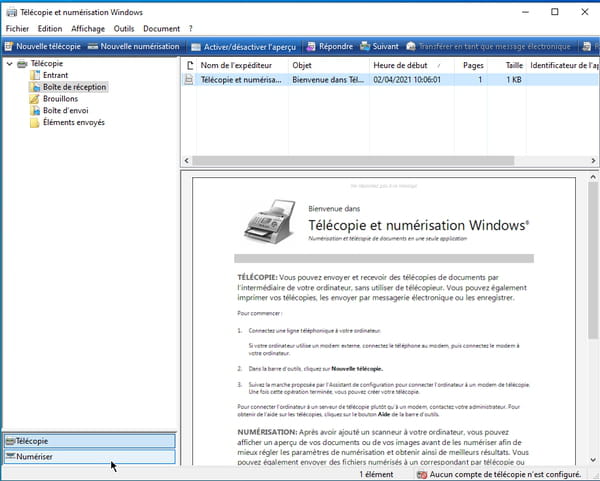
- The tool switches to the scanning functions.
On macOS
- In the absence of software dedicated to your scanner, it is through the Image transfer application, supplied with macOS, that the scanning operations can be carried out. Launch it from the folder Applications from macOS.
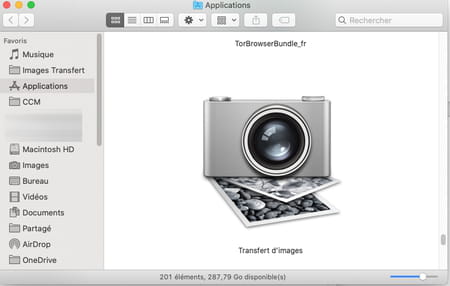
- As soon as it is launched, the utility starts the scanner to take advantage of a preview of the document placed on the glass.
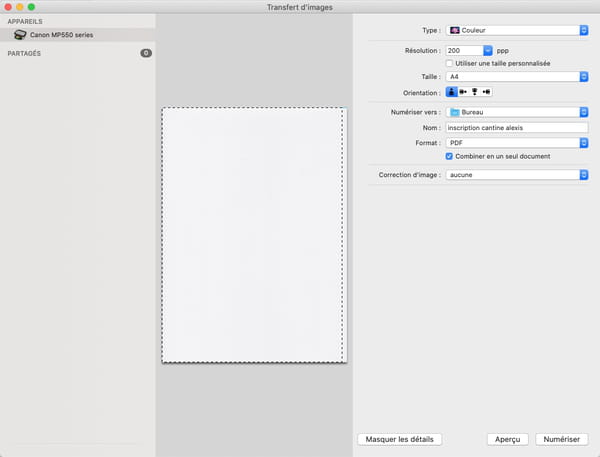
What are the correct settings for scanning a document?
Each type of document has a corresponding scanning mode. Multifunction scanners and printers generally offer an automatic mode, but it is far from perfect. Better to do it manually for the best results by adjusting the desired resolution, color, screening and final file format. All these options are generally adjustable through drop-down menus.
Scan a text document
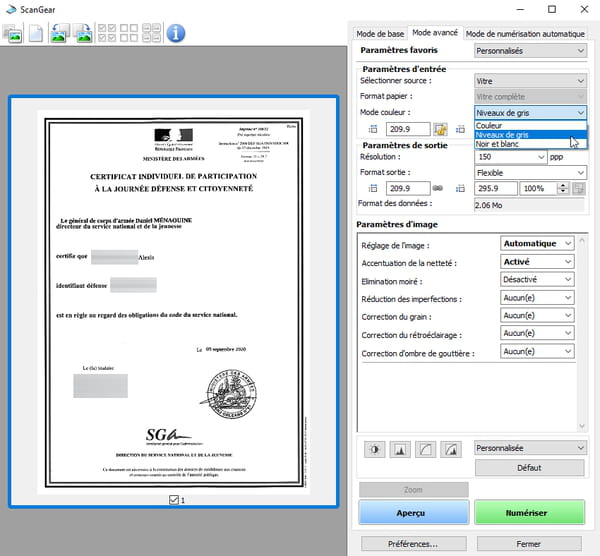
Administrative forms or invoices do not need high resolution color scanning. They must nevertheless remain legible. For this type of document, choose a resolution of 150 dpi (or dpi) and a restitution in Shades of grey. Avoid black and white mode which can tend to cluster pixels that are close to each other. Finally, for the output format, choose the PDF. A universal file format, readable on any device.
Scan a magazine or newspaper article
The pages of a magazine or newspaper require special handling. Indeed, without particular adjustments, they let appear a screen, the dots which constitute the image due to the offset printing, a little like when one looks closely at a 4×3 advertising poster. The scanners all have a function to eliminate this defect. She can be baptized Descreening or simply hide behind a setting titled Magazine and or Newspaper. In all cases, opt for digitalization in Colors or in Shades of grey according to the original page, a resolution of 300 dpi (or dpi) and activate the option of Descreening. Likewise, if the scanner driver suggests it, enable theElimination of moiré to further attenuate the grid effect that may appear in the image. Finally, for the file format, choose the PDF.
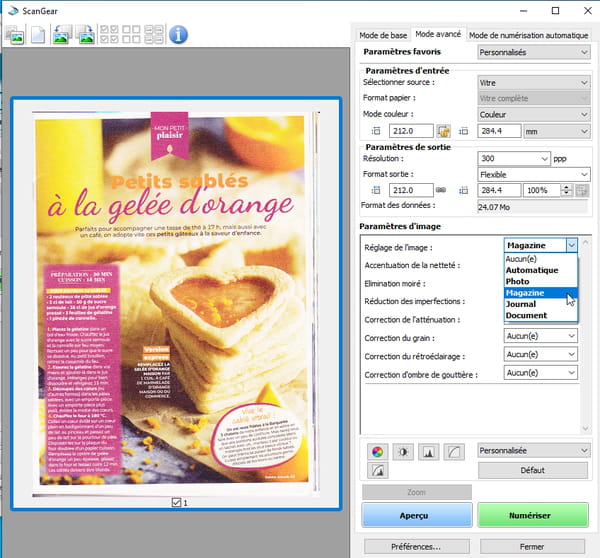
Scan a photo
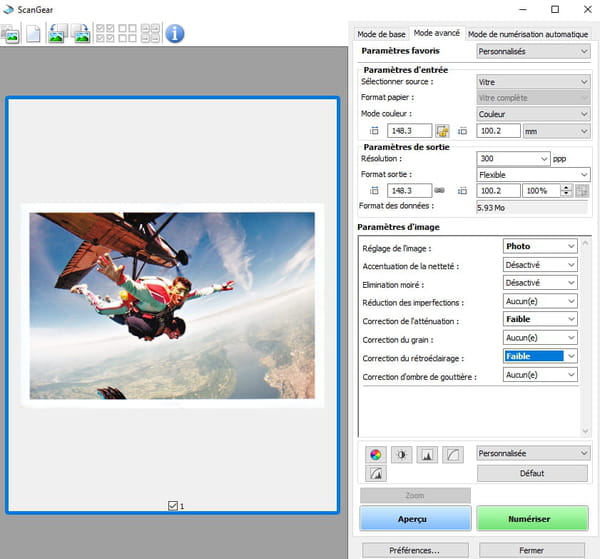
To digitize printed images or photo prints from a laboratory, several criteria must be defined before proceeding with the operation. First of all, what is the use of the scanned document? If it is to share it on social networks, to send it by email or to make an enlargement or an equivalent size print, the resolution choices must be adjusted. We can thus opt for a resolution of 72 Where 75 dpi if it is to publish the image on the web or social networks, go up to 150 dpi for sending by email and climb to 300 Where 600 dpi if it is to print it. And even more – if possible – if you plan to expand. Remember to choose the mode Photo. The software supplied with the scanner may offer specific correction options, for example to correct image imperfections such as scratches or dust. Handle this tool lightly at the risk of blurring the image. Finally, for the file format, again, it all depends on the use of the image. Choose Jpeg Where PNG whether it is intended for publication on the Web, sharing via social networks or sending by email. Instead, opt for a file TIFF if the image needs to be retouched with software and then printed in good quality. The resulting file will be heavier but will not undergo compression.
