Is your PC starting to show serious signs of fatigue? Replace its hard drive with an SSD! The operation is simple and economical. And, above all, it will give a spectacular vigor to your computer, even old.
The SSD (Solid State Drive) is a real blessing for computers. By replacing the traditional hard disk and its rotating electromagnetic platters, this storage system provides a multitude of advantages. It weighs only a few grams and is much more resistant to shocks and falls. And for good reason: it does not carry any mechanical parts. Data is stored in flash memory chips such as microSD or CompactFlash type memory cards found in cameras or smartphones. The SSD is also perfectly silent, does not heat up and consumes much less energy than a hard drive.
But the main advantage of the SSD lies in its speed and responsiveness. Once installed on an SSD, Windows launches in a handful of seconds. Ditto for software and data stored on SSD. Thus, by replacing the main hard drive of your computer, the handling of the system, applications and files is significantly improved, all operations becoming much faster and smoother. The gain in speed and comfort is even much more spectacular than by adding random access memory (Ram). The PC is unrecognizable! And this, even if it only has an old processor or if it only has 4 GB of Ram, which is the minimum today to use Windows 10. As for the prices, they have come down a lot in recent years. years, to the point of making the SSD solution truly accessible to all: count around thirty euros for a 240 GB disk and around a hundred euros for a model with a capacity of 1 TB (more than 1000 GB).
What to know before replacing a hard drive with an SSD
Seduced? Before you start, there are a few things to check on your PC to make sure you do The good choice.
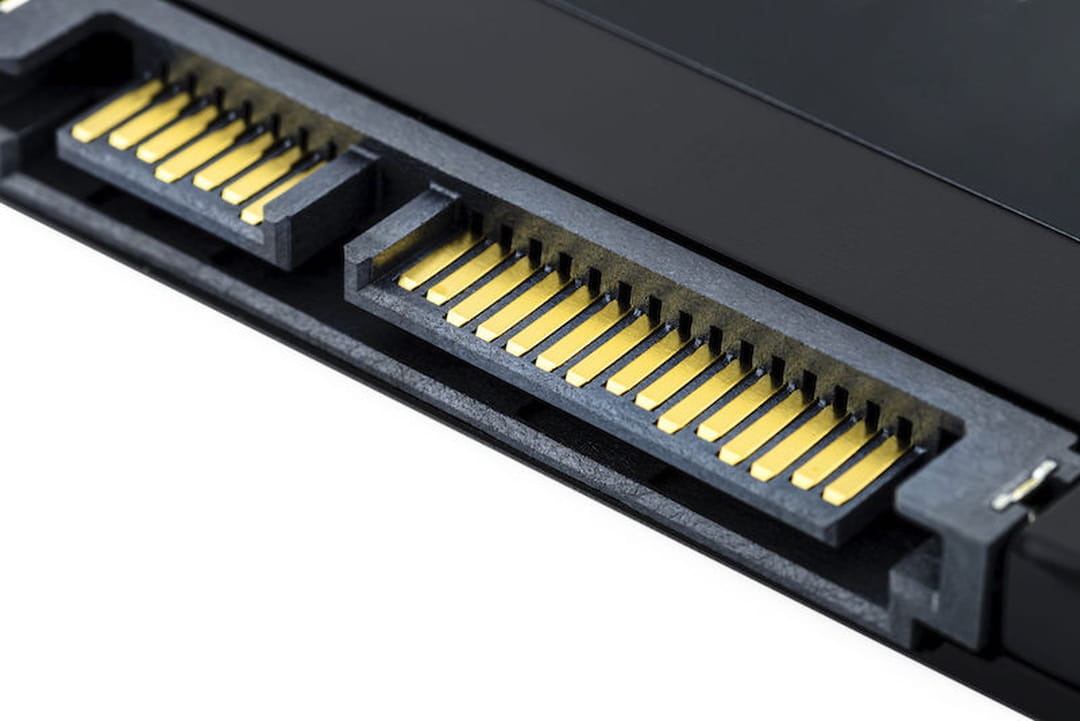
- Check the login interface on your machine. Chances are that the hard drive present in your PC is connected with SATA interface. But a check is necessary before any intervention. If you don’t know how to identify a SATA drive at a glance, follow the advice of our practical sheet Identifying the components of a PC. Do not worry about the SATA version (II or III most often): the connectors remain compatible.

SATA connector on disk or SSD side © Kinek00 - Estimate the storage capacity you need. If the hard drive present displays 500 GB on the counter, it will be better to direct your choice towards an SSD of the same capacity or more. Be careful, whether it is a hard disk or an SSD, the “raw” capacity announced by the manufacturer or the seller is always greater than the capacity actually usable. Thus, a 240 GB SSD will “only” offer 222 GB once formatted in Windows.
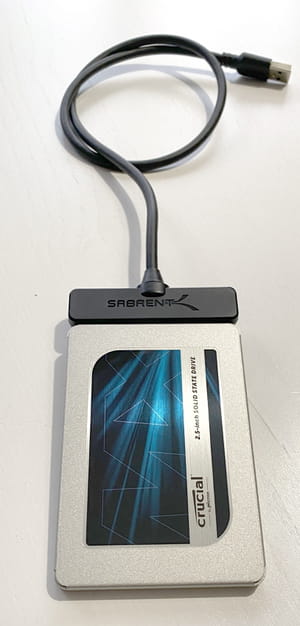
- Anticipate data recovery. By swapping your hard drive for an SSD, you have two choices. You can clone the old disk to the SSD. This way, you will find Windows as you left it with your settings, your software and your data. This operation extends the duration of the intervention since it will first be necessary to copy the entire hard disk to the SSD using cloning software. And you will also need to equip yourself with a suitable cable (SATA-USB) if your PC only has one hard drive slot (there are some available for about ten euros). But you can also wipe the slate clean and reinstall a clean, unadorned Windows. A brand new Windows, not weighed down by the amount of software and elements accumulated over the years and therefore even more responsive. An easy operation since all you have to do is create a bootable Windows 10 USB key before you start the disk exchange. And don’t worry about your Windows license number. It is linked to your machine and will not be requested. Once Windows is installed on the SSD, you can recover your documents and personal data on your old hard drive. You can also always continue to use it, like an external drive. All you have to do is install it in a small external box – an operation that is done by hand, without tools, in a few seconds – to give it a second life. A very economical transformation because there are cases equipped with a USB 3.0 or 3.1 interface for less than ten euros…
- Prepare for installation. Most SSDs are in the 2.5 inch format (with the exception of M2 drives which look like large bars of RAM). If this size is traditionally used in laptops, this is not the case for desktop PCs. If you have a PC in tower or desktop format, the onboard hard drive should logically adopt the 3.5-inch format. This difference in size must be compensated by an adapter cradle. Again, we find such accessories online for less than ten euros.
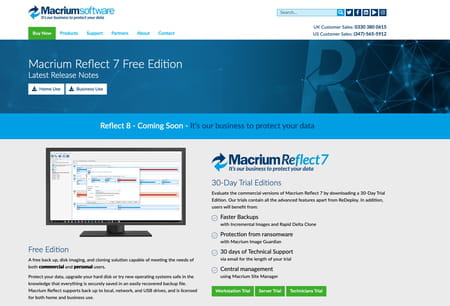
Have you bought and recovered your new SSD drive for your PC and want to copy the data contained in your old hard drive to it identically? You will need to use cloning software for this. It may come with your brand new SSD. Crucial offers for example to use Acronis True Image without spending anything when Samsung prefers to provide the Data Migration tool. Prefer the utility delivered with the SSD. If nothing is offered – which is the case with many SSDs from less prestigious brands sold online – you will need to download one. We have chosen for this operation Macrium Reflect Free. In its free version, this software – in English but simple to use – makes it easy to clone the contents of your hard drive. But you can also use a backup and colony utility like AOMEI Backupper Standardfree in its basic version.
- Connect your SSD to the PC using a SATA-USB cable or by integrating it into an external hard drive enclosure.
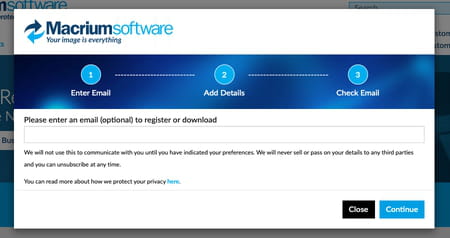
- Download the Macrium Reflect Free tool by going to the website of Macrium Software. Click on the button Home Use.
- In the window that appears, simply click keep on going without entering an email address. You can now download the utility.
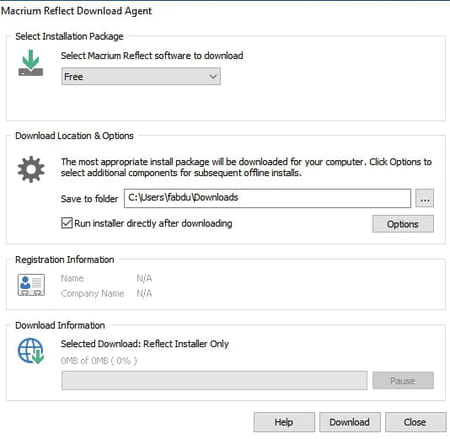
- Launch the installation by clicking on the button Download at the bottom of the window.
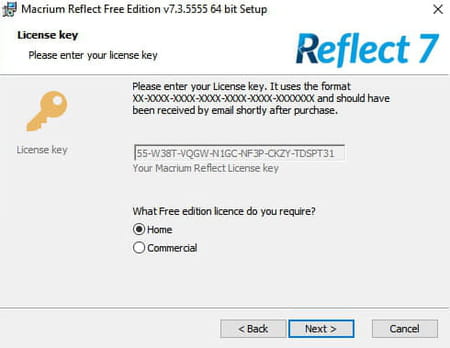
- In the next window click on Next then again Next and check the box Home.
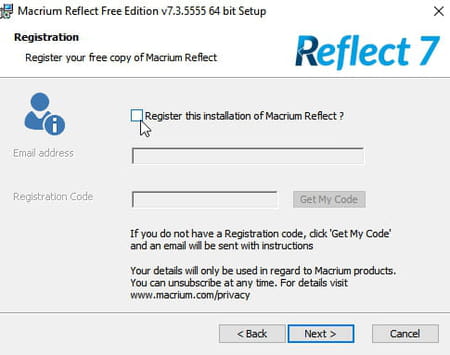
- Click on Next then uncheck the box Register this installation of Macrium Reflect?
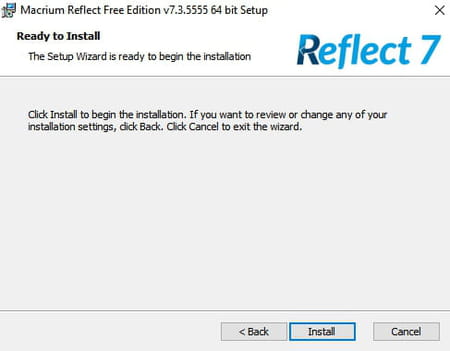
- Validate with a click on NextAgain Next and finally click on Install then Finish. The software opens.
- The utility presents a wide window. In the upper area is displayed the current hard disk of the PC with its different partitions. Make sure they are all checked, then click on the link below Clone this disk.

- In the lower area of the window, click the link Select a disk to clone to in order to define the target disk, the SSD therefore.

- Select your SSD at the bottom of the window.

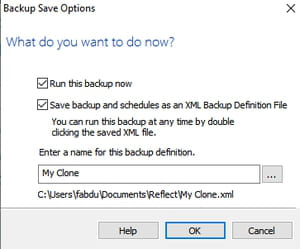
- It is then displayed as the destination disk. Click on Next then again Next and finally Finish.

- In the new window that appears, click OK to keep track of your cloning.
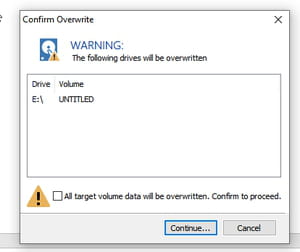
- Finally check the box All target volume data will be overwritten which specifies that all continuous data on the SSD disk will be erased, and validate by keep on going.
- The clone operation starts. It can take several tens of minutes depending on the amount of data to be copied, the transfer speed via the USB cable and the speed of the hard disk. Stop using your PC while cloning.

Your SSD is now ready to join your PC in place of your old hard drive. Whether you have a laptop or a desktop PC, the manipulations are almost identical. On a fixed PC, you will have to disconnect the SATA cable (absent on laptops since the disk connects directly to the connector) and provide yourself with a 3.5-inch adapter cradle.
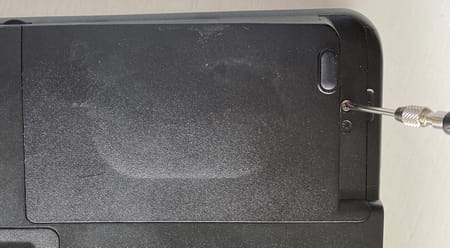
- After cloning is complete, turn off the PC. Unplug the USB-SATA cable that holds your SSD. Also unplug the PC from the power outlet. If it is a portable PC, as in our example, also remove the battery, if possible.
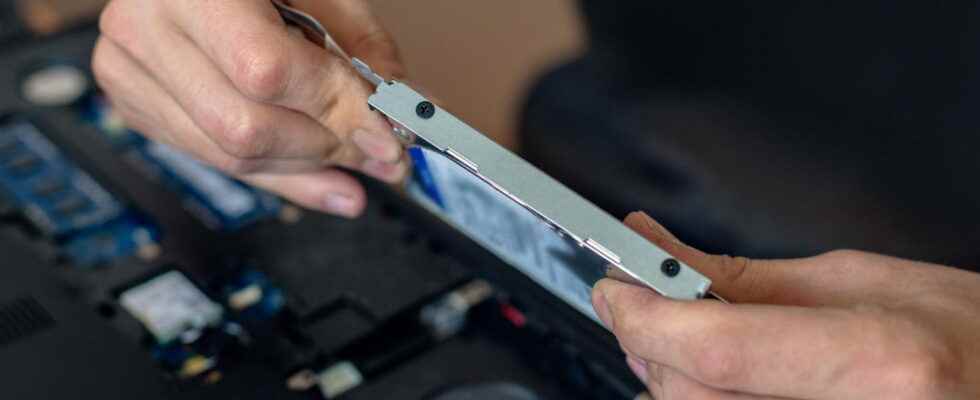
- Now open your PC to reach the hard drive slot. Of course, the manipulation varies according to the PC. It’s still fairly straightforward on a desktop PC, as the case is designed to be taken apart, providing easy access to the components. With a laptop, it’s the lottery. Sometimes all it takes is removing a few screws from the back to open a hatch covering the hard drive slot. In other cases, the bottom shell must be completely removed… In our example, the laptop has a dedicated hatch sealed with a single screw, which greatly facilitates handling.
- The hard drive is held in place by two screws (there may be more depending on the PC model. Remove them to separate the drive from the chassis.
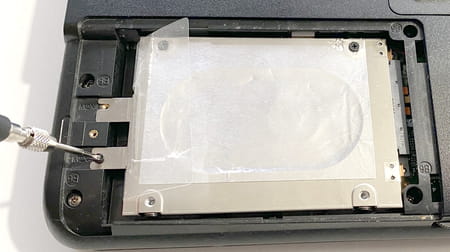
- Lift the hard drive slightly then pull it gently outward to disconnect it from the SATA connector.
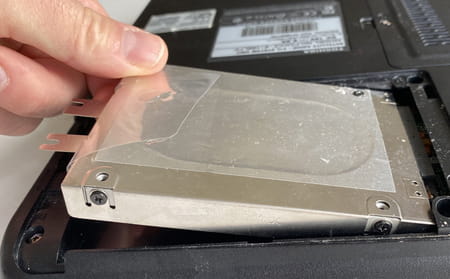
- Even on laptops, the hard drive is housed in a metal caddy. Remove all the screws holding it there to release it.
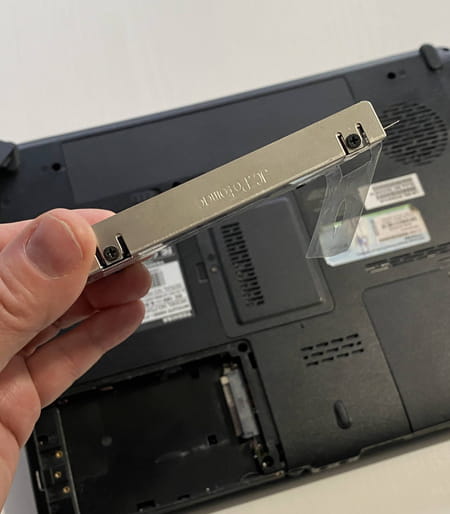
- Swap with your SSD. Place this in the cradle and secure it with the original screws. Connect it to the SATA connector (impossible to get the wrong direction thanks to the corrector). Tighten the screws that hold the cradle to the chassis then replace the access hatch.
- Replace the battery and reconnect the PC to the mains. Now turn your computer back on.
- If you cloned your hard drive to the SSD, your boot normally… but much faster! All your apps and data are there, just like before. But the operation of the PC is much smoother.
- If you haven’t cloned your hard drive, your SSD is totally blank. You will need to install Windows, as we explain in the next step.
Didn’t want to clone your hard drive to your new SSD in order to have a clean Windows? All that remains is to install a new system.
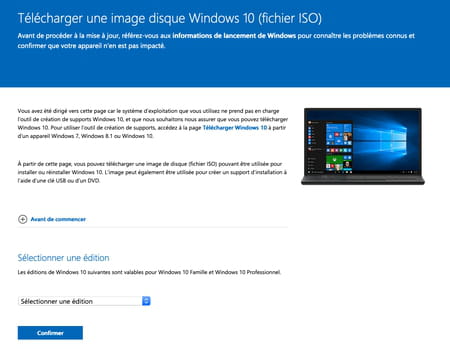
- Before you start dismantling your machine to do the disk swap, you need to prepare the new system for installation. To do this, follow the steps in our practical guide Create a bootable Windows 10 USB key.
- When your USB key is ready, repeat the operations described above to perform the disk swap.
- Once your SSD disk is in place and the PC is closed, insert your USB key containing Windows into one of your PC’s USB ports and start the computer.
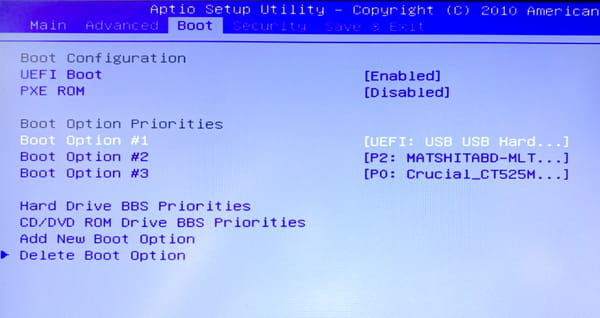
- If the BIOS of the machine is correctly configured, Windows should start from the USB key. Otherwise, you have to access the BIOS or UEFI setup utility yourself.
- In the section Boot Where Startup depending on the name assigned by the manufacturer, put USB at the top of the list of media to boot from. Save the configuration and restart the PC.
- The PC starts on the USB key. All that remains is to follow the instructions displayed on the screen to install Windows on your SSD.