
No need to install messaging software to send and receive messages with Windows 10: the system comes standard with Mail, a simple but sufficient application, even with several email addresses.
You may never have noticed it, but Windows 10 comes standard with messaging software, simply called Mail. Of course, it does not compete with sophisticated applications like Microsoft’s Outlook or Mozilla Foundation’s Thunderbird, but it is more than enough for everyday use. Above all, Courrier shines with its elegance and simplicity: it is even so intuitive that anyone can get started in just a few seconds!
In addition, Courrier can manage e-mail accounts, and therefore several e-mail addresses (Outlook, Google, Yahoo, Exchange, etc.) directly on the PC without the need to add other tools. Small nice bonus: Mail works in tandem with the Calendar application, making it easy to create new events, appointment reminders, contact synchronization and email-based calendar management.
In short, if you do not like going through webmails like Gmail, Yahoo Mail or Outlook.com to manage your messages and you prefer to keep your messages on your PC, you have every interest in turning to Mail. Here’s how to set up your different addresses to easily send and receive your emails.
Mail relies on the information you provided when you installed Windows or when you first set up your computer. Also, if you have entered a Microsoft address (Outlook, Live or Hotmail) to manage your Windows session, it is therefore to this address that the app will turn in the first place. If you haven’t set up a Microsoft account, you’ll need to choose which account to use yourself.
- Start by opening the Mail app. To do this, click on the menu To start up then find it in the list of installed applications. You can also find it in the taskbar – it’s the envelope icon – if you haven’t removed it during a personalization.
With a Microsoft account associated with Windows
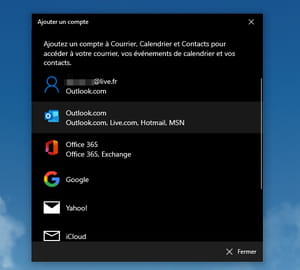
- If you’ve never launched it before, the first window that appears shows a list of accounts you can add. At the top of the list, the email address associated with your Windows account. Click on it.
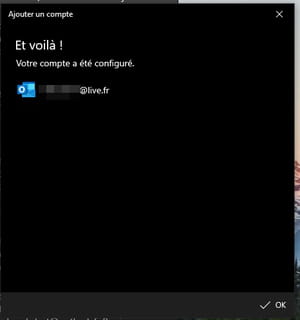
- The app may ask you for the password associated with this address. However, since it’s also attached to your Microsoft account, it shouldn’t need it. The configuration is automatic. After a few seconds, the operation is complete. Click on OK. Courrier collects the mails from your mailbox.
Without a Microsoft account associated with Windows
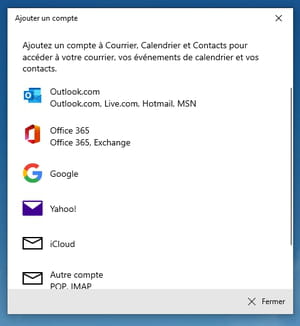
- If you’ve never launched it before, the first window that appears shows a list of accounts you can add. Choose from the list the service that corresponds to the address you want to add: Google for Gmail, iCloud for an Apple address or Other account if it is the address linked to your operator such as Orange, Bouygues or SFR for example. In our case, we are going to add a Gmail address.
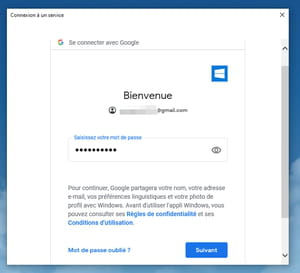
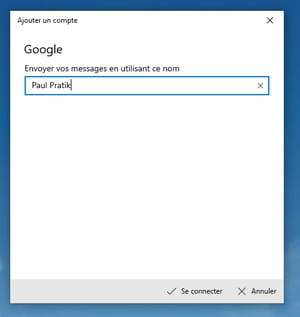
- Enter your address in the window Sign in with google, then click Following.
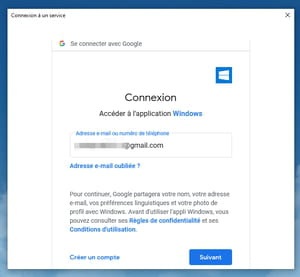
- In the next window, enter the password associated with this address and validate with Following.
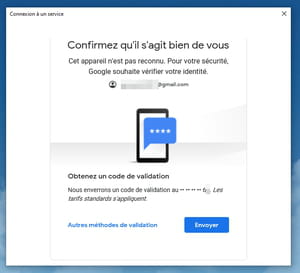
- If you have adopted security by double authentication (by sending an SMS to a mobile number associated with this address), click on the button Send in order to verify that it is indeed you.
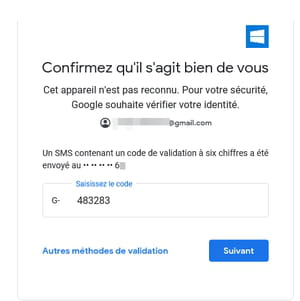
- You will then receive on your mobile in the following seconds, an SMS from Google including a six-digit code. Copy it in the field enter the code and click on Following.
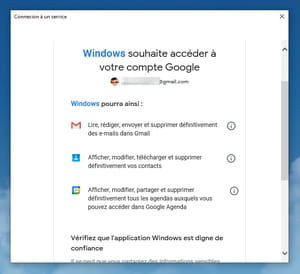
- Once authentication is complete, a window displays the access granted to your account (management of emails, contacts and calendar). Click on the button To allow.
- The last configuration step is presented. Indicate in the available field the name that will be associated with this email address by Mail. Click on To log in.
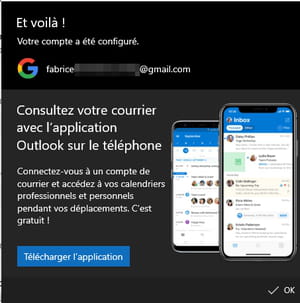
- After a few seconds, the configuration is complete. Click on OK. Courrier collects your correspondence.
Of course, Microsoft’s app isn’t limited to managing a single email address. You can add more than one.
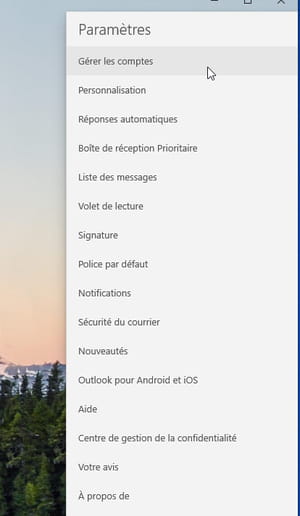
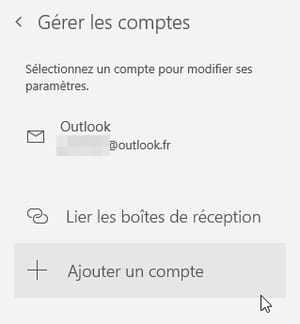
- In the Mail application, click the toothed wheel at the bottom of the left pane.
- A pane unfolds to the right of the window. Click on Manage accounts.
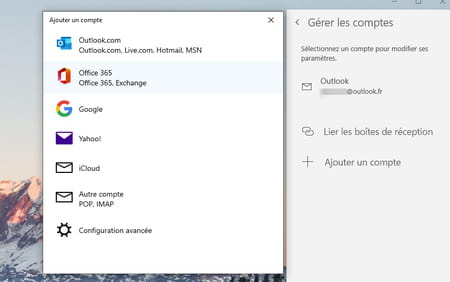
- Now click on + Add an account.
- A window presenting a list of e-mail services appears. You just have to repeat the operations described above for adding a first account to define a second.
- Once the second account is added, it takes place in the left pane of Mail. Just click on it to select it and display the correspondence associated with it.
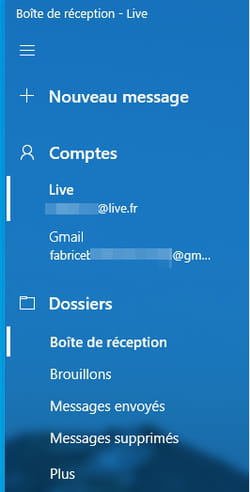
- Each account has its own folders (Inbox, Sent messages, Trash, etc.).
Microsoft’s email app plays it easy. To send a message or reply to a missive, nothing could be simpler.
- To send a new message, choose the account from which you want to compose it (if you have added several in the Mail app).
- Then click on the button + New message at the top of the left pane.
- The compose window is displayed. Edit your missive as with any other software or e-mail service then send it by clicking on the icon Send at the top right of the window.
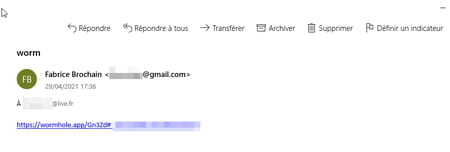
- To reply to a message, display it then click on the button To respond at the top of the interface.
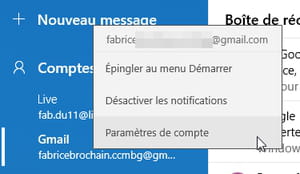
Want to make changes to the accounts you’ve added in the Mail app? You can adopt different settings for each of them.
- Right-click on one of your accounts in the left pane of the Mail app. In the small menu that appears choose Account settings.
- In the window that appears, you can already change the name of this account which, by default, has taken the name of the electronic mail service.
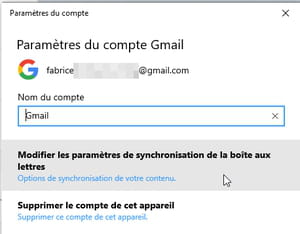
- Then click on Change mailbox synchronization settings to change the behavior of this account.
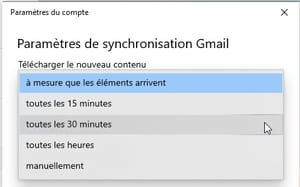
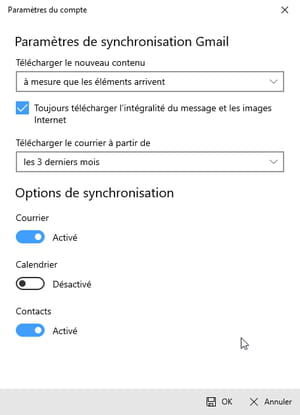
- Here you can set the frequency for checking mail. To do this, click on the drop-down menu Download new content and choose the option that suits you. Opt for example for Manually if you are on the move and want to save a 4G connection for example.
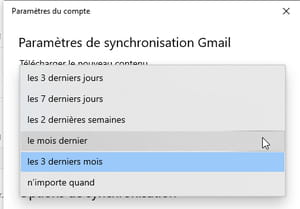
- Choose from the menu Download mail from the date to which you wish to go back. A practical option to not immediately repatriate all the mails stored on the server of the mail service.
- Finally, choose what Mail should synchronize: The mails, the calendar and contacts by activating or not the corresponding switches. Click on OK then on Save once you have made your choices.
- Repeat this operation for each of the accounts you manage with the Mail app.