Is your iPhone or iPad storage space running out? Is your iCloud account already full? Rather than sacrificing your photos and videos, simply move them to your PC or Mac!
On mobile devices with little storage space, photos and videos are often the first items that are sacrificed to save space. If your Apple smartphone or tablet is reaching saturation point and the advice given in our practical sheet Making space on an iPhone or iPad is not enough, you will actually have to rid your device of these bulky multimedia files. And if you have a free iCloud account with its meager 5 GB courtesy of Apple, don’t count on it too much to store your photo library there.
The best way to regain some space on your device without sacrificing your photos or videos is simply to copy these precious – but heavy – files to a computer. Whether you have a PC or a Mac, the operation is quite simple. Once the files are safe on your computer, you can delete them from your mobile device. If you have time in front of you, you can operate a sort in order to keep on your iPhone or your iPad, the shots and sequences which are dear to you to consult them whenever you want. And, rest assured, whatever your choice, it will always be possible to move your favorite items from the computer to the mobile device again whenever you want.
The Apple and Microsoft universes now know how to communicate serenely. Windows 10 does not require any additional software to transfer the multimedia content from your iPhone or iPad to a PC, since everything can be done with the Photos application, delivered as standard. The system just needs drivers to manage the mobile device. Just make sure you have an internet connection so you can download them automatically the first time you plug in the smartphone or tablet.
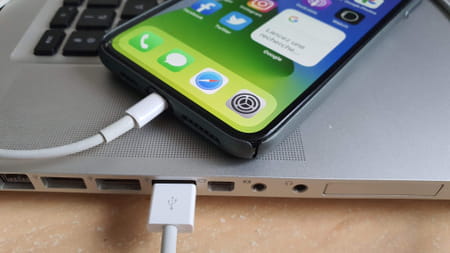
- Turn on and unlock the iPhone or iPad. Connect it to the PC with its USB/Lightning cable.
- Immediately, an authorization request to unlock access to photos and videos is displayed on the mobile’s home screen. Press on To allow.

- If it’s the first time you connect the iPhone or iPad to the PC, Windows automatically downloads the necessary drivers. After a few seconds, a notification indicates that your mobile is ready.

- Launch the Windows 10 Photos app: as it comes standard with the system, you can easily find it via the menu To start up. In the window that appears, click the button Importtop right, and choose From a connected device.

- The app then searches for devices connected to your PC and identifies photos and videos that may be copied to the hard drive.

- After a few seconds, all the media files present on the iPhone or iPad will be displayed. They are listed in chronological order, from most recent to oldest.

- If your iPhone or iPad contains a large amount of photos and videos and you have time on your hands, you can select the items you want to back up to the PC disk one by one. Tick for it the box nestled in the upper right corner of each thumbnail. Those that are not part of your selection will remain in the memory of the mobile device.

- If you prefer not to sort immediately, click on the drop-down menu placed under the option Select and choose All the elements.

- Now check the box Delete original items after import so as to automatically delete photos and videos from the iPhone or iPad.

- Finally click on the button Import XXXX out of XXXX elements (XXXX corresponding to the number of files selected and present on the mobile device). Charging starts. It may take several minutes depending on the volume of files to be copied and the type of connection (USB 2 or USB 3). Be sure to keep the iPhone or iPad “awake” and unlocked during the operation.

- After copying, you still have a chance to leave your photos and videos in place on the iPhone or iPad (in case you are not sure yet to delete them from the device). Click the blue button Delete XXXX items to validate their deletion (XXXX corresponding to the number of files concerned).

- They are automatically erased from the device. You can disconnect it from the PC.

Of course, Macs are ready to communicate with iPhones and iPads without having to install anything. To recover photos and videos from your Apple mobile devices, it’s through the Photos application that it happens.
- Turn on and unlock the iPhone or iPad.
- Launch the macOS Photos app: it comes with the system and you can easily find it in the Dock or the Applications folder. Connect the iPhone or iPad to the Mac with its USB/Lightning cable.
- If this is your first time connecting to this computer, tap Yes in the message that appears on the screen. You will also need to enter the device passcode to authorize the Mac to access the files on it.

- A dialog may appear in the Photos app to update a software component. Accept the installation that takes less than a minute.

- Soon after, the device name appears in the left pane of the Photos app. The software analyzes its content. All the snaps and videos in it are displayed as thumbnails.

- If you want to erase the photos and videos from your mobile device that you are about to save on your Mac, check the box Delete items after import.

- If your iPhone or iPad contains a large amount of photos and videos and you have time on your hands, you can select the items you want to back up on the Mac one by one. To do so, click on each thumbnail. Files that are not part of your selection will remain in the mobile device’s memory. Validate your choice with a click on the blue button Import the X selected items at the top right of the window (X corresponding to the number of files selected).

- If you prefer not to sort immediately, click on the blue button Import all new items at the top right of the window.

- Please note that photos and videos are automatically deleted from the device as soon as they are copied to your Mac. You can disconnect your iPhone or iPad from the computer.
