Today we will show you step by step how to format windows 10.
Formatting a Windows 10 computer I suggest you make a backup first if your computer is usable! Because there may be some files on your “C” disk that you do not want to lose. You can prevent data loss by backing them up to a USB stick or a cloud platform. It is not impossible to recover data after formatting, but it is definitely a very long process with low success rate, remember that!
Formatting Steps to Windows 10;
- Backing up your important files
- Download the Windows 10 setup file
- Prepare the Windows 10 installation disc
- BIOS settings
- Disk partitioning, formatting
- Windows 10 installation
Preparing the Windows 10 Installation File
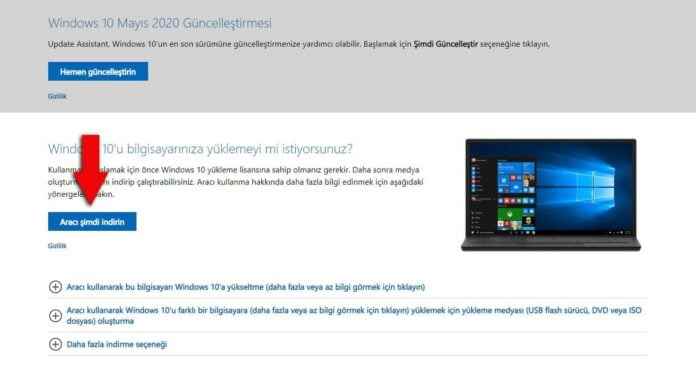
Formatting Windows 10 Before starting the process, of course, you need to download the installation files for Windows 10.
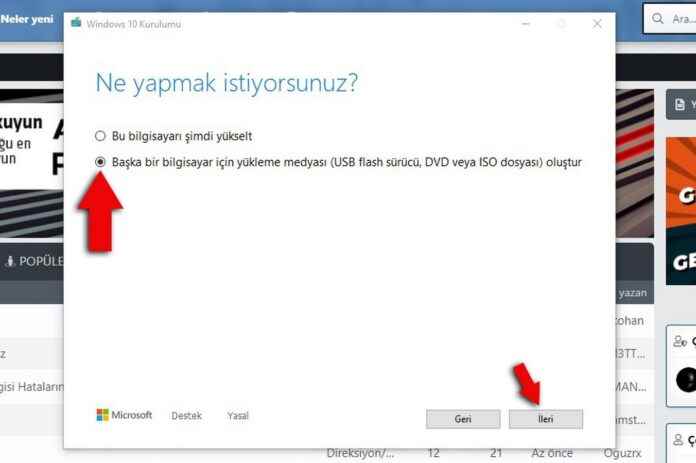
Then select the option we showed with the arrow above from the Windows 10 Setup Tool you downloaded. Then select the 64 Bit operating system and continue with the USB stick installation mode. Remember, all data in your USB memory will be deleted after this process!
BIOS Settings to Format to Windows 10
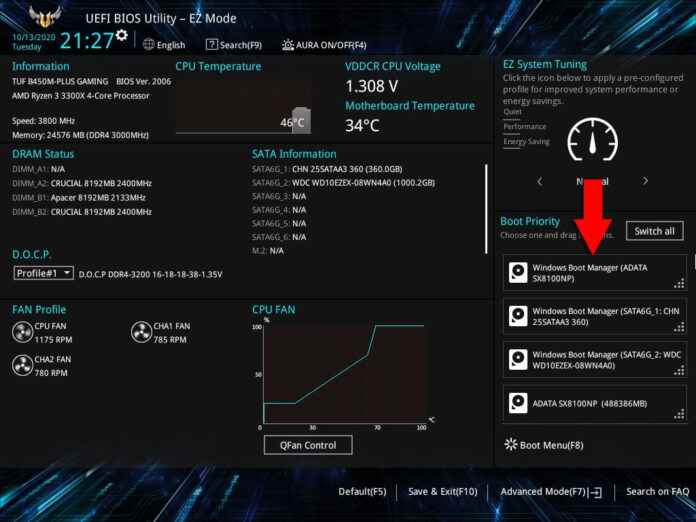
Windows 10 formatting Most people can get confused here. But it’s actually a pretty simple process. Desktop computers usually “Delete” In the BIOS screen you reach with the key “Boot Priority” find the part. The brand or model of the USB memory where you installed your Windows 10 installation files will be written, bring it to the top. Later on F10 Press the key to save the settings and exit the BIOS.
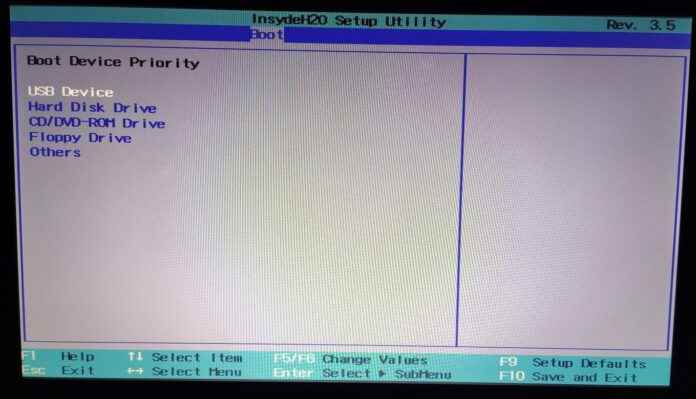
If you have a slightly older device, your bios screen may be as above. But you will still do the same. on laptops usually F1 or F2 Enter the BIOS that opens with the key. Find the boot partition, then Boot Device Priority Get the USB stick on which you wrote the files from the section at the top, with F10 save and exit.
Formatting Windows 10

After the computer restarts, the Windows icon will appear, after a short while the installation screen will appear. By this stage “I don’t have a product key” You can continue by selecting If you already have a key that you have used before, it will automatically detect it.
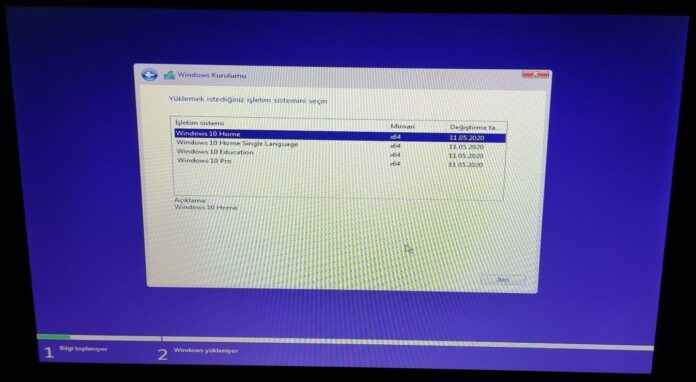
You will then be presented with a screen asking which version of Windows 10 you want to install. You can install Windows 10 Home or Windows 10 Pro, If your hardware is a little weaker, Windows 10 Home might be a better option.
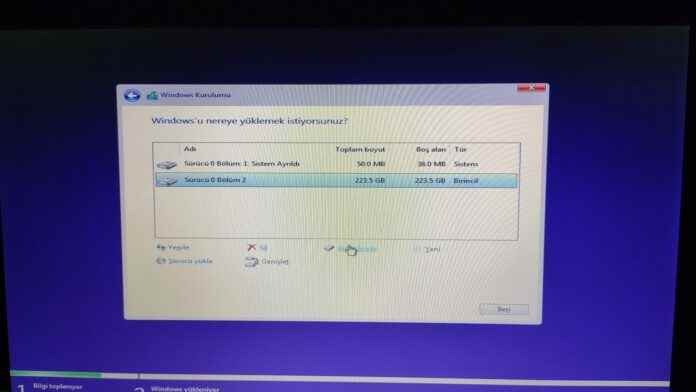
Now we are at the most important part, the formatting screen. Here, different options will appear depending on the condition of your disk. If you are going to clean the whole disk completely and do a clean install, select all the drivers and “Delete” Press the key. After deleting them all, only one drive will remain.
Select that disk, the “New” button will be active. From there you can partition your disk if you want. If you are using SSD + HDD, you need to install the operating system directly on the SSD. Also, create the partition where you will install Windows 10 first.
If you are using the other disk for your backups, definitely do not select it and act on it, otherwise your files will be deleted. Don’t forget 1024 MB disk space is equivalent to 1 GB disk space, Make your partition accordingly.
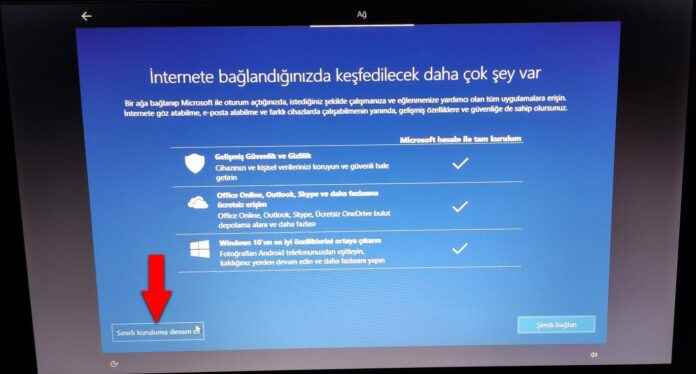
The installation time of Windows 10 will vary depending on your computer’s performance. After your computer restarts automatically, remove the USB stick. Then a screen like the one above will appear. Here you can connect to your Microsoft account if you want, or you can directly continue with the limited installation. Then you can finish the installation.
See also: Windows 11 Best Practices