Following a breakdown, a bug or a wrong manipulation, files stored on the disk of your PC or on a USB key are erased or unusable? You can try to recover them with WinfrGUI, a simple, effective and free software.
No one is safe from a breakdown or an incident resulting in the loss of data on a computer or storage medium. but if file recovery software abounds on the Web, most provide a minimal service by allowing you to restore some data and then asking a few tens of euros to acquire the full version which will allow you to really recover what you want. Without spending a penny, it is also possible to rely on the tool Windows File Recovery provided by Microsoft… But it is better to be accustomed to the command lines since this tool does not have a graphical interface that can be manipulated with the mouse. This is where WinfrGUI comes in. As its name suggests – Windows File Recovery Graphic User Interface – this software takes over the functions of that of Microsoft but grafts it on top of a graphical interface. It thus makes it possible to analyze any storage medium (hard disk, SSD, external disk, USB key, memory card, etc.) and to recover data that has been erased or made inaccessible after formatting or a problem with the storage medium. WinfrGUI is totally free, in French and works with both Windows 10 and Windows 11.
How to recover data on PC with WinfrGUI?
As is customary with data recovery tools, it is better to install it before any tragedy happens to your precious files. Indeed, by installing software (and therefore by copying data to your hard drive or SSD where your data has disappeared), you risk deleting them permanently, excluding any possibility of recovery.
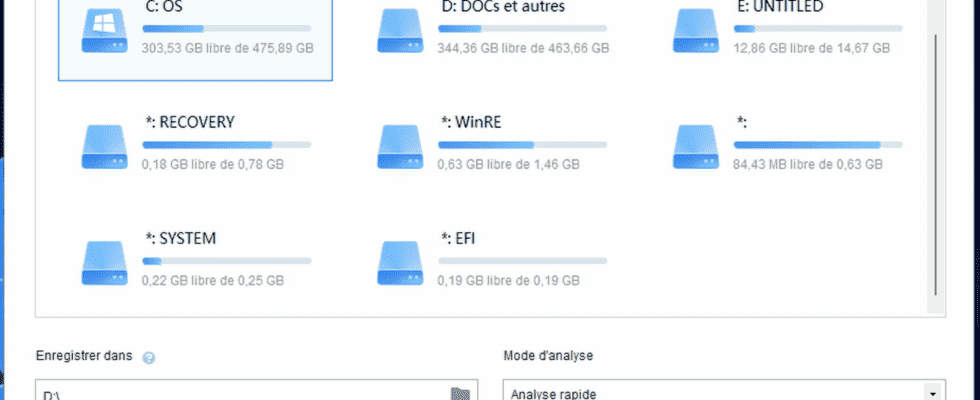
► Download and install WinfrGUI on your PC and launch it. The first window that appears presents the various partitions and storage spaces detected on the PC. Select the disk to scan.
► Then pull down the menu save to at the bottom of the window and designate the folder where the data you are about to recover should be saved. Warning: do not choose the disk on which they are supposed to appear at the risk of deleting them permanently.

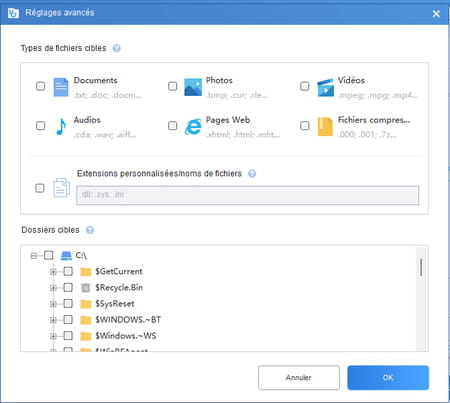
► If you know exactly what types of files you want to recover, click on the button Advanced settings at the bottom of the window. In the new window that appears, you can choose whether it is office documents, photos, music, compressed files, etc. You can even specify the exact file extension (.doc, .mp4, .jpg, etc.) and designate, if you know it, the location on the hard disk where you are convinced that the files were present. Validate your choices with a click on OK.
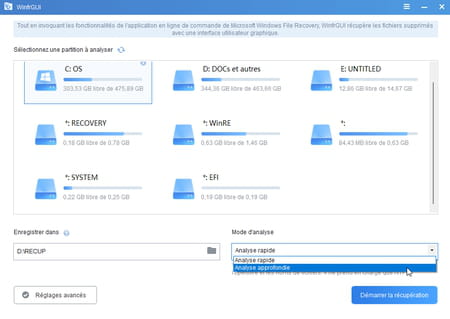
► Back in the main WinfrGUI window, all you have to do is choose the type of analysis to perform. L’Quick Scan only works on NTFS volumes. If it is a question of finding files on a storage medium formatted in FAT 32 for example, choose Deep analyze. When everything is ready, click Start Recovery.
► The analysis starts. It can last longer or shorter depending on the mode used and especially the size of the disk to be scanned.

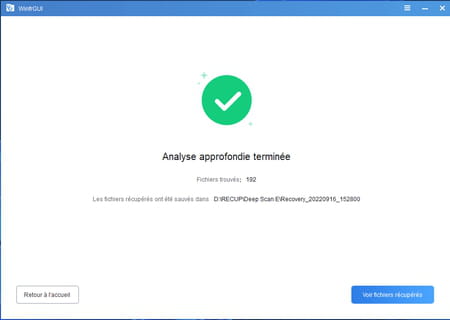
► At the end of the analysis, the software indicates what it was able to recover. Click on the button View recovered files.
► All that remains is to hope that the files you are looking for are among the lucky survivors.