Do you want to share passions, news, outings or any kind of center of interest with real or virtual friends? Create a group on Facebook: it’s simple and practical!
Whether you’ve been invited to join or you’ve made the request yourself, you’re probably already a member of a group – or even several – on Facebook. But it may be that, for personal or professional reasons, you have not yet found a community with which to share your love for Mortagne-au-Perche or your camel training skills, or worse, that you are disappointed by the groups of which you are a member because you believe that they are, for example, less passionate about Allan Holdsworth or less connoisseur of Louis de Funès than you are. In this case, assuming that you are never better served than by yourself, you might as well become a caliph instead of the caliph and create your own group.
To be able to share information with friends, communicate with family, get feedback from customers or inform fans, there is no need for a special status: to create one or more groups, all you need is a Facebook profile and, of course, to respect the “Facebook community standardsWhether you choose to create a public group (members and posts visible to everyone) or a private group (members visible only to members), it’s a matter of minutes.
In a few clicks and a few moments, here is the procedure to follow…
► With your usual web browser, go to the Facebook site and log in to your account.
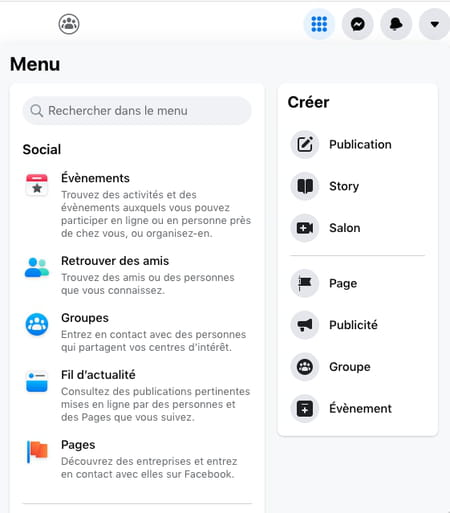
► You can open the page Create a group in two ways: either by clicking on the icon Menu (the leftmost of the four icons at the top right), then click Band in the menu Create which opens to the right…

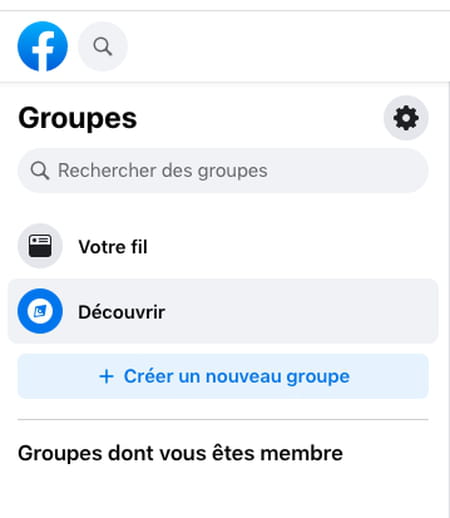
► Either by clicking directly on the icon Groups (the rightmost of the three central icons at the top of your page), then click Create a new group in the menu that opens on the left…

► You now have access to the page Create a group, on which you will be able (and must!) fill in several areas on the left of the screen. Being the creator of the group, you are automatically the administrator.
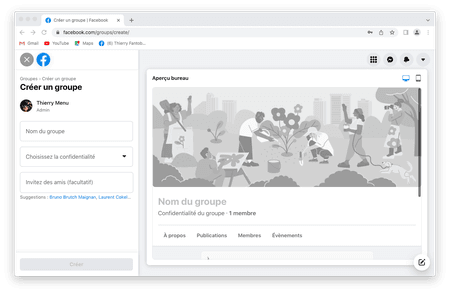
► First write the name of the group in the box provided.
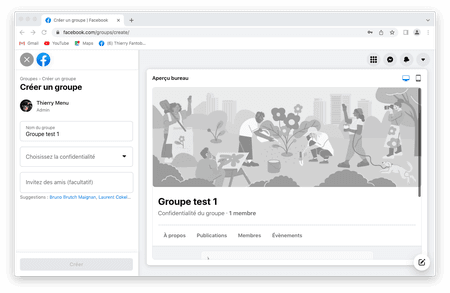
► In the box Choose privacyclick on the downward-pointing triangle to choose between Audience (everyone can see who’s in the group and what’s posted) and Private (only members can see who’s in the group and what’s posted).
► If you choose Privateyou have access to a new choice between Visible (everyone can find the group) and Mask (only members can find the group).
► You can then (but it is not mandatory to create the group) click in the box Invite friends (optional) ; a list of friends is then suggested to you by Facebook, but you can of course choose from all your friends.
► Now click on the blue area Create.
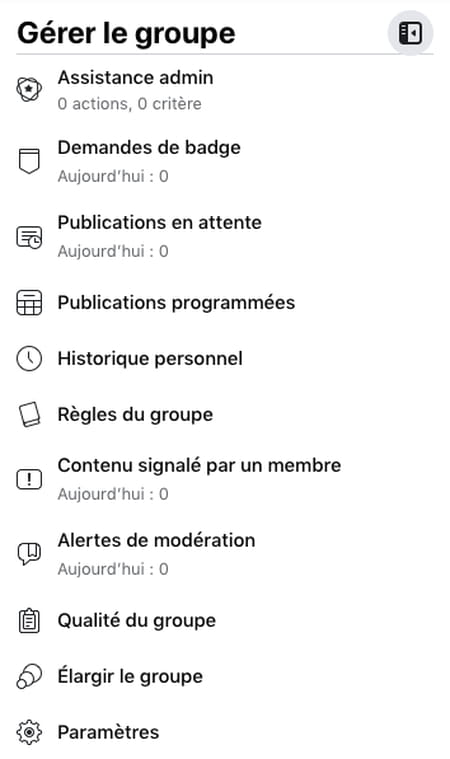
► The group is created, on the left appears the menu Manage the group.

► By clicking on the V on the right of Administration toolsyou access a drop-down menu that gives access to the information and parameters used to manage and administer the group.
► To find your group from the Facebook home page, click as at the beginning of this article on the icon Groups (the rightmost of the three central icons at the top of the page), and your group appears in the menu that opens on the left, under Groups you manage. And by clicking on the name of this group, you again access the information and settings to manage and administer the group.
You can also simply create a Facebook group from your mobile, and even if the process may seem a little longer than on a computer, it actually only takes a few minutes…
► On your mobile, launch the Facebook application and log in… You can display your profile but it is not necessary, from the home page press the menu at the bottom right of the screen.

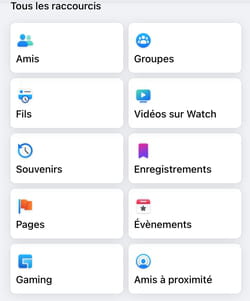
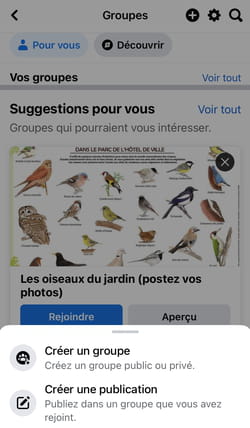
► In the drop-down menu that appears, tap the shortcut Band.
► At the top right of the page that opens, tap the sign +.
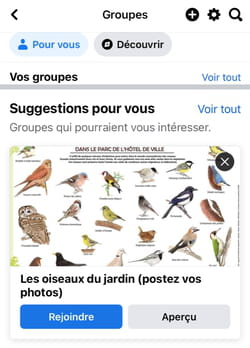
► In the window that opens at the bottom, tap Create a group.
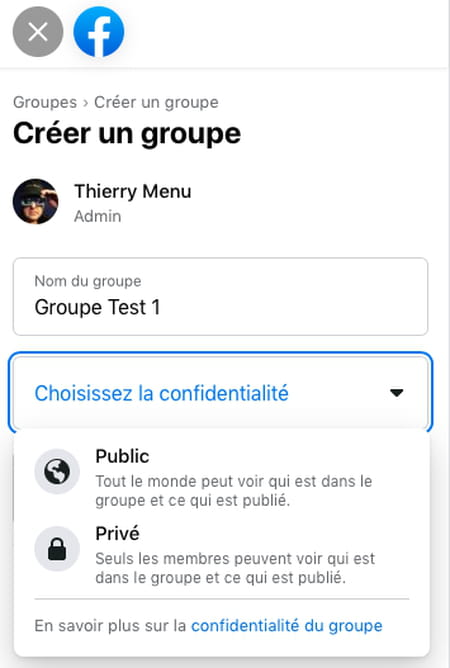
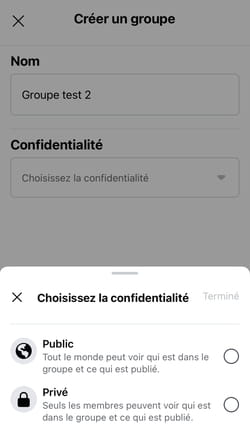
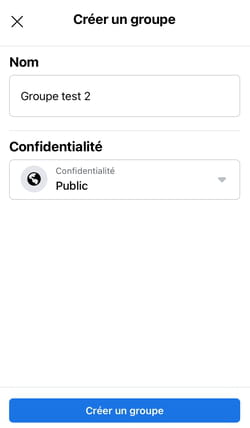
► Now write the name of the group in the box provided.

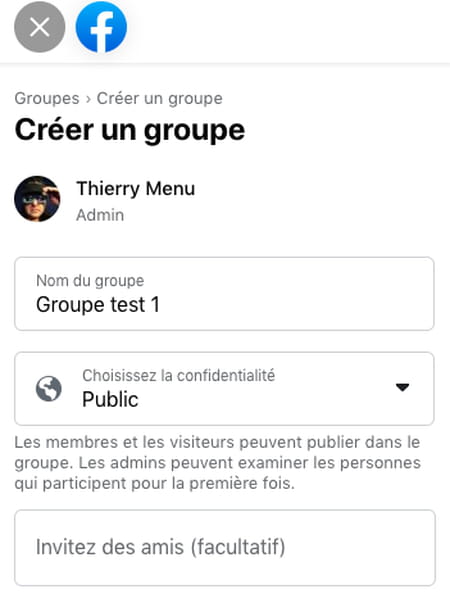
► Then press in the box Choose privacy. You can now choose between Audience (everyone can see who’s in the group and what’s posted) and Private (only members can see who’s in the group and what’s posted). When you’ve chosen, tap Done.
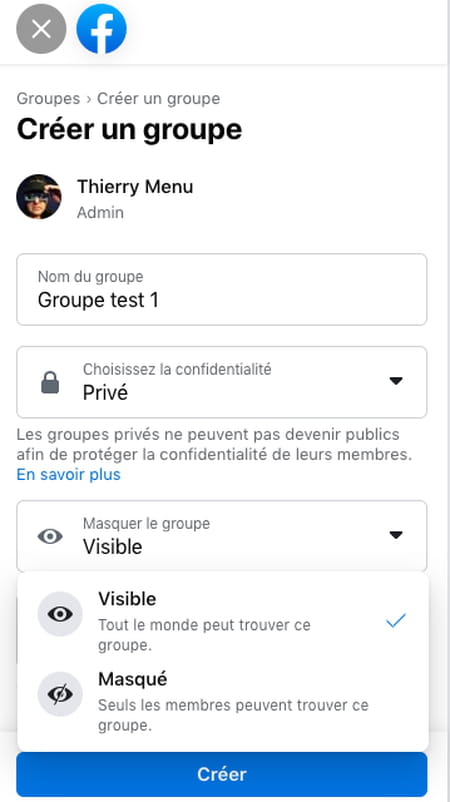
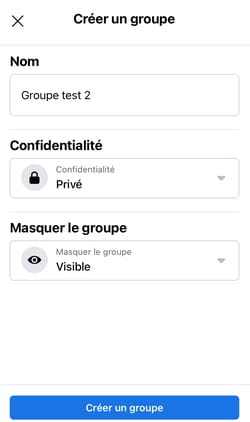
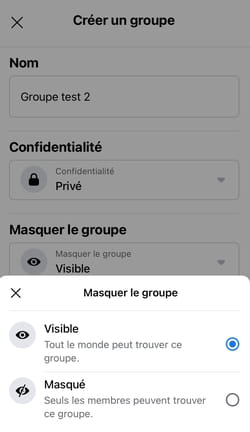
► If you have chosen Privatea new cell Hide group appears, displaying Visible.
► Tap in this box and choose between Visible (everyone can find this group) and Mask (only members can find this group).
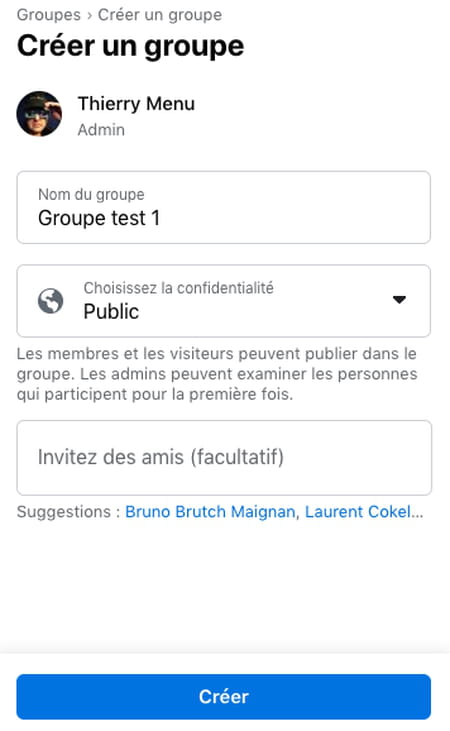
► Finally, tap on the bottom Create a group.
► A page titled Invite people opens now, you can run right away or else press Following at the end of the page.

► By pressing Followinga page Add a cover photo opens. Again you can act immediately, or press Followingor better yet do like me, i.e. press at the top right on continue laterin order to fine-tune the characteristics of your group at rest.

► To manage and administer your group whenever you want, you just have to redo the manipulation from the beginning, namely to connect and from the home page press the menu at the bottom right of the screen, then in the drop-down menu that appears, press the shortcut Band.

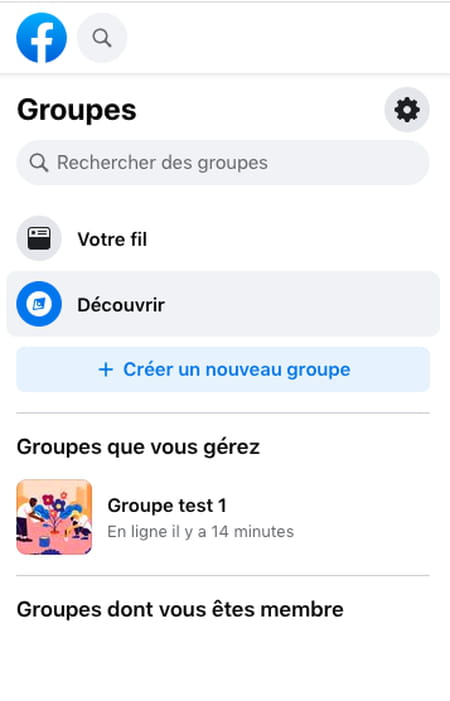
► On the page that opens, at the top right of Your groupsto push on See everything.
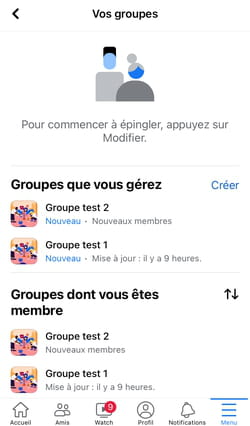
► In the list Groups you manageyou just have to press on the name of your group to access the page allowing you to continue the configuration of the said group, and then to manage and administer it.