
Do you want to print a large table? Or even convert it to a PDF file? Take advantage of all of Excel’s layout options to improve its readability and make it easier to read across multiple pages.
When managing large tables in Excel, it is illusory to launch the command To print hoping everything will be perfect. There are always tweaks to be made and layout options to be set to make the document more readable, while saving time, ink and paper! Print table headers on all pages, fit all columns on one page… these are some of the main settings that we suggest you discover here. They will be just as useful for printing your spreadsheets on paper as for converting them to PDF, for wider distribution. Our advice applies to versions of Excel for Windows and Mac, including older ones, as well as the free version of Excel for the web.
If your large table has several hundred rows and is obviously going to have to be printed on several pages to remain readable, the versions ofExcel for Windows and for Mac provide an option to repeat the same headers on every page. These settings apply to both printed spreadsheets and those you convert to PDF.
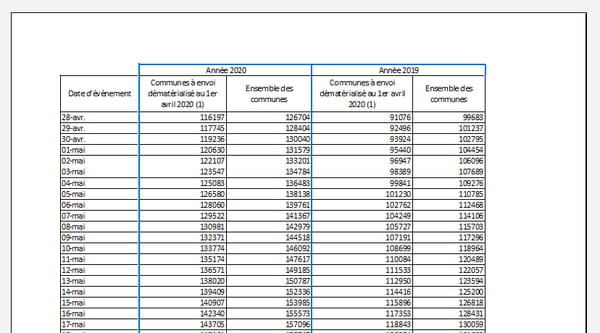
- The illustration below shows you the first page of a large printed table. We see the rows of headers presenting the years 2020 and 2019, and the column on the left with the dates of the event.
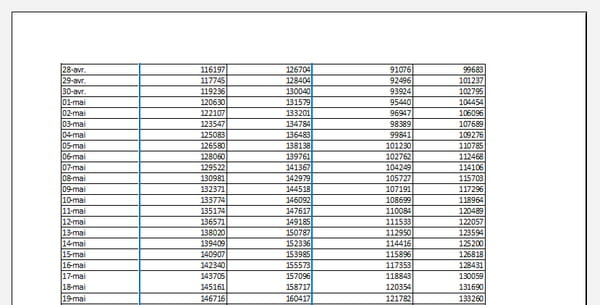
- Below is what the printout of page 2 will look like if you don’t ask for the title lines to be repeated across the top of all the pages. These columns of numbers are not very explicit!
- And below, the preview of the same page 2 with two lines of repeated headers: we already find ourselves there better!
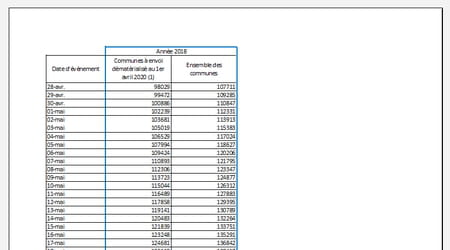
- Finally, on one of the following printed pages, instead of having two columns of raw figures, we can know here both that it is data for the year 2018 thanks to the two lines of entry heads, and have a reminder of event dates thanks to the column on the left.
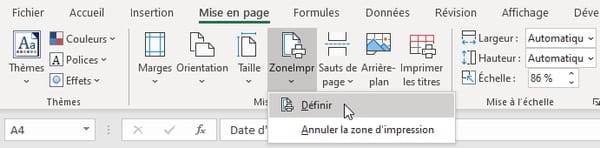
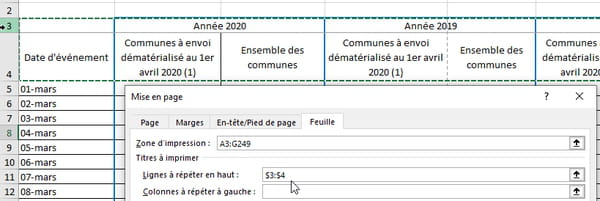
- If you do not want to print all the contents of the spreadsheet, start by specifying the block of cells you are interested in: select this range of cells and, in the tab Layoutclick the icon AreaPrint, Where Print area on Mac, then on To define. You have just defined the print area.
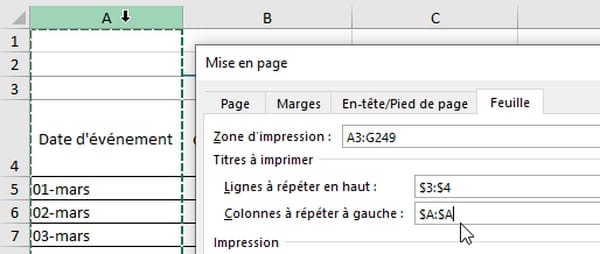
- In the tab Layoutnow click on the icon Print titles. The options of Layout open to tab Leaf.
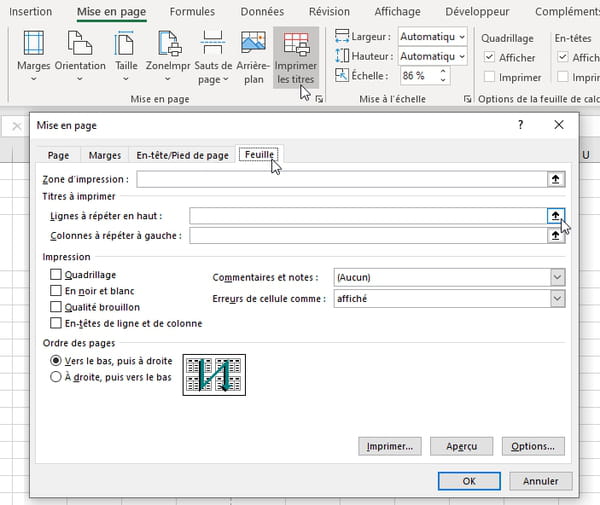
- Click in the area Rows to repeat at top and select in your spreadsheet the rows that will be printed on page 2 and beyond.
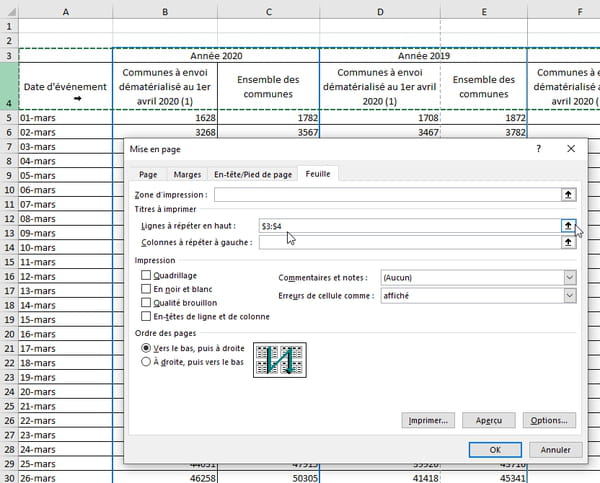
- For example, if you want to repeat the lines 3 and 4click in the area Rows to repeat at topand then in the worksheet, click the line 3hold down the mouse button and drag to the line 4 before releasing the button. In the box fits $3:$4 – you could type this information on the keyboard instead of making the selection with the mouse.
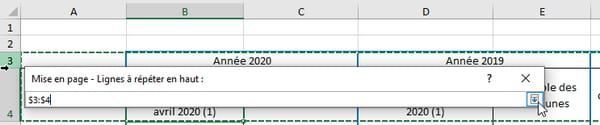
- If the layout options window takes up too much space on the screen, make your life easier by minimizing this window by clicking on the icon (the arrow pointing up) at the very right of the area input Lines to repeat at the top. Click again on the icon to the right of the input box (which has turned into a down arrow), to restore the full options window.
- Also indicate, if necessary, Columns to repeat left on all pages. Click in this input box Columns to repeat left then select the column(s) in your spreadsheet. If you select only one column, for example column A, Excel will note it $A:$A in the input area. If you select columns A through C with a mouse drag, this is the range $A:$C which will be retained.
- In this dialog box, on PC, press the button Insight to see if your settings are correct.

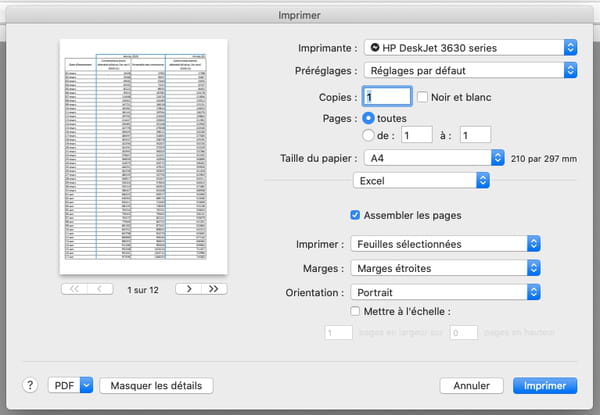
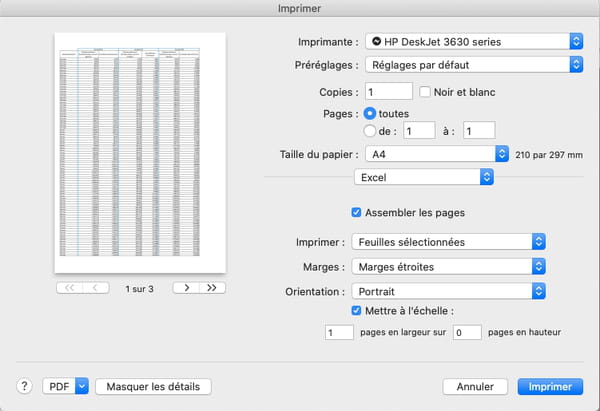
- On Mac and PC, to see the print preview or actually launch the print, you can also click on the menu File and choose To print. On Mac (illustration below), press the button Show/Hide Details to discover all the printing options.
Sometimes it wouldn’t take much to get all the columns of the table to fit in width on a single page while still being readable, printing the hundreds of rows that follow across multiple pages. Here’s how to help Excel (Windows, Mac, Web) adjust Scaling, before printing the spreadsheet or converting it to PDF. You will find that Excel for Windows and Mac offer the same option three times in different forms!
- To fit all the columns on a printed page, you could, of course, reduce the width of certain columns. Or, in the print options, request for example a print in mode Landscape rather than fashion Portrait, this orientation is more suitable for some tables. But that’s not always enough to solve the problem…
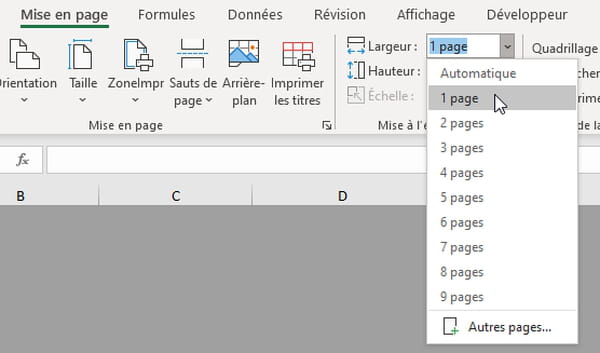
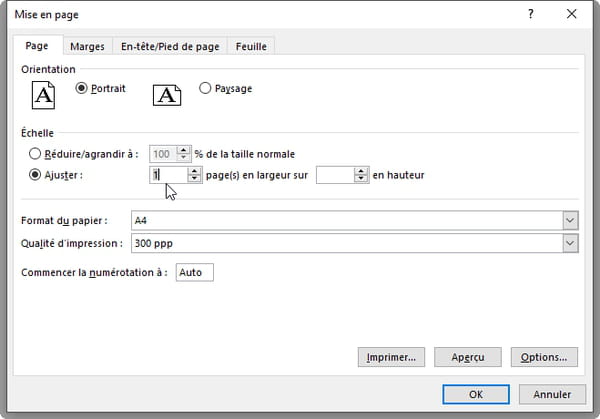
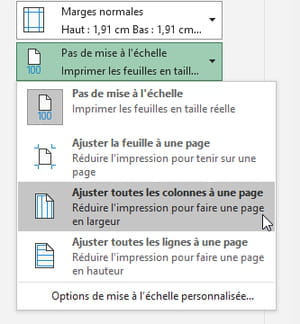
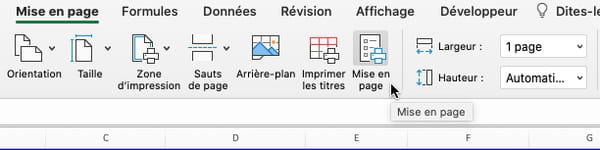
- So you could mostly ask Excel toFit all columns to one page. In Excel Windows/Mac, a first method is to go to the tab Layoutclick on the drop-down list Width and choose 1 page (instead of Automatique).
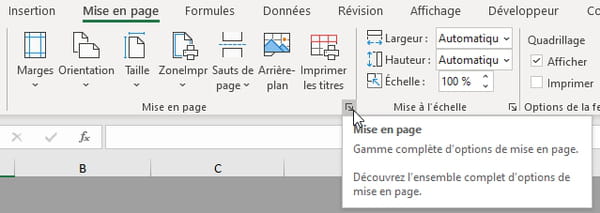
- Second method in Windows: in the options of Layout accessible for example by clicking on the small arrow in the lower right corner of the section…
- … under the tab Pagesection Laddertick To adjust and indicate 1 page(s) wideand leave empty (or at 0) the area in height. Also note that you can Reduce/enlarge the document to be printed by indicating a percentage, but that forces you to do a lot of trial and error.
- Finally, third method in Windows, this scaling is proposed in the final step when you click on File > Print. Select Fit all columns to one page.
- On Mac now. So you have a first method with the drop-down list Width (select value: 1 page) of the tab Layout. In this same ribbon, second method, you can also click on the icon Layout…
- … and under the tab Pagesection Laddertick To adapt to and indicate 1 Pages wideand leave empty (or at 0) the area In height. To change the scale, you could also change the percentage just above in the option Reduce/enlargebut it seems less practical in this case.
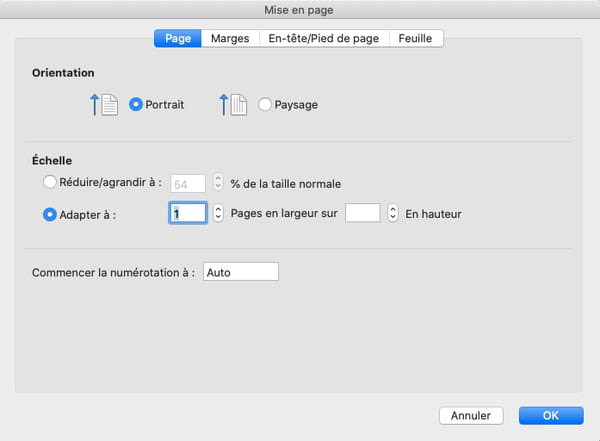
- Third method on Mac: when you are about to print via File > Print > Show Detailstick To scale then indicate 1 page in width and 0 pages in height.
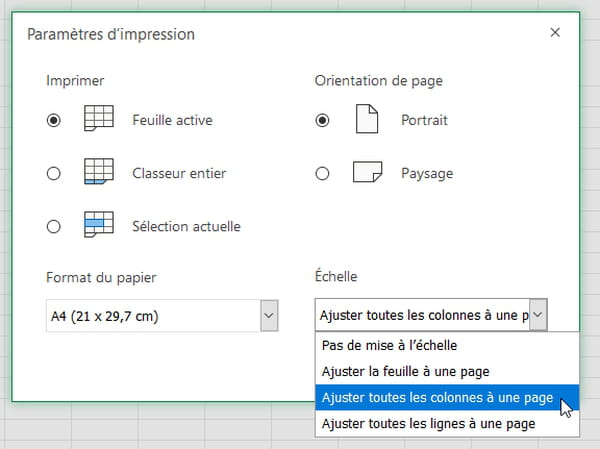
- In Excel for the web (below), there is only one method: click File > Print then, in the drop-down list Ladderchoose Fit all columns to one page.
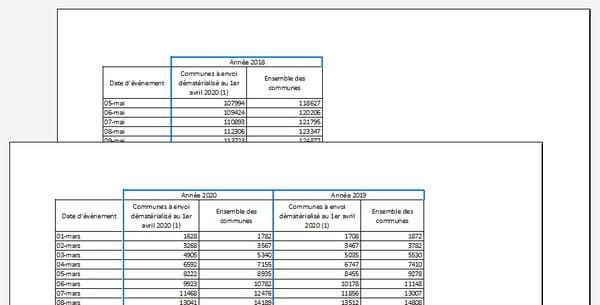
Let’s look at a last case that often arises when printing a large table: this time there are too many columns to remain readable by making them all fit on a single page, so as Excel suggests, it is desirable to make them fit in width on several pages, but the break is not made where it should be.
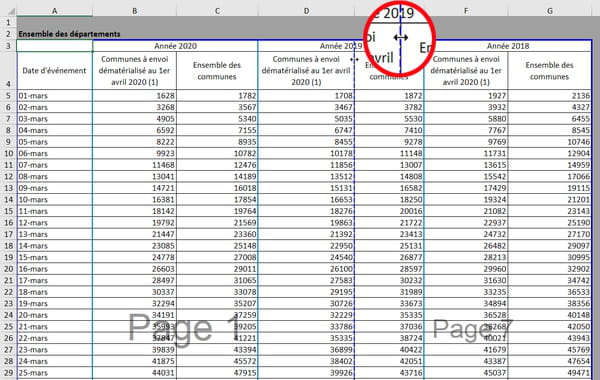
An example ? Below, we see it for 2020, each year has two columns and, alas, those of 2019 are separated by a page break.

Here’s how to move page breaks in Excel for Windows and Mac, before the spreadsheet is printed or exported to PDF.
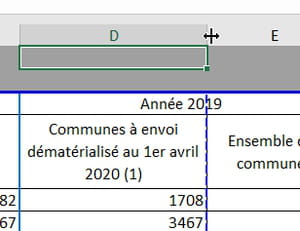
- You can, of course, start by changing the width of a column by dragging its right boundary, which will affect the layout on screen and in print. If that’s not enough, try the following method in Excel for Windows/Mac.…
- In the tab Displayclick the display mode With page breaks rather than fashion Normal.

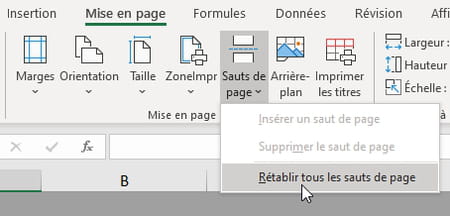
- Excel shows you the pages and numbers them superimposed, with a solid blue frame to represent the full print area, and dashed blue lines to signify a page break calculated by Excel. Position the mouse pointer over a broken page break line and move it to the right to include the next column.
- Excel takes your instructions into account and adapts the printing scale accordingly. Check that moving the page break does not adversely affect the rest of the table. If this is the case, you can move page breaks again or return to the initial situation via the tab Layout > Page Breaks > Reset All Page Breaks.
- Once the settings have been made, print the table or export it to PDF. Don’t forget to return to a display mode Normal on the tab Display. Here is our table with the columns for the years 2020 and 2019 on the same page, and the year 2018 relegated to a single page.
- Excel ignores manual page breaks if you have enabled the option To adjust explained above.
Need to deepen your knowledge of Excel?
Follow our training on CCM Benchmark Institute!
Discover Excel training on CCM Benchmark Institute
To refine the layout, it is also possible to play with the margins of the document to be printed or exported to PDF.
- In Excel for Windows and Mac, click the tab Layoutthen on the icon Marginswhich pulls down a menu of options: click Narrow. If the change is not for you, continue…
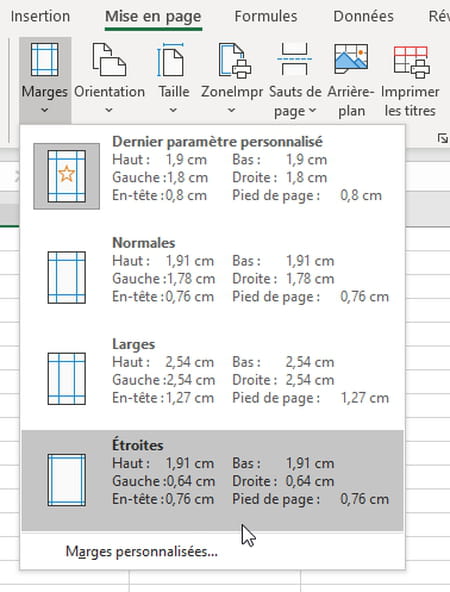
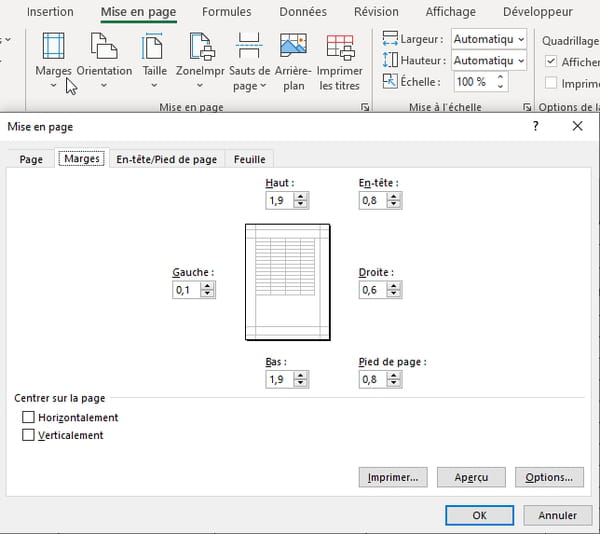
- After clicking on the icon Marginsclick on the last option, Custom margins, to display the options window below. For example, reduce the left and right margins.
- Recent versions of Excel for Windows offer a more visual way to change margins, and even change the width of columns for printing, right in the print window. See you in the menu File > Print. Column margins and boundaries are represented by small black tabs in the control area.

- If these tabs are not visible, click in the lower right corner of the window on the icon Show margins. The icon next to it is for zooming. Grab a tab (of the margin or of a column) and drag it to the left or to the right: Excel shows you in real time the result for printing.
- In Windows, if we transform the Excel sheet into PDF, we found that the command File > Export > PDF did not take margins into account. On the other hand, if you “print” the document by choosing File > Print and choosing for printer Microsoft Print to PDF (this virtual printer driver appeared with Windows 10), the modification of the margins is reflected in the generated PDF file.