Do you suspect a neighbor is using your Wi-Fi network without your knowledge? You can quickly draw up an inventory and check the list of devices connected, currently or previously, in a few seconds.
At home, the management of the Wi-Fi network is generally entrusted to the Internet box. Or, more exactly, to the router it embeds. It is he who organizes the traffic for all devices wishing to benefit from an Internet connection. It manages both wired connections (for computers, televisions, printers or CPL boxes for example) connected with an Ethernet cable as well as wireless connections for smartphones, tablets and other connected devices such as lamps, watches or voice assistants for example. To do this, it uses two data. First, it locates the MAC address of each device. This unique identifier consists of twelve hexadecimal characters and serves as an identity card for any device with a network connection. Then, it assigns each of the devices authorized to connect with the password of your Wi-Fi network, a private IP address of its own (it may, however, vary over time).
By knowing these two pieces of information, the MAC address and the private IP address of the devices you use at home, you too can identify all those who are or have been connected to your Wi-Fi network. an unscrupulous neighbor or a hacker who, having unearthed your network password, would profit from your connection without your knowledge. To know this data, read our practical sheets Finding the MAC address of a computer or a connected device and What is the difference between public IP and local IP? Armed with these two pieces of information, you can easily spot machines that do not belong to you. And to draw up a complete map of your network, several tools are at your disposal. Starting with your box. It is indeed your best informant since it is she who manages all the connections. You can also use a specialized utility that will simply analyze your network. Free and available on both PCs and Macs, these tools allow you to do away with navigation that is not always easy in the various menus of the Internet box.
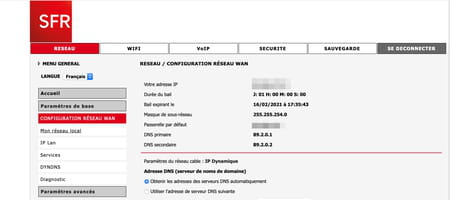
The box of your Internet service provider (ISP) is a real miniature and specialized computer that manages both the Internet connection – whether it is ADSL, fiber optic, cable or even 4G – and traffic on your local network, both wired and Wi-Fi. It therefore has an operating system that can be accessed from a simple web browser. Then all you have to do is find the right menu to enjoy a general view of the network. For the example, we are using an SFR box here, but you can do the same with other boxes, by browsing the menus.
- Once identified on the box administration page, search for the appropriate menu. He is named My local network on SFR boxes, My connected equipment on Orange Liveboxes, Diagram of my network on Bouygues BBoxes or Network Peripherals on the Freeboxes of Free.
- Depending on the ISP boxes, you should see a diagram showing the structure of your local network. The devices connected by Ethernet and Wi-Fi are represented there. Your box can even manage (thanks to the first digits of the MAC address of each device) to identify certain devices by their name. It is therefore easier to take inventory.
- If MAC addresses are displayed but are not associated with IP addresses, the devices to which they were assigned are not currently connected.
- Now all you have to do is compare the IP addresses and MAC addresses identified by your box with those of your own devices to find a possible intruder.
On Windows, there are many utilities to analyze or “sniff” your local network in order to find the devices connected to it. WireShark is one of the best known but also of the most complex and which requires some network skills to be tamed. Others, more summary like Angry IP Scanner Where Wireless Network Scanner sometimes struggle to identify online equipment. For our part, we have retained Advanced IP Scanner. Free, it adopts a clear interface in French and provides a faithful overview of your network.
- Start by repatriating Advanced IP Scanner to your PC. It is available in two versions: one to install, the other, portable, which does not require any installation and can be launched directly.
Download Advanced IP Scanner for Windows
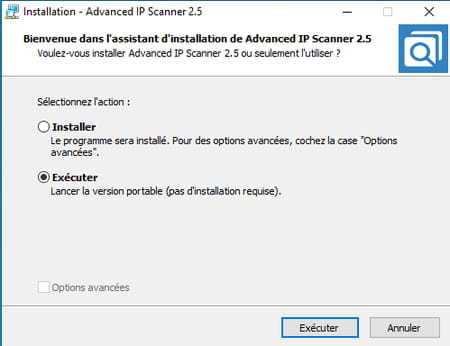
- Open the downloaded file then tick the box corresponding to your choice to to install the software or just theexecute. We have chosen the second option.
- The tool displays a blank window. In the field under the green button Analyze, enter the range of IP addresses to scan. Your local network should normally assign addresses ranging from 192.168.0.0 to 192.168.0.254. Check this information by reading the private IP address of your PC. To achieve this, read our practical sheet Finding the local IP address of a computer or mobile.

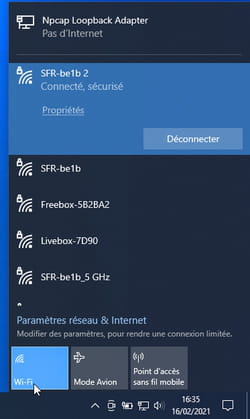
- If your PC is connected to the network with an Ethernet cable, check that the Wi-Fi connection is also activated. To do this, click on the icon Network at the bottom right of the Windows taskbar. The Wi-Fi icon should be on.
- Finally click on the green button Analyze. Advanced IP Scanner then sends requests to each IP address within the range specified above. It then retrieves the responses to identify the connected equipment.
- At the end of the analysis, the software lists all the connected devices. Thanks to the first digits of each device’s MAC address, it can even identify certain devices by name. It is therefore easier to take inventory.
- Now all you have to do is compare the IP addresses and MAC addresses identified by Advanced IP Scanner with those of your own devices to find a possible intruder.
Few free software is available on the Mac to efficiently and explicitly draw up an inventory of machines connected to the Wi-Fi network. Angry IP Scanner did not convince us (he did not manage to identify the devices yet online). On the other hand LanScan provides better results. Even though the free version of the software hides some information (like full device names), it already makes it easy to identify connected devices.
- First, get LanScan. The app is available on the Mac App Store.
- Install LanScan and then launch it (you will need to enter your administrator password). As soon as it is opened, LanScan displays the IP address of the Mac on which it is installed as well as its MAC address.
- If your Mac is connected to the network with an Ethernet cable, make sure the Wi-Fi connection is turned on as well. To do this, click on the icon Wireless at the top right of the macOS menu bar and choose Activate Wi-Fi if applicable.

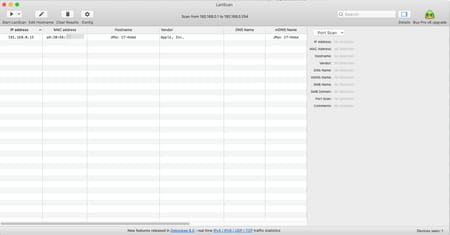
- In the LanScan window, now click on the icon Start LanScan on the top corner left. Network scan starts.
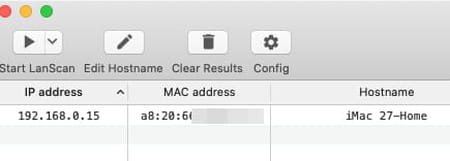
- After a few seconds, LanScan displays a list of all the devices currently connected to your network. Thanks to the first digits of the MAC address of each device, it even presents part of the name of certain identified peripherals (to obtain the full name, it is necessary to acquire the paid version of the software invoiced, 6.99 €). But it is already sufficient to draw up an inventory.
- Now all you have to do is compare the IP addresses and MAC addresses found by LanScan with those of your own devices to find a possible intruder.
