Do you need to lend your Android smartphone or tablet but without being able to access all of its content? Add a guest account for temporary use or a new user account for recurring use.
On Windows as on macOS, it is possible to define several user accounts so that each member of the family who uses the computer can create their own environment and access their own data. Convenient to maintain some confidentiality regarding the files hosted in each session. The same approach is also possible on Android. You can thus create several user accounts on a smartphone or tablet. A solution that you can put in place, for example, when it comes to lending the device to a child during a long journey. He will thus be able to access his own environment with his games and the apps he uses without going to snoop around in your photos or your messages. Be careful though. This feature is not available on all Android devices. We were able to set it up on a Google Pixel 6 Pro (Android 12), a Samsung Galaxy Tab S5E tablet (Android 11) and even a Google Nexus 6P from 2015 (Android 8) while it is absent on a Samsung Galaxy Note 10+ (Android 12), a Xiaomi Redmi 9 (Android 11) or an Honor 10 Lite (Android 10). Also, keep in mind that using multiple accounts can impact device performance. Adding accounts uses additional storage space, especially if each user installs their own apps.
You have two options for adding a user account on Android. You can opt for a Guest account, to activate when you want to temporarily lend your smartphone to a relative or friend without them being able to access your personal data, or choose to create a full user account. In this case, you will have to configure the account on the device just as you did the first time you turned on your mobile when you took it out of its box.
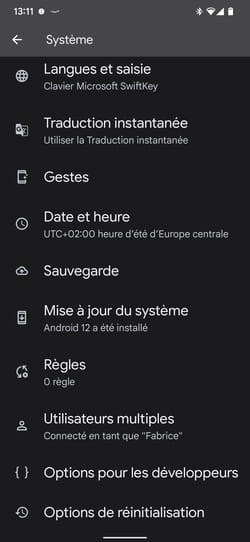
► Go to Android settings. Look for the menu System and press it. If it is a Samsung tablet, choose Accounts and Backup.
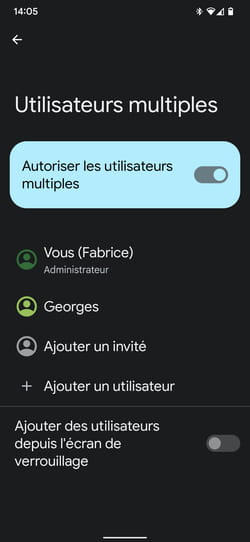
► Then press Multiple users. At Samsung, press Users.
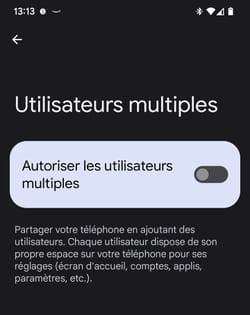
► Toggle the switch Allow multiple users in active position.
Add guest
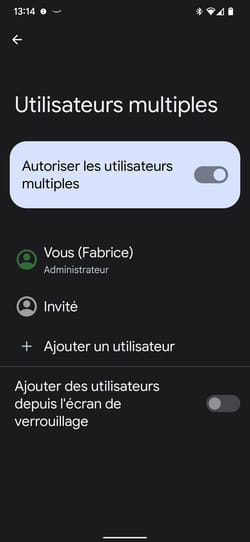
► You now have the option toadd user Guest. Tap this option.
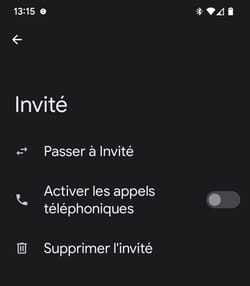
► Here you can allow the guest to use the phone app or not. If so, past call history will be shared with your account. In other words, the guest will also have access to your call history. The Guest session is instantly created. To use it immediately, press Switch to guest.
► A new session then opens and gives access to the basic applications supplied with Android: Gmail, YouTube, Telephone, SMS, Chrome, etc.
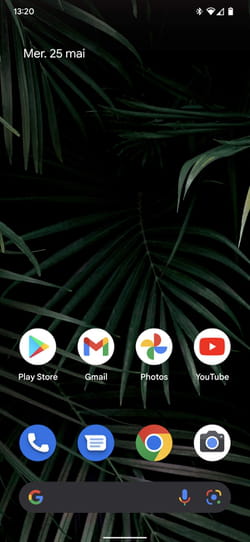
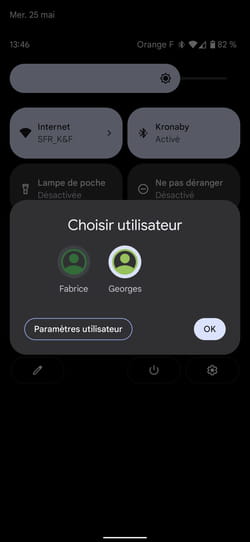
► To close the Guest session, pull down the notification panel then press the icon in the shape of aavatar.
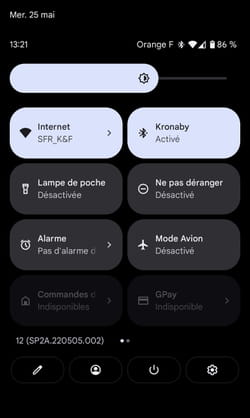
► Then press the name of the original account (yours) to access your user account again. You can also delete the Guest account if it is no longer needed so that it does not occupy unnecessary space on the smartphone.
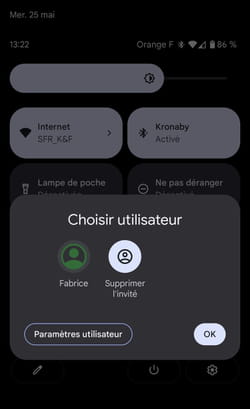
Add user account
► Press + Add user.
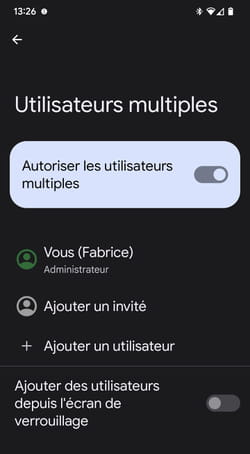
► Google tells you the consequences of adding a new user on Android. Press on okay.
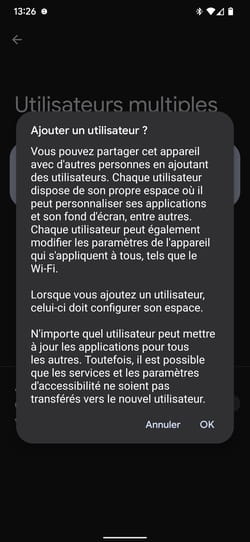
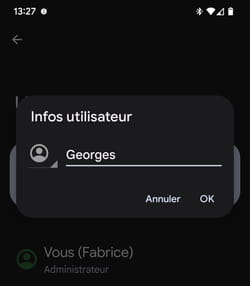
► Now enter a name for this user account and validate.
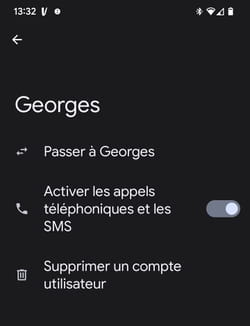
► The new account is instantly created. You can authorize or not this new user to use the phone and SMS application. If so, the history of calls made and SMS sent will be shared with your account. But it goes both ways. As strange as it may seem, the second user account will not only have access to your call history but also to your SMS history. So be careful.

► To immediately use this new account, press Will pass followed by the name of the chosen account.
► You will now have to configure this new user account on the smartphone. You will therefore be asked, as if you were setting up the device for the first time, to enter all the necessary information (name, Gmail address, etc.). Press on Configure.

► Google also informs you that you retain control of the device. You will be able to delete apps installed by the new user or delete this account completely. Press on Continue.
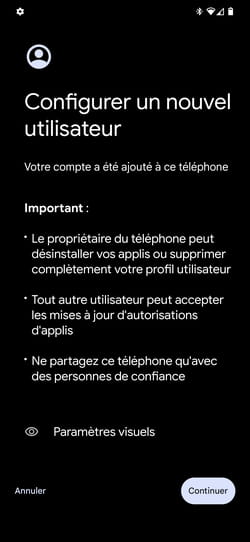
► The configuration starts as if it were a smartphone straight out of the box.

► You must then define the Google identifiers of this new account, indicate an unlock PIN code, etc.

► To switch back to your account, pull down the notification panel then press the icon in the form of aavatar. Then press the name of the original account (yours) to access your user account again.
Don’t need that user account you created on your Android device anymore? You can of course delete it.
► Access the user profile account management page again from Android settings. Tap the user account you want to delete.
► In the new page that appears, tap Delete a user account.

► Confirm your choice by pressing To delete. All the apps he may have installed and the data he saved on your smartphone are deleted.

