Present since the beginnings of Windows, the Start menu has undergone many transformations during the evolution of the system. Less flexible than before, it can however still adapt a little to your desires.
Handy and customizable at will in Windows XP and Windows 7, the Start menu since Windows 8 offers much less flexibility to those who like to tweak their system so that it bends to their needs. Imposing with its large side panel filled with tiles corresponding to installed applications or shortcuts, it can still be modified … if you know where to look.
Because Microsoft has not simplified the task. The options for adding a personal touch to this menu are indeed quite scattered. Some are accessible directly from the Start menu while others fall into various categories of system settings. And to make matters worse, Microsoft is scrambling the waters, sometimes talking about the home screen… Not easy to navigate, especially since the possibilities for customization are rather limited. While waiting for the arrival of Windows 11 – code name, Sun Valley – scheduled for the end of 2021, which promises profound changes, especially in the Start menu, here is what you can customize in Windows 10.
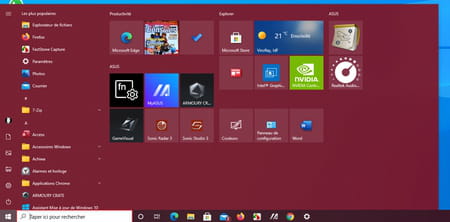
Appeared with Windows 8 / 8.1, the tiles pane of the Start menu brings together shortcuts to applications. You can change its content and appearance. But no offense to those who don’t like it, it is impossible to hide or deactivate it.
Change the size of the pane
- Click on the start menu to display the tiles pane. Place the mouse pointer over the right or top edge of the pane. It turns into double arrows. Click and drag to resize the pane to the size you want. The minimum width corresponds to that of the left pane displaying the list of programs.
Add or remove tiles
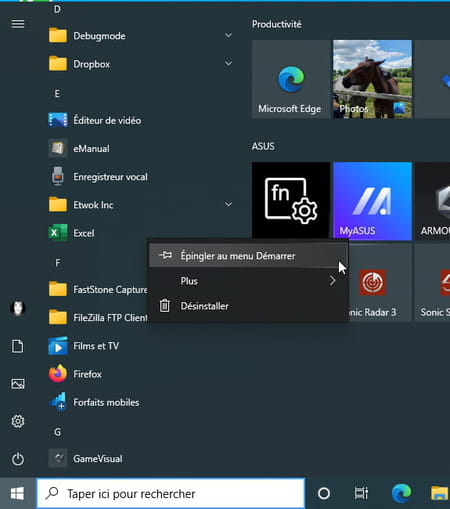
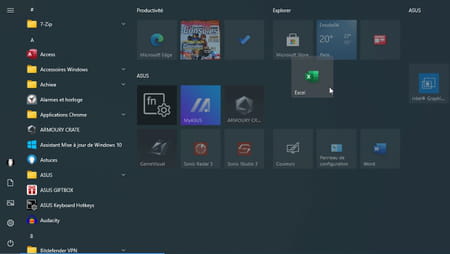
- You can complete the list of tiles present with new ones corresponding to applications that you use frequently. To add a shortcut to the Start menu tile pane, right-click the name of the program shown in the left pane. In the menu that opens, choose Pin to Start menu. A new tile with the icon and the name of the program takes place immediately in the right pane.
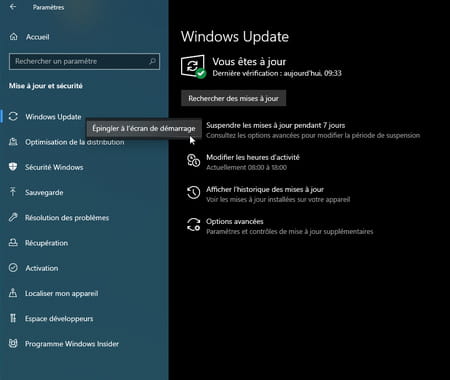
- You can also pin shortcuts corresponding to system settings. Convenient, for example, to quickly access network settings, Windows Update or activate or deactivate Windows Dark mode. To do this, go to Settings Windows by pressing the shortcut Win + I. Choose the setting you want, then the setting you want to access quickly. Right-click on her name and choose Pin to home screen.
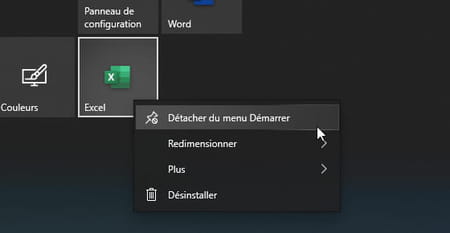
- To remove a tile from the right pane of the Start menu, right-click on it and choose Detach from Start menu.
Arrange the tiles
- The tiles distributed in the right pane of the Start menu are not frozen. You can move them around at your leisure. Click on one of them and keep the mouse button pressed. Move the tile where you want and release the button.
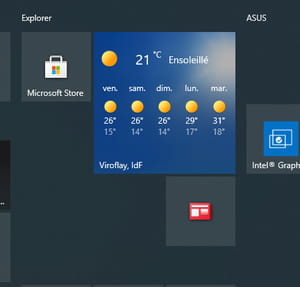
- The tiles can also be resized. Depending on their category, they can adopt a larger or smaller size. The Weather tile, for example, has four different formats while a tile for a program shortcut has only two. Right-click on the desired tile, choose Resize, then select the desired size.
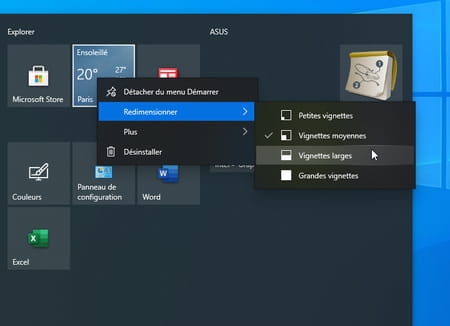
- The new size applies immediately.
Windows offers few customization possibilities for the left part of the Start menu. However, you can modify certain attributes.
Edit the list of shortcuts
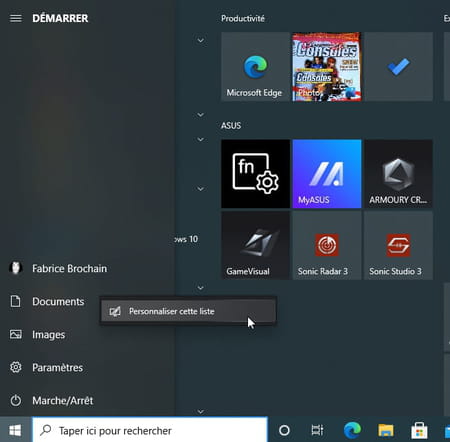
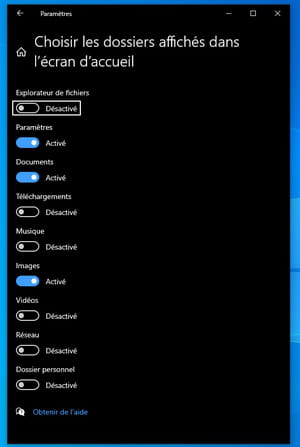
- At the bottom left of the applications listed in the Start menu, there are shortcuts to folders Documents and Pictures, towards the Settings and the menu On Off. You can modify the list of shortcuts to the folders present. Hover the mouse pointer over file icon until the five default shortcuts appear. Right-click on any of them (any), then click Customize this list.
- A settings window appears. Turn on or off the switches corresponding to the items you want or not to see in the Start menu.
Manage the display of applications
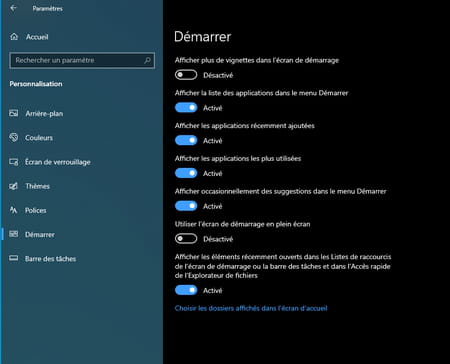
- The list of applications displayed in the left pane of the Start menu can be customized. Access to Settings Windows 10 by pressing the shortcut Win + I. Click on Customization.

- In the window that appears, click To start up in the left pane. You can now activate or not the various switches offered to modify the display of applications. They are immediately effective so that you can appreciate the result.
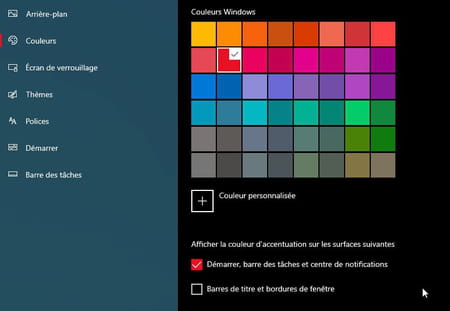
Windows offers a few options to make the Start menu a little more cheerful by applying a color of your choice to it. Be careful though, because this change also changes the taskbar and the Notification Center.
- Access to Settings Windows 10 by pressing the shortcut Win + I. Click on Customization.
- In the window that appears, click Colors. Scroll down the contents of the window. Choose a color you like from the color chart or click on + Custom color to define a color yourself using a color wheel.
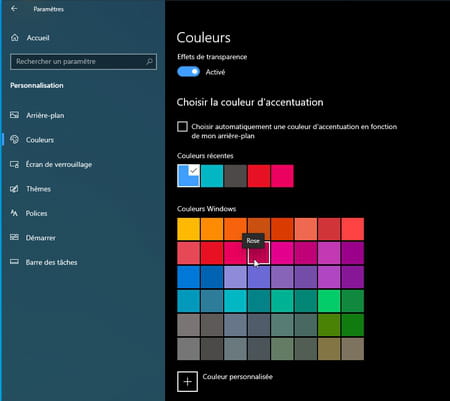
- Now check the option Start, taskbar and action center.
- The chosen color is immediately applied.