By default, Windows Documents, Pictures, Music, Videos, and Downloads folders are on your PC’s system drive. But you can perfectly move them to another disk or another partition…
Windows User Libraries, including the Quick Access panel in Explorer, are the Documents, Pictures, Music, Videos, and Downloads folders associated with each PC user. The system uses them to store all files you create or retrieve on your computer by default. And, again by default, these folders are located on the system disk, ie the hard disk or SSD on which Windows is installed (most often, C:). But if it seems simple and natural, this location is not always the most judicious. And it can be a problem when the system disk starts to fill up or when you have to completely reformat it to completely and cleanly reinstall Windows.
Fortunately, it is quite possible to move these files to put them on another hard drive or SSD, on another partition, or even on an external drive or a network drive, provided that it is still accessible. The operation is very simple, whether under Windows 10 or Windows 11. And it is even reversible, if you change your mind. The first advantage is that it frees up space on the system disk – useful for those who download a lot of large files, such as videos. Second advantage: if Windows crashes and you have to reinstall it, there is nothing to worry about for personal files, since all downloads, documents, images, videos and music are well protected in another site.
A few clicks are all it takes to move your user libraries to another location. Whether you use Windows 10 or 11, the manipulations are strictly identical.
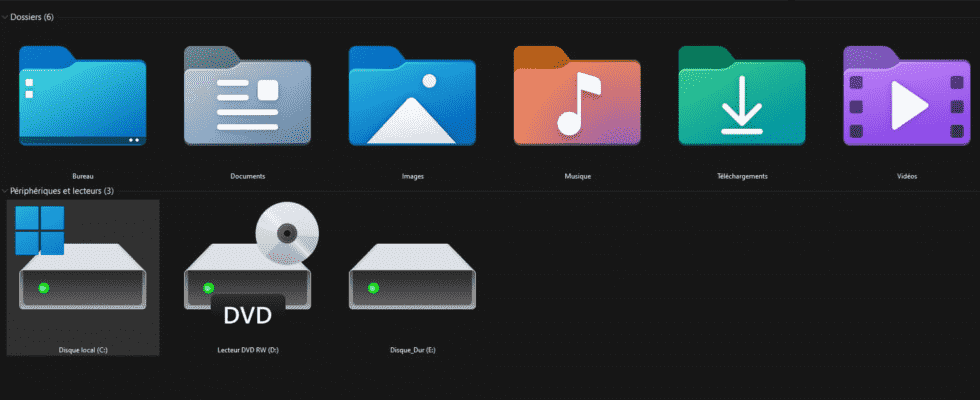
► Open Windows File Explorer. Open the disk that will host the library you want to move. Create a new folder there. To do this, right-click and choose New > Case. Give this folder the same name as your current Library (Pictures in our example).
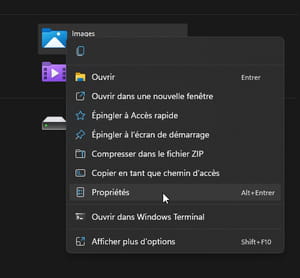
► In File Explorer, locate the user library you want to move. Right-click on its name. From the context menu that expands, choose Properties.
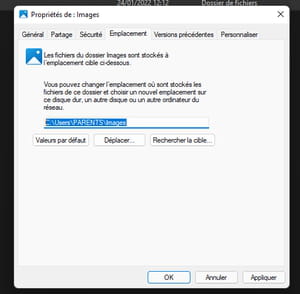
► The folder properties window appears. Click on the tab Site.
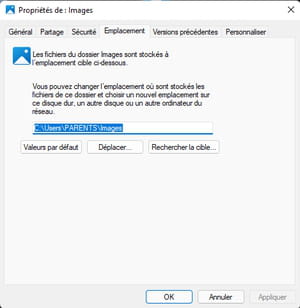
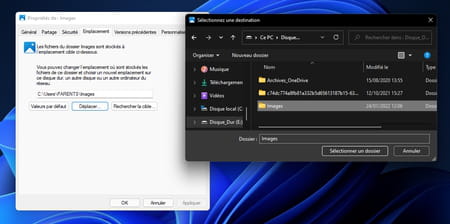
► Click the button To move. In the new window that opens, now select the folder you created earlier.
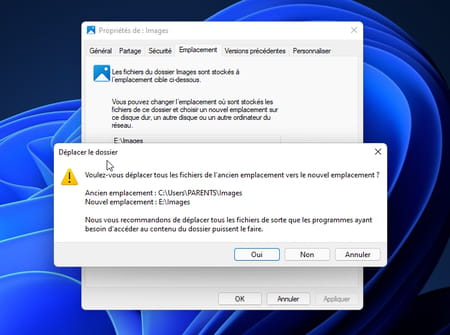
► Back in the folder properties window, click on the button Apply. A dialog box pops up. It informs you of the operation that you are about to validate. Click on Yes. Then close the properties window by clicking on okay.
► Your user library (and everything in it) is now moved to the new chosen location. All you have to do is do the same with the other libraries if necessary. Note that the default shortcuts in File Explorer have been updated automatically to reflect this new location.
The new location of your user libraries does not suit you or Windows encounters some malfunctions with this new setting? You can of course go back.
► The method to set the original location is relatively the same as described above. All you have to do is create a folder with the same name as the library to be moved to the right location. To do this, open Windows File Explorer and then open the folder This PC > Local disk (C:) > Users > Your username. Right-click and choose New > Case. Give it the name of your library.
► Then repeat the manipulations described above to restore the original configuration.