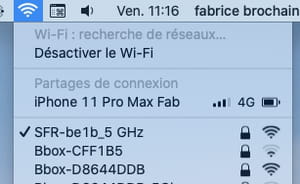
At home, with friends, in a hotel, a train station, a train, an airport… there are plenty of opportunities to want to connect your computer to a Wi-Fi network. The simplest operation with Windows 10 like macOS.
PC or Mac, fixed or portable, all computers can join a Wi-Fi network to enjoy an Internet connection or exchange files through a local network without having to worry about wires. It is still necessary to connect to this network precisely. Today, both Windows and macOS handle this operation without the slightest difficulty, all the necessary functions having been integrated as standard in operating systems for years. On your side, you just have to check that your computer has the necessary Wi-Fi module to communicate wirelessly. If necessary, you will need to invest in a USB-Wi-Fi key or a PCIe-Wi-FI card. Ditto if said module has died. It is also the opportunity to enjoy a more efficient and faster Wi-Fi connection by equipping yourself with a module compatible with a more recent standard, such as Wi-Fi 5 (802.11ac standard) or Wi-Fi 6 ( standard 808.11 ax).
A few things that are always good to know about Wi-Fi. First, Wi-Fi does not mean Internet. Wi-Fi is only used to connect to a local network without having to go through cables of the Ethernet type. If the local network is not connected to the Internet via a modem or a box, you can be connected to the network but not be able to access the Internet. Then, Wi-Fi is a “local” technology. Beyond a few tens of meters from an access point – the distance varies depending on the obstacles – you cannot connect to a Wi-Fi network. Finally, if you find that your wireless network at home is showing a bit weak, read our practical sheet Optimizing a Wi-Fi network. You can improve its performance to enjoy a smooth, stable and always wireless connection throughout your home!
If the question does not arise for Macs equipped for a long time with a Wi-Fi module, whatever the model (fixed or portable), the configuration of the PCs can vary greatly. Portable models inevitably accommodate a Wi-Fi module, but it is not necessarily present on stationary PCs such as tower or desktop. A little check is required.
- Right-click the button To start up Windows 10. In the menu that opens, choose Device Manager.
- The window that appears shows all the peripherals – internal as well as external – connected to your PC. Locate the line Network cards and click on it. The various listed list all the network components of your PC. Locate among them the presence of a Wi-Fi module. It bears the mention Wireless (wireless in English).
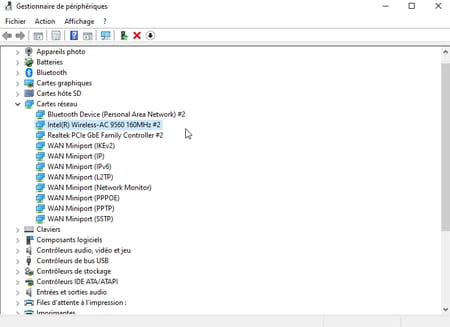
- If no mention Wireless is present, it means that your computer does not embed the appropriate module. But you can perfectly equip it with a Wi-Fi module. USB-Wi-Fi keys (also sold under the name “Wi-Fi adapter” or “Wi-Fi dongle) can be found today at online merchants. -Fi “) to be plugged directly into one of the available USB ports on your PC. It will cost you less than twenty euros for a model offering Wi-Fi 5 (or AC), the most common standard currently. Just make sure to plug this key into a USB 3 port on the PC if possible in order to enjoy a comfortable flow.
- If you have a stationary PC in tower or desktop format, you can also install a Wi-Fi network card on one of the PCI-Express slots available in the machine. You will need to open the computer case to install this type of card, which most of the time has one or two external antennas in order to better capture the Wi-Fi network of the house. These cards have two advantages: first, they do not monopolize a USB port on the machine; then, they are often accompanied by a Bluetooth module to connect wireless devices such as headphones, speakers, etc. It will cost you less than forty euros for a good quality W-Fi AC card.
Your Wi-Fi module is present or connected to the PC but it may still be on standby. Here’s how to activate it.
On pc
- At the far right of the taskbar, click icon globe shaped or, if your computer is connected to the network with an Ethernet cable, on computer icon with cable on the left side. Three tiles are displayed along with the type of connection currently in use.
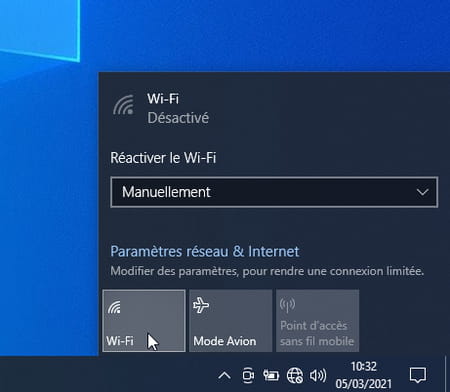
- Click on the first tile bearing the mention Wireless to activate the module. It must change color. The Wi-Fi module is now active.
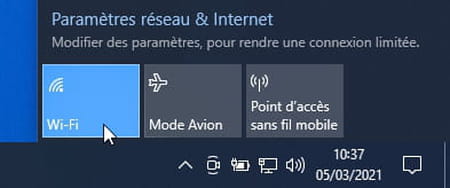
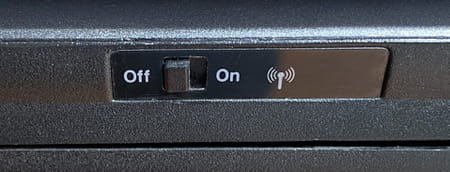
- Note, on some older laptops, Wi-Fi is activated using a physical button nested on one of the edges of the PC. If so, check that the switch is in the active position.
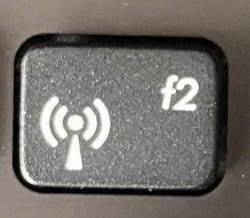
- It can also be a keyboard key with the Wi-Fi symbol or an antenna. Press it at the same time as the button. Fn on the keypad to activate Wi-Fi.
On Mac
- Among the icons in the menu bar (top right, near the clock) click on the one representing a triangle with a rounded side and pointing down. In the menu that opens, choose Activate Wi-Fi.

- The menu closes and the Mac searches for available nearby Wi-Fi networks. The icon now sports the well-known Wi-Fi symbol and activates.

With Wi-Fi now activated, all that remains is to connect the computer to the wireless network.
- At the far right of the taskbar, click on the icon with now the Wi-Fi logo or, if your computer is connected to the network with an Ethernet cable, on computer icon with cable on the left side. The list of surrounding Wi-Fi networks is displayed.
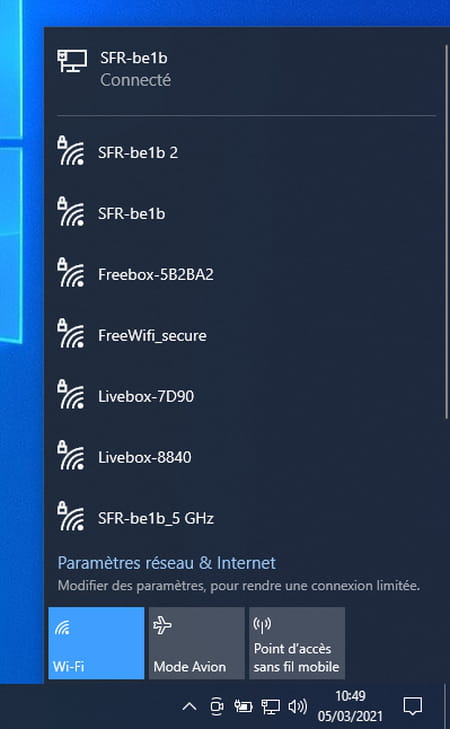
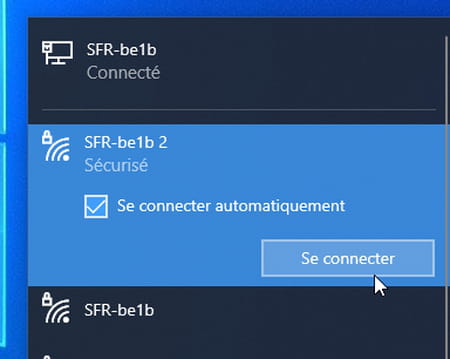
- Click on the Wi-Fi network name you want to connect to. Then click on the button To log in. You can leave the box checked Automatically connect so that Windows always connects to this network when it is available.
- A dialog box appears. You must enter the password linked to this Wi-Fi network. Enter it in the field Enter the network security key and validate with a click on Following.
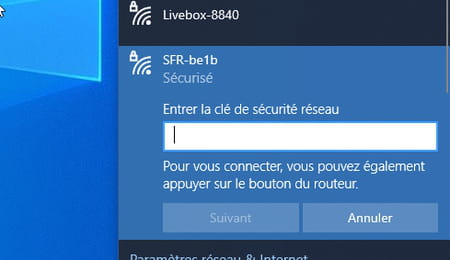
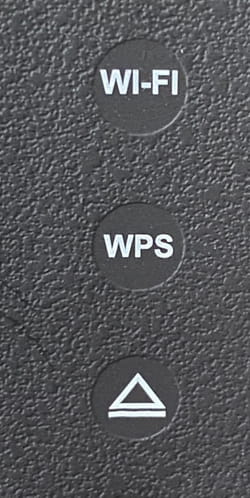
- Please note, some boxes use the WPS function (for Wi-Fi Protected Setup or Wi-Fi protected start-up). This is a push button present on the box. It must be in a hurry when connecting a new device (PC, Mac, smartphone, tablet, etc.) to the Wi-Fi network. Its presence prevents an intruder from connecting from outside to your wireless network without your authorisation.
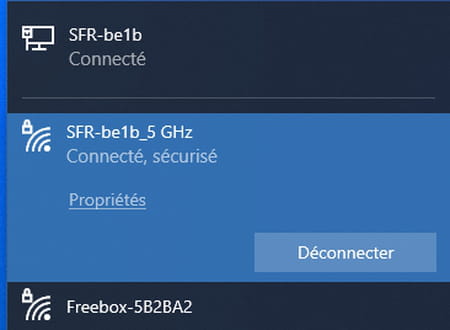
- After a few seconds, your box router assigns an IP address to your PC. It is now connected to the wireless network.
On Mac, all operations to join a Wi-Fi network are done from the Finder, and more particularly the menu bar of macOS.
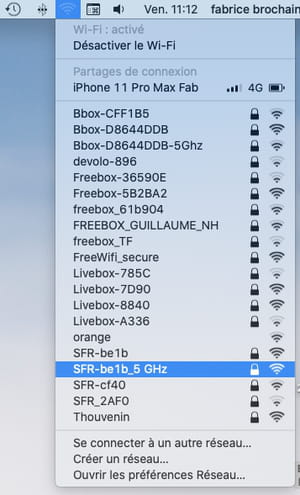
- Click on thewi-fi icon in the menu bar The list of available Wi-Fi networks is displayed. Click on the name of the wireless network you want to connect to.
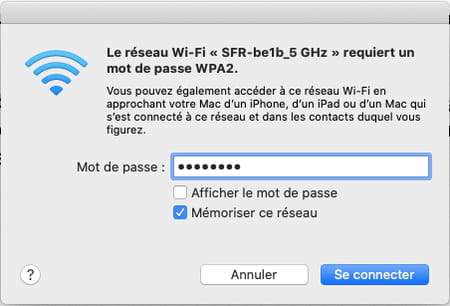
- A dialog box appears. You must enter the password linked to this Wi-Fi network. Enter it in the field Password. You can leave the box checked Remember this network so that you don’t have to grab the sesame every time you connect to it. Confirm with a click on To log in.
- Please note, some boxes use the WPS function (for Wi-Fi Protected Setup or protected activation of Wi-Fi). This is a push button present on the box. It must be in a hurry when connecting a new device (PC, Mac, smartphone, tablet, etc.) to the Wi-Fi network. Its presence prevents an intruder from connecting from outside to your wireless network without your authorisation.

- After a few seconds, your box router assigns an IP address to your Mac. It is now connected to the wireless network as indicated by the check mark to the left of the network name.
