
If you stay in the Mac world, it is in your best interest to use the APFS file system to format your disks and USB keys, because this format offers many advantages over the classic Mac OS Extended.
You have just purchased an external storage device (hard drive, SSD, USB key, etc.) to copy files or keep archives. You plug it into the Mac and, there, hell: macOS tells you that you can’t write on it! Do not panic: this does not mean that the support is damaged – it is so rare! –, but quite simply that it is not “formatted” for your Mac. More precisely, that it does not use the “file system” of the Mac. This is very often the case with commercial USB keys or external drives, which are, in their vast majority, designed to operate on a PC under Windows – normally, they are the most numerous, by far.
Of course it is possible to prepare your USB key or your external disk to use it on your Mac. This is called formatting. Please note that this operation completely resets the storage device, whether external (USB) or internal (the one inside your Mac). In other words, it completely erases the data (files, folders) stored there. For a USB key that you just bought, this is not a problem. But it is an important concept that must be kept in mind for the following times, since you can perform this formatting as many times as you want, to pass the key or the external disk from the PC to the Mac or vice versa.
Which file system to choose on Mac?
Formatting a storage device (disk or USB key) means preparing it to receive data, a bit like installing shelves in a cupboard, ready to receive boxes (folders) and sheets (files). ). It can also be partitioned to divide it into several independent storage spaces, as if adding a door to the wardrobe.
When formatting, you have to choose a file system, that is, an organization of the medium. There are several (FAT, HFS+, NTFS, exFAT, etc.) and each operating system – Windows, macOS, Linux – has its preferences in this area (to find out more on the subject, consult our practical sheet Choose a file system for formatting). Note that in practice, we gladly use the word “format” for “file system” – clearer and more concise.
The choice of format is very important because it determines how you can use your storage medium. Thus, PCs and Macs are still able to read and write to hard drives using the – very – aging FAT32 file system inherited from MS-DOS. Since the mid-1990s, PCs have used NTFS, which Macs can only read but not modify. This explains the case mentioned above of certain external drives and keys purchased commercially and which are formatted in NTFS by default. A PC is unable to read a key formatted for Mac, whatever the chosen format Mac OS extended or APFS (see later).
For many years, it was the HFS system (dating from 1985), then its successor the HFS+ or extended Mac OS (in 1998) which were used. Since the end of 2017 and the introduction of macOS High Sierra (version 10.13), the new APFS file system has been used by default on all Macs (and incidentally on all iOS devices, but that’s another story ). As with PCs, each new file system version brings its share of improvements and new features. And this is of course the case of the APFS which greatly influences the notion of formatting a disk or a USB key. Please note that macOS versions 10.11 (El Capitan) and earlier are unable to read disks and keys formatted in APFS. In other words, if you want to use a USB flash drive on a slightly older Mac, don’t forget to format it in Mac OS Extended (see later).
macOS has a standard tool for formatting and partitioning storage media: it is macOS Disk Utility, which we will detail below. Better still, it allows you to modify the size of existing partitions, for example to make room and create a new partition, but also to delete a partition – be careful, all the files it contains are then irretrievably lost – to then enlarge the remaining partition so that it takes up all available space.
What are the advantages of the APFS format?
Appeared recently, with macOS High Sierra (10.13), Apple’s APFS format adds two notions to that of partition: the container and the volume. An APFS partition can unite several containers, which themselves can be divided into several volumes. This system has several surprising advantages.
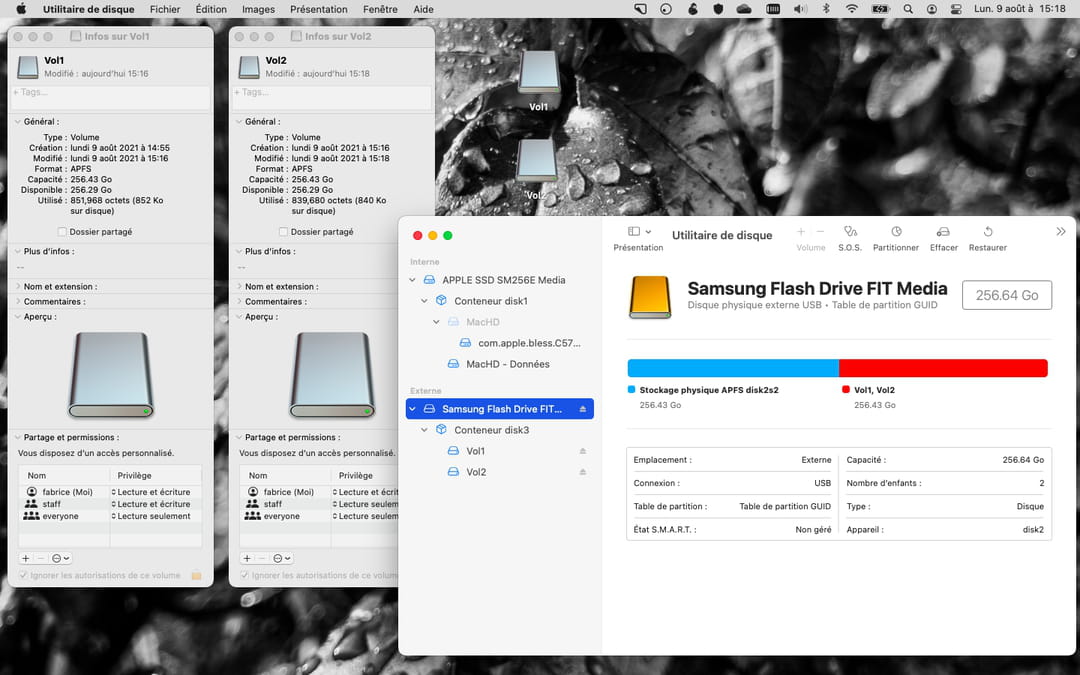
- Unlike a partition, there is no need to allocate a specific storage space when creating a volume. All volumes in a container have the potential to occupy all of the container’s storage space. This is easily verified. On our 256 GB key, the two volumes have a maximum capacity of 256 GB each. Whereas if we had created two equal partitions, each would be limited to a maximum of 128 GB. Amazing, right?

- That said, the physical limit of the USB key or disk remains of course unsurpassable. In other words, if the files contained in one volume already occupy 100 GB on a 256 GB key, the second volume naturally cannot store more than 156 GB. But if you erase 20 GB on the first volume, then you will be able to store up to ‘to 176 GB on the second, without further ado. Whereas with the partition system, you would have to go through Disk Utility to change the sizes of the two partitions.
- Volumes can be independently hidden and/or write-protected. This is the case of the macOS system volume, the one most often called MacintoshHD. This is one of the means used by the system to protect itself from attacks.
- Volumes can be grouped together to appear as a single volume in the Finder. This is the case of your MacintoshHD which actually includes a second volume named Macintosh – Data and which contains, you guessed it, all your files. But which are therefore independent of the protected system volume.

- APFS is more adept than the Mac OS Extended format at managing storage space and maintaining its integrity. Its cloning system allows it to “physically” keep only one version of a file, even if you duplicate it so that it appears in two different folders.
- APFS includes a system of instantaneous copies, snapshots, allowing it to go back in the event of a problem. This technique is used in particular by Time Machine, the backup function integrated into Mac OS (read our article on the subject).
- APFS is also more resistant to possible crashes of your Mac even during a data writing phase. Unlike the Mac OS Extended file system, APFS does not directly replace a file with its new version (like when you save a modified version of a text file). It first writes the complete new file, before erasing the one it replaces.
On Mac, all operations concerning the management of storage media – internal or external – are carried out with the Disk Utility of macOS. No matter which version of the system you are using, this application is always in the same place. But you can reach it in several ways.
- Open the folder Apps of your Mac, then the subfolder Utilities. And double-click the icondisk utilityrepresenting a stethoscope auscultating a hard disk.

- Simultaneously press the keys Command (⌘) and Space for throwing spotlight. In the search box that appears, type disk utility and click the application name. You can also select it with the keyboard arrow keys and launch the app with the key Hall.

- The window of thedisk utility appears.
- To be sure to see all the information of the storage spaces attached to your Mac, whether internal or connected via USB, pull down the menu Presentation and make sure the option Show all devices is well checked.

- Notice then that the left column of the windowdisk utility displays the list of devices physically attached to your Mac. Click on the small arrow to the left of their name to display the sheet music, containers and volumes of each of them (see above to understand all these notions).
MacOS Disk Utility is where you can choose the format of a USB flash drive or disk.
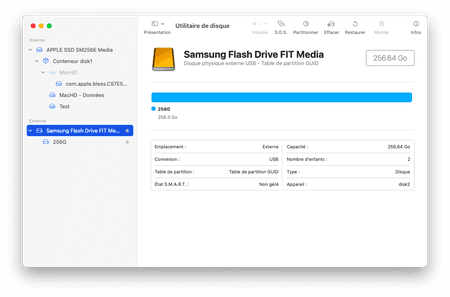
- Launch Disk Utility (see above) and, in the left column, select thephysical media iconbut not a partition or a volume (here, therefore, it is Samsung Flash Drive).
- Click on the button Wipe off in the top toolbar of the window. A window appears.
- Give a name to the support in the appropriate field.

- In the menu Formatchoose APFS. Mac OS Extended is reserved for disks and keys that you want to be able to plug into slightly older Macs using Mac OS El Capitan (10.11) or earlier.

- The other two formats (MS-DOS and ExFAT) are not Mac specific and allow you to plug your USB drive into either a Mac or a PC. Choose them if that’s what you’re looking for. But it will come at the cost of some performance hit and all the reliability features of the Mac’s file system.
- The APFS format offers a few options. If you choose the encrypted mode, you will have to provide a password which will be essential each time you plug the key into a Mac, whether it is yours or not. A good way to protect access to your data. As to case sensitive modeit means that the system will then be able to distinguish between upper and lower case letters in file names, for example between mytext.txt and MyText.txt.
- Note that choosing a case-insensitive mode does not prevent you from mixing lowercase and uppercase letters in your filenames. But you cannot place the mytext.txt and mytext.txt files mentioned above in the same folder.
- In the menu Planchoose the option GUID partition table. Boot Record (MBR) mode is only useful if you want to use this disk on both a Mac and a PC. As for the Apple Partition Table, it is only used by very old Macs based on PowerPC processors, you can forget about it.

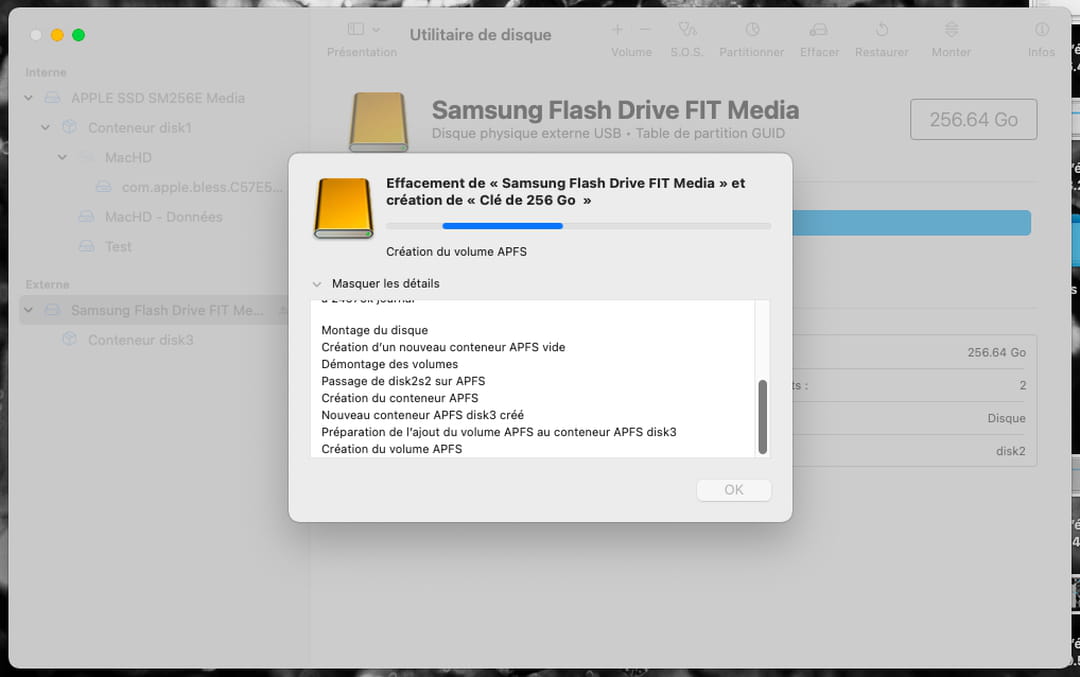
- Click on the button Wipe off. Let the operation take place for a few moments… your support is ready. You’ll see it appear in both the left column of Disk Utility and Finder.


You can easily recognize a disk formatted in APFS by the fact that it first consists of a container hosting a volume. It is inside this volume that your files and folders will be stored. And it is this volume that appears in the Finder. If you need to carve up your key or disk storage space, you can create partitions or volumes.
- Fortunately, it is not necessary to reformat media to delete an APFS volume.
- See you in thedisk utility (see above).
- Select the volume to delete and click on the button – in the toolbar, above the word Volume.

- Attention, all data contained in the volume will be deleted. However, the operation will have no effect on the other volume(s) of the key or disk.

That’s it, you are ready to format any storage device for use on your Mac. Note that even if the volume you are erasing is encrypted, Disk Utility will not prompt you for the password to confirm the erasure. You have already given it to the system by plugging in the key.