Need to use percentages in Excel, but having trouble displaying them? Here are the techniques to correctly enter and display these particular numbers in a table.
Percentages are a very convenient mathematical notation for representing proportions and making comparisons. In the context of work or our personal life, we are regularly led to use percentages to carry out calculations, such as measuring the evolution of a price, determining the amount of a tax or knowing the share of each expense in a budget.
To carry out these operations, spreadsheets like Microsoft Excel are powerful and very practical tools, but it is not always easy to enter and manipulate percentages with these software, and you can sometimes find yourself stuck when faced with numbers. which do not display correctly or produce strange calculation results.
This article provides an introduction to using percentages in Excel, focusing on how to correctly display numbers as percentages and pointing out some common pitfalls to avoid. The actual methods for calculating percentages will be covered in another article.
Please note that although the examples given are for Excel, all the methods presented for writing and formatting percentages exist identically in other spreadsheets such as Google Sheets, LibreOffice Calc or OnlyOffice Spreadsheets, and that only the location buttons in the toolbar may vary.
Before studying the different ways to write and format percentages in Excel, it is useful to recall some basics about this mathematical notation. Although it is very widespread and used in everyday language, it is not necessarily well understood by everyone, which can generate errors in reasoning and therefore calculation.
A percentage is the representation of a ratio between two values, therefore the result of a division, expressed as a fraction of 100 and often written as a number followed by the symbol “%” or the expression “percent”. To obtain a percentage, we calculate the ratio between a particular value and a reference value, or between a final value and an initial value, then we multiply the result by 100 and add the symbol “%”.
This notation is particularly interesting because it offers a representation of proportions that is more intuitive to the human mind than fractions or decimals, and it makes it easy to compare ratios between values that seem very different at first glance, but are in fact different. identical reality.
As you will have understood, a percentage is an alternative, and more intuitive, representation of decimal numbers and fractions of 100. Thus, the notation 25% is equal to the fraction 25/100 and the number 0.25. And good news, to write percentages in Excel and other spreadsheets, you can use these three notations interchangeably. However, it is essential to keep in mind the equivalence between these three forms of writing, in order to avoid errors in reasoning which could lead to incorrect calculation formulas.
For example, if you wanted to apply a 20% increase to the number 100, you might be tempted to write the formula =100+20% in a cell of your Excel workbook. You would then get the result 100.2, whereas you probably expected to find 120. The explanation is as follows: the notation “20%” actually corresponds to “20 divided by 100”, or the number 0.2. The formula =100+20% therefore represents the mathematical operation 100 + 0.2the result of which is indeed 100.2.
The everyday phrase “apply an increase of 20% to the number 100” should therefore be understood as “add 100 and 20% of 100”. And this expression can be represented by the formulas =100+(20%*100), =100+(20/100*100) Or =100+(0.2*100)the results of which are well 120.
To enter numbers as percentages in Excel, you can therefore use the % symbol notation, fractional writing and decimal writing interchangeably. Let’s see how to use these three forms of writing in the Microsoft spreadsheet.
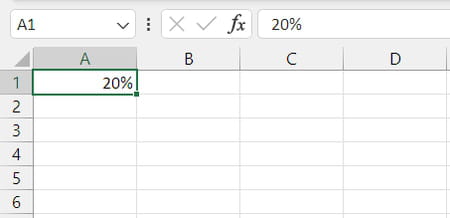
► In a cell, write 20% (by manually writing the % symbol after the number, with or without a space). Excel automatically recognizes percentage notation and saves the entry as such, meaning that the number actually stored in the cell is 0.2 and not 20even if the notation 20% appears in the formula bar.

► To write multiple percentages without having to manually enter the % sign each time, select the range of cells in which you want to enter percentages, then click the button Percent style in the tab Welcome from the toolbar, or use the keyboard shortcut Ctrl + Shift + %.
► You can then directly write numbers in the range of cells to which you have just applied the percentage format, Excel will automatically add the % sign at the end of your entry.
► Please note, you must apply the percentage format before writing numbers in the cells. If you enter numbers before applying the percent format, Excel will multiply them by 100 before adding a % sign to them, which may not be the expected result. If this applies to you, see the next section to work around this issue.
► To enter multiple values before applying percent format, you must write them as fractions or as decimal numbers. For example, to get 20% you can write =20/100 in the cell A1 And 0.2 in the cell A2then select these cells and apply the percentage format using the button Percent style in the tab Welcome from the toolbar or keyboard shortcut Ctrl + Shift + %.
► By default, Excel rounds percentages without any digits after the decimal point. If you need to write a percentage with a decimal part, you can increase or decrease the number of digits after the decimal point using the buttons Add a decimal Or Reduce decimal places in the tab Welcome from the toolbar. For example, to get 5.5%, you can write =5.5/100 in the cell A1 And 0.055, then select the two cells and apply the percentage format to them. Then you can adjust the number of decimal places by clicking the buttons as many times as necessary. Add a decimal Or Reduce decimal places.
If you’ve ever tried to convert a column or row containing numbers you’ve already entered to a percentage, you may have encountered the following problem: Excel multiplies all values by 100 before adding a % sign to them. This behavior is normal and useful in most cases, especially when putting the result of a calculation formula as a percentage. But it can be particularly annoying if you need to display as percentages a large number of values that have already been entered, either by you or someone else.
Fortunately, there is a very simple and quick trick to convert all the values to be put into percentages at once, without having to modify them individually and without using a calculation formula.
► For the example, let’s say you have the numbers 1 through 15 written in column A of a spreadsheet. In an empty cell, write the number 100, then copy this number to the clipboard by clicking the button To copy under the tab Welcome from the toolbar, or using the keyboard shortcut Ctrl+C.
► Then select the range of cells containing the values to put into percentages (A1:A15 in our example), right-click with the mouse, then click on Special bonding… in the context menu, or use the keyboard shortcut Ctrl+Alt+V.
► In the window Special bonding which appears, under the section OperationCheck the box Division then press the button OK at the bottom to validate the operation.
► All the values you selected have been divided by 100, and since this is a special paste and not a calculation formula, you can erase the number 100 that you had written in a cell without risking lose this modification.
► Finally, select the range of cells containing the values you have just modified and which you wish to put in percentages (A1:A15 in our example), and apply the percentage format using the button Percent style in the tab Welcome from the toolbar or keyboard shortcut Ctrl + Shift + %.


